Issue
- Create a dynamic group: EDTD compatible
- Create a dynamic group: Missing EDTD License
- Create a dynamic group: EDTD License
- Create a policy for EDTD (EES/EEA)
- Create a policy for EDTD (EFS)
- Apply policies to the group (EDTD Activated)
Details
If you have the ESET LiveGuard Advanced (ESET Dynamic Threat Defense) license, you can automatically enable ESET LiveGuard Advanced (ESET Dynamic Threat Defense) on compatible products in your network using ESET PROTECT 8.x. You need to import the EDTD license using ESET Business Account (EBA) and activate your compatible ESET products.
Solution
Create a dynamic group: EDTD compatible
Open the ESET PROTECT Web Console in your web browser and log in.
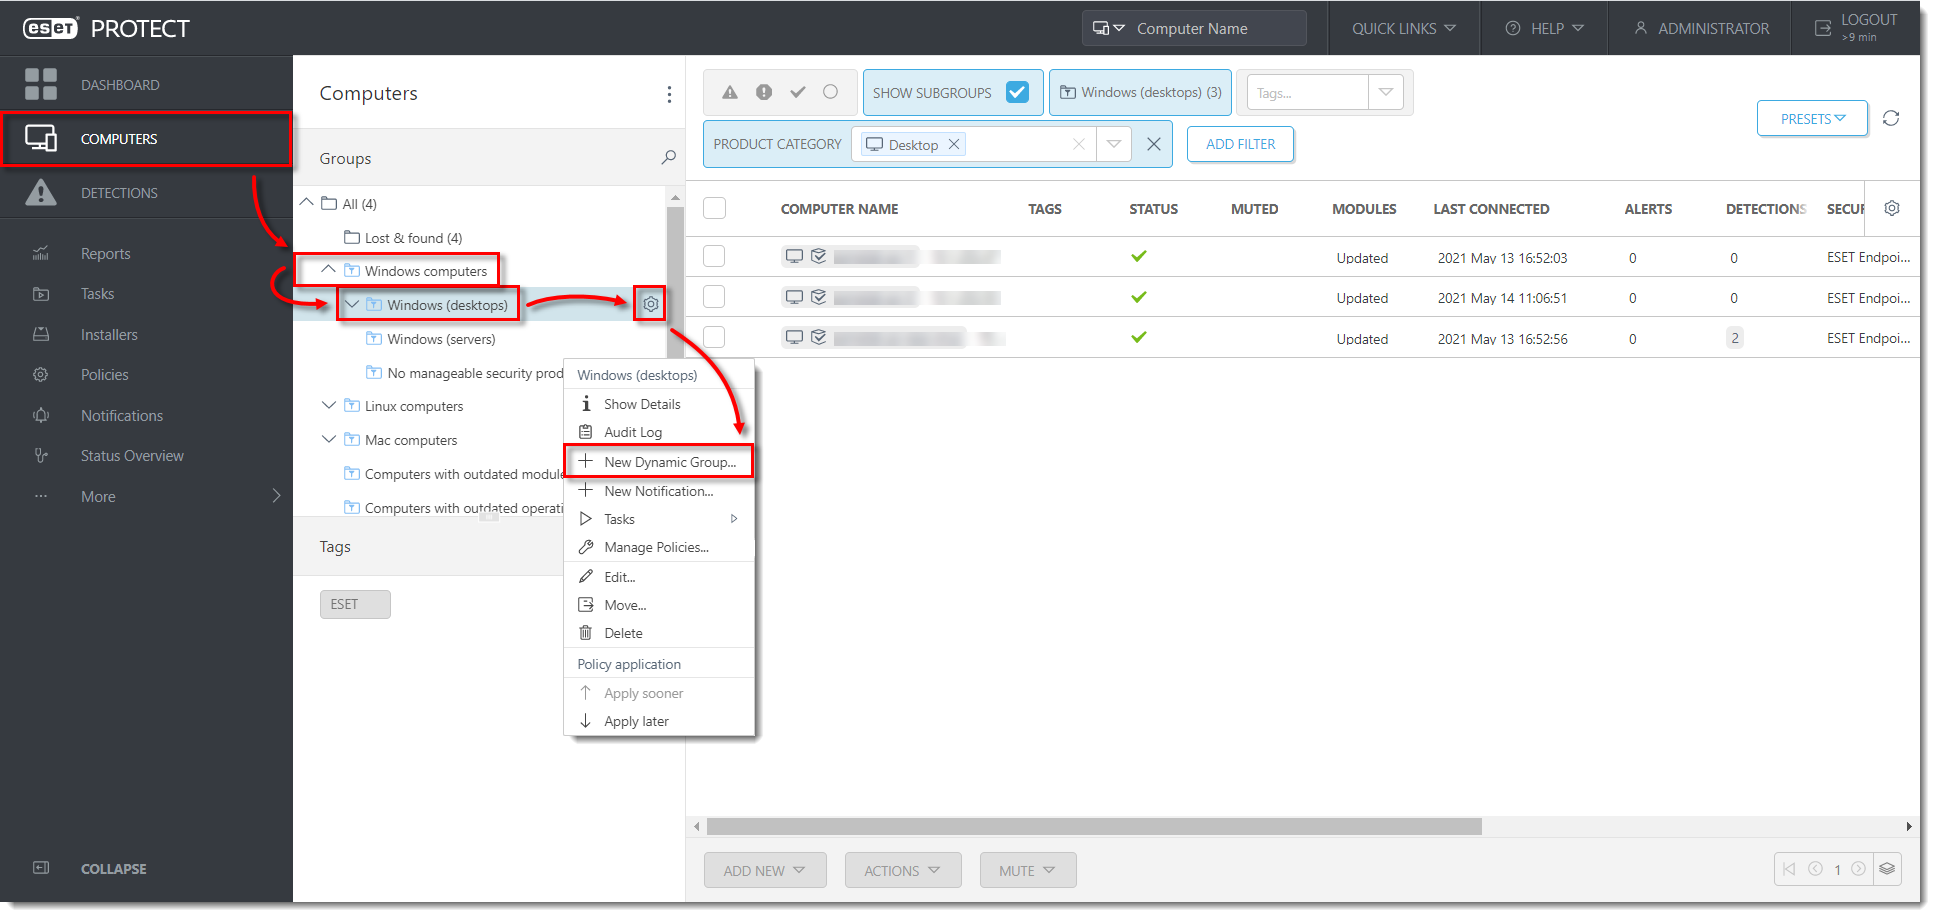
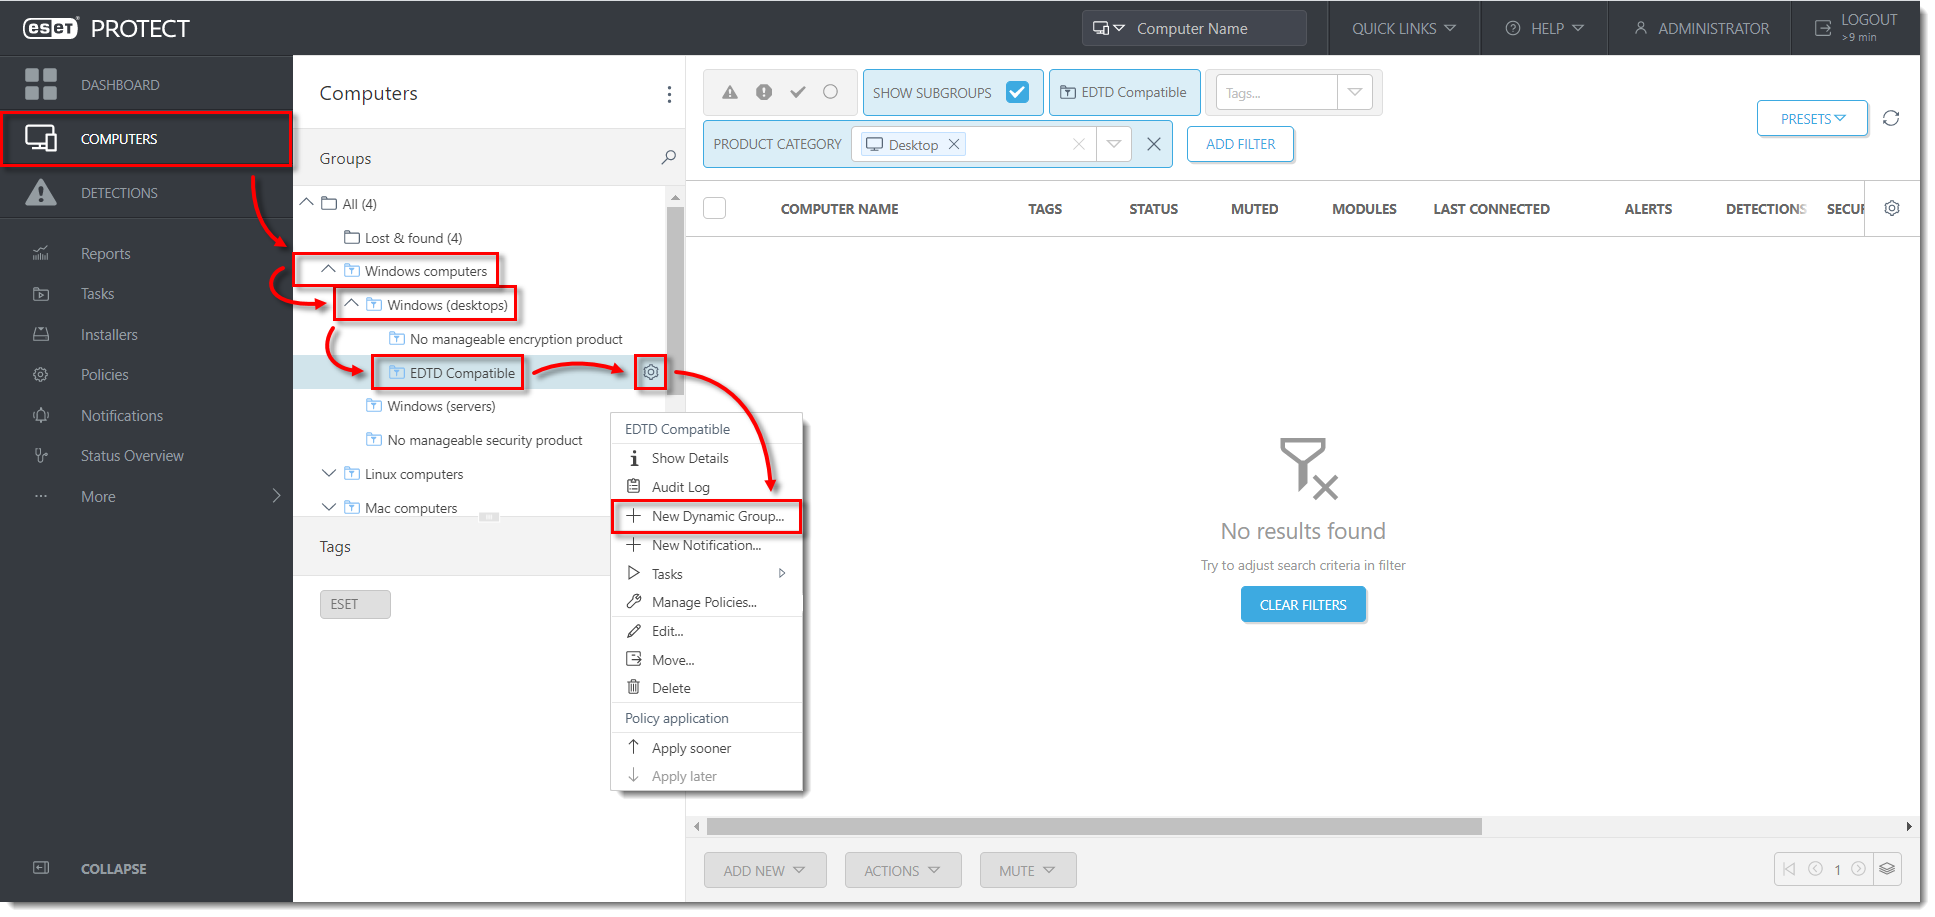
- Click Computers, expand Windows computers, click Windows (desktops) → gear icon.
 In the pop-up menu window, click New Dynamic Group.
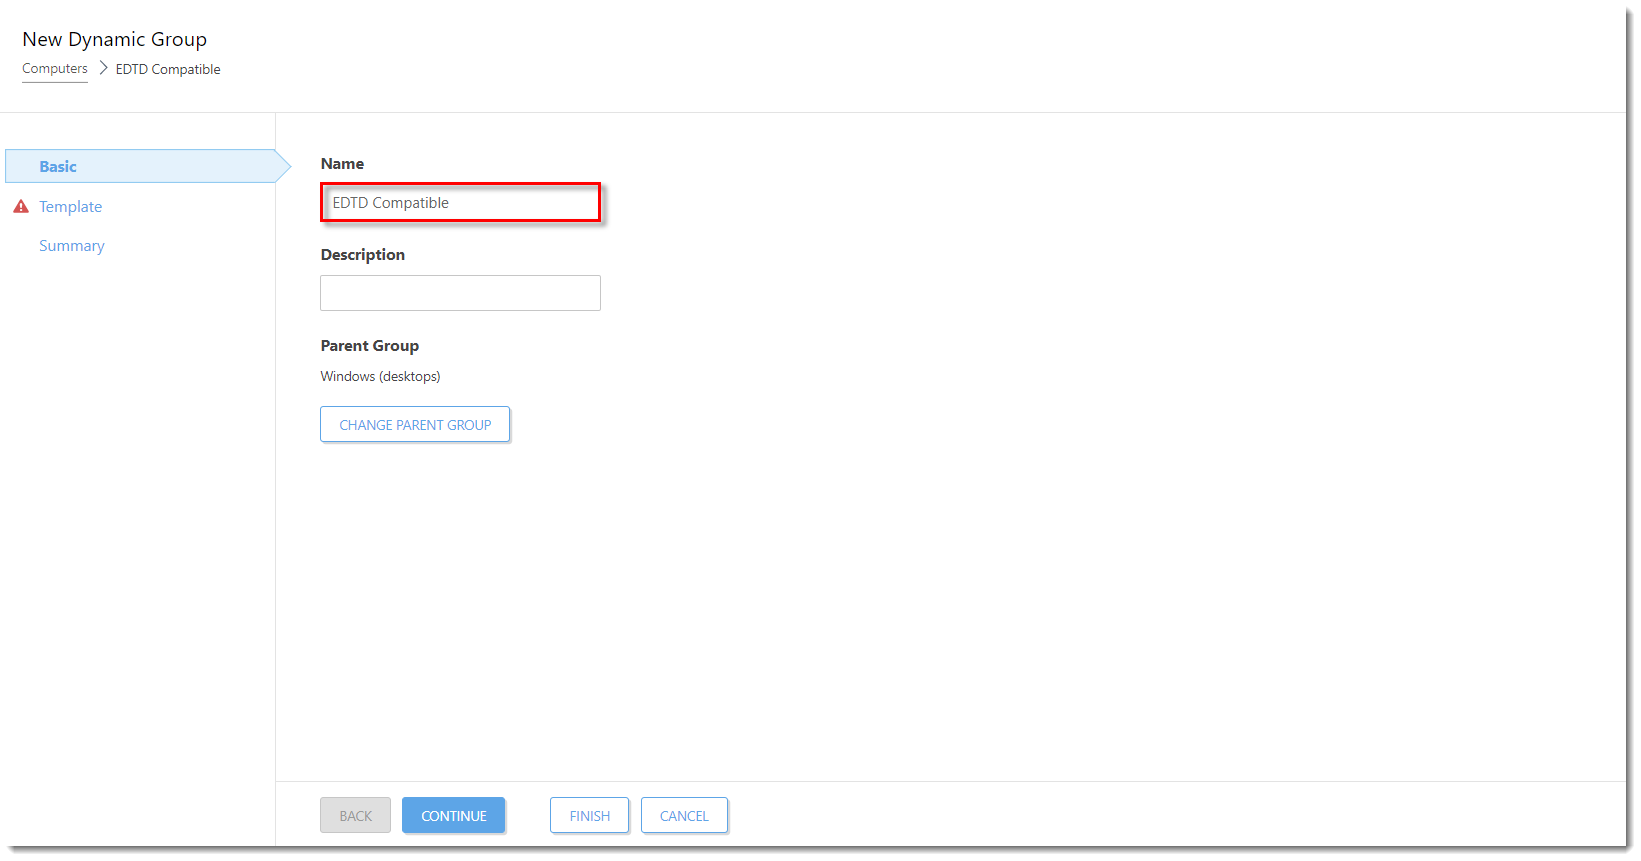
- Type a name for the new group. The Description field is optional.
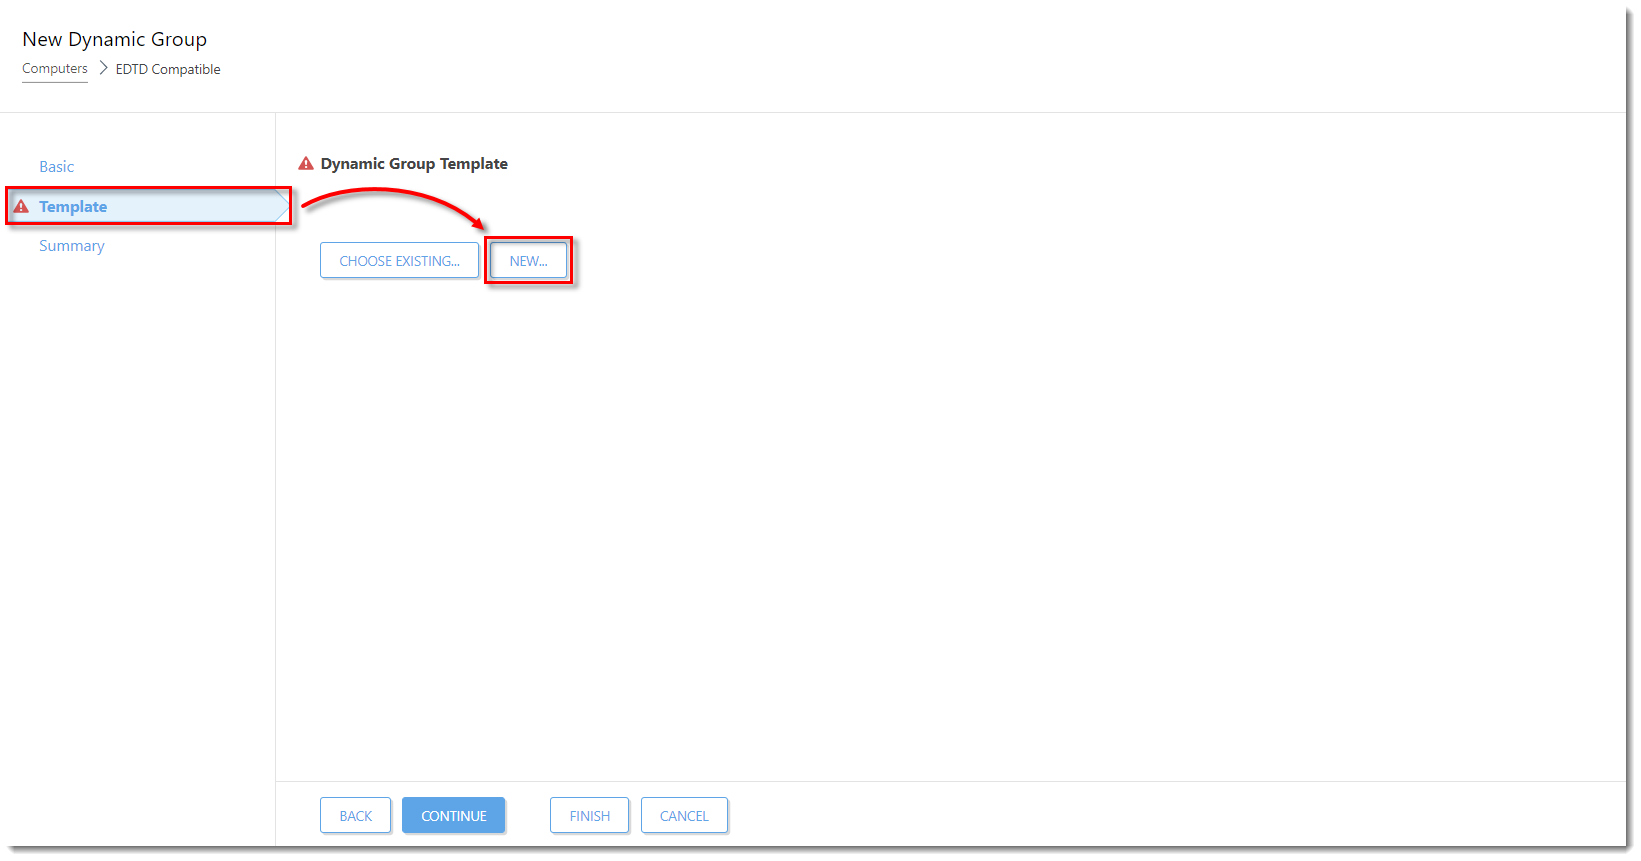
- Click Template → New.
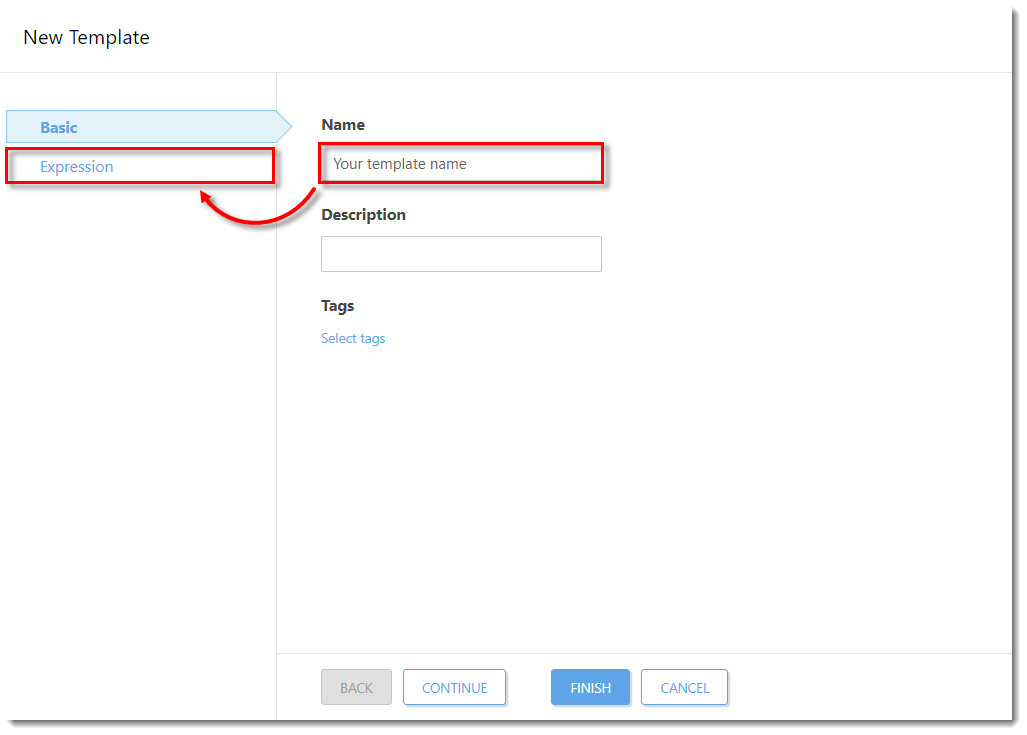
- Type a name for your template (the Description field is optional) and click Expression.
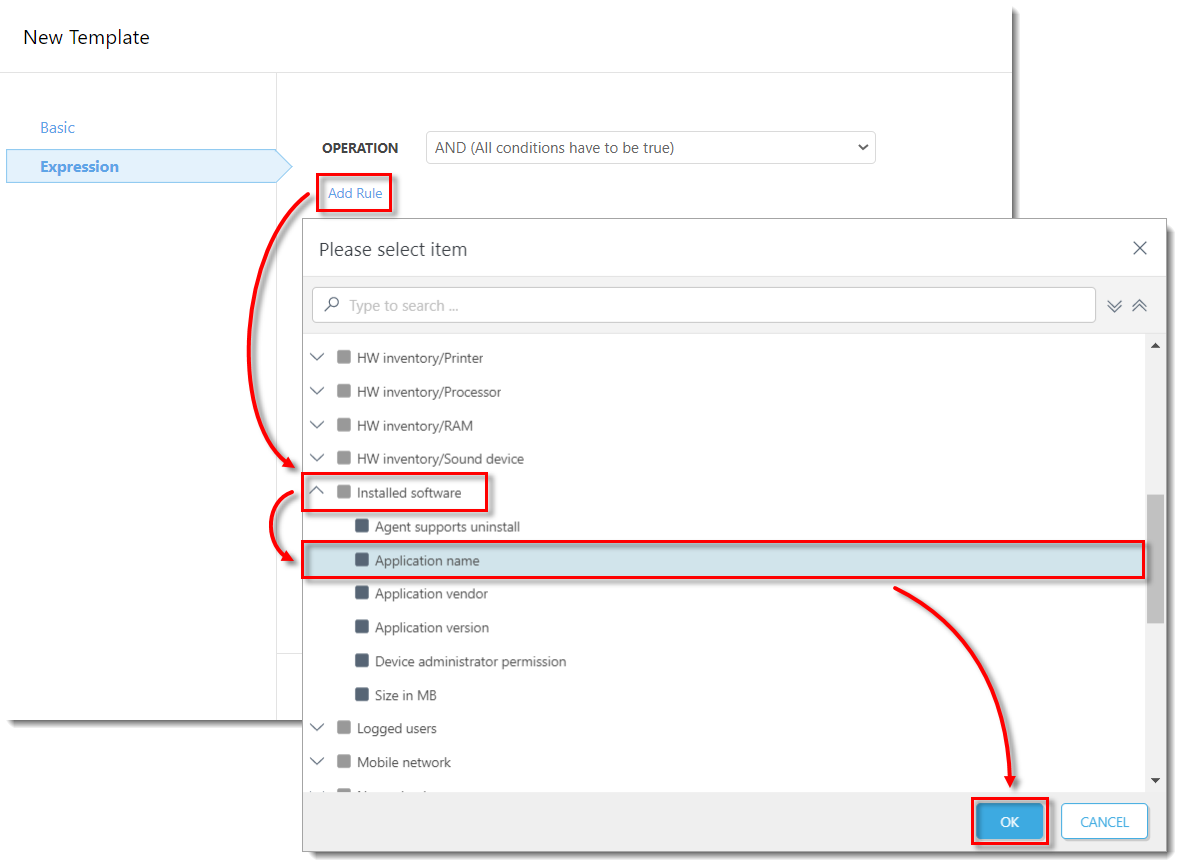
- Click Add Rule and in the dialog window, expand Installed software, select Application name, and click OK.
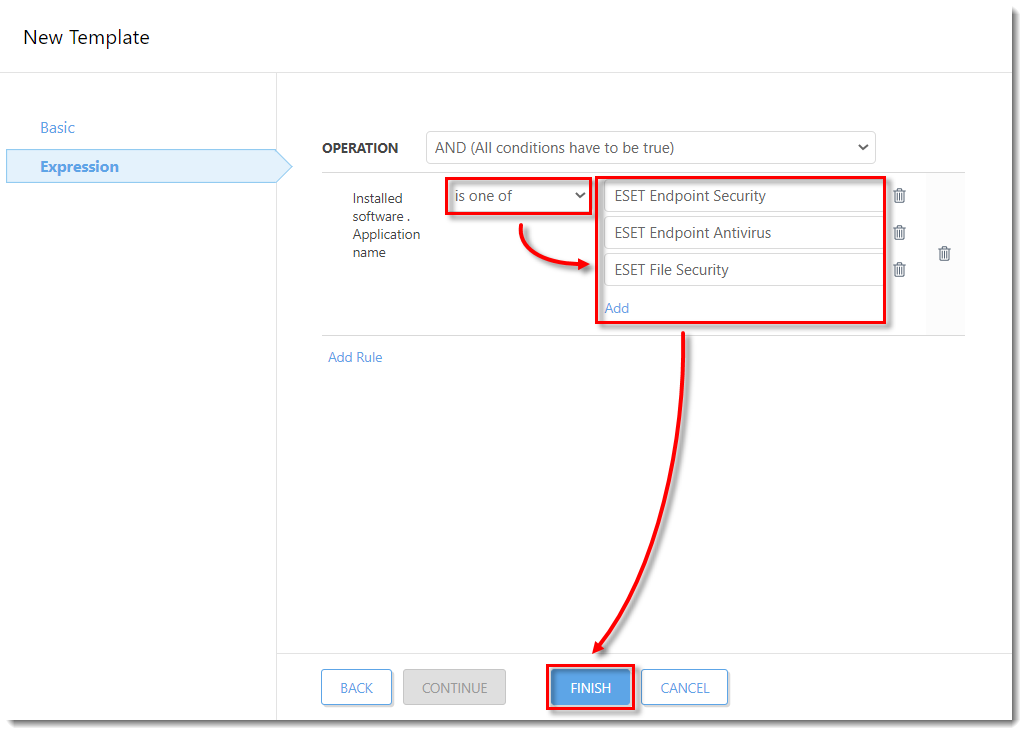
- Ensure that the operator next to Installed software . Aplication name is set to is one of. Click Add → Add to add two additional fields, then type in the values listed below and click Finish.
- ESET Endpoint Security
- ESET Endpoint Antivirus
- ESET File Security
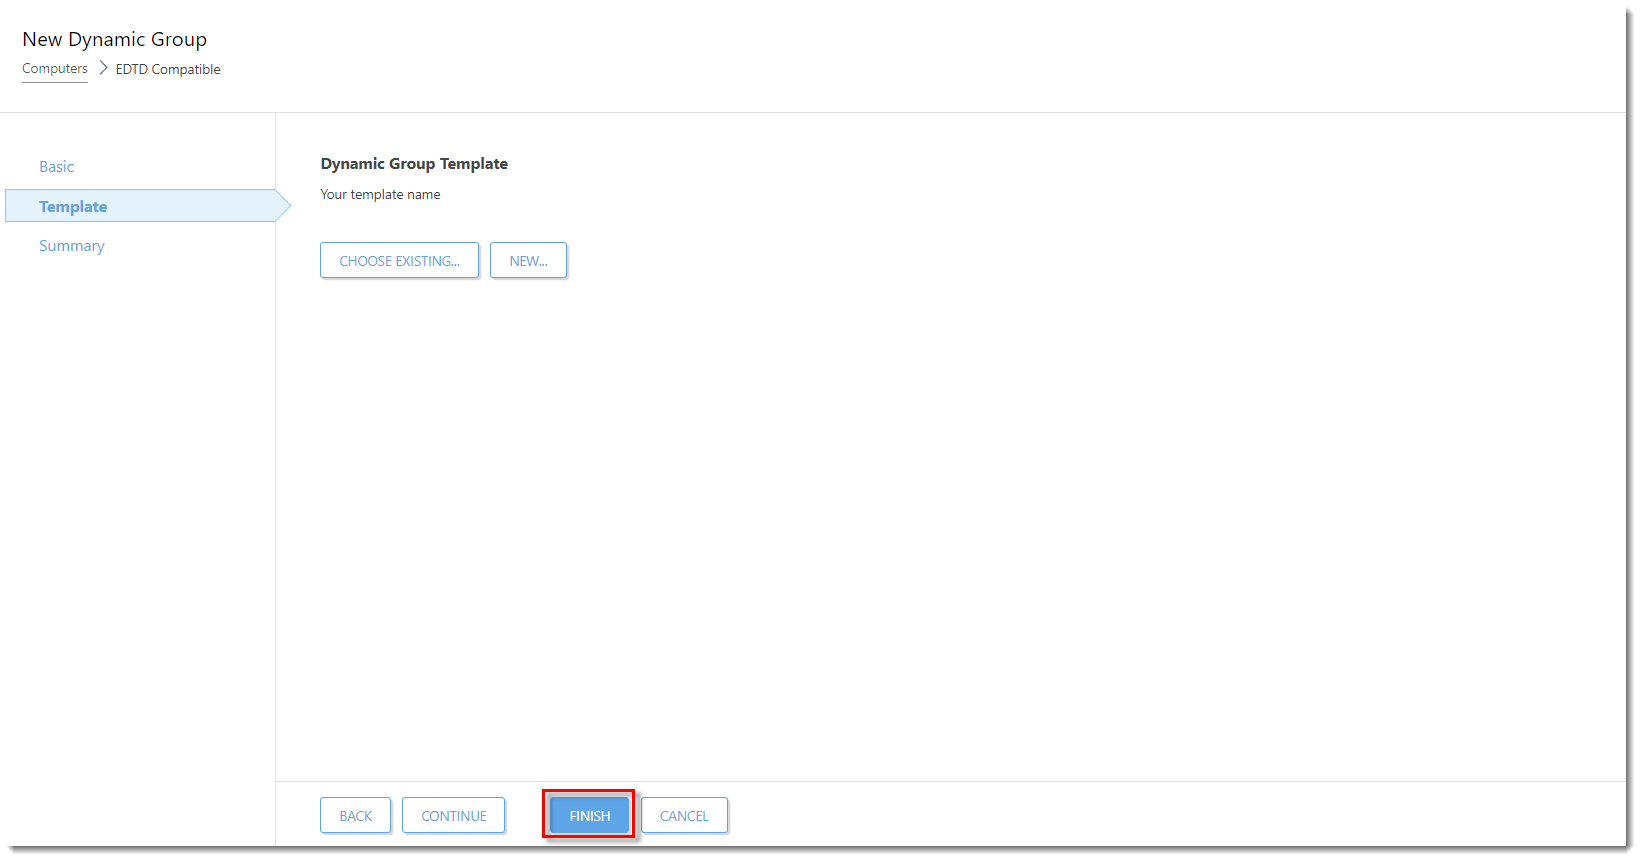
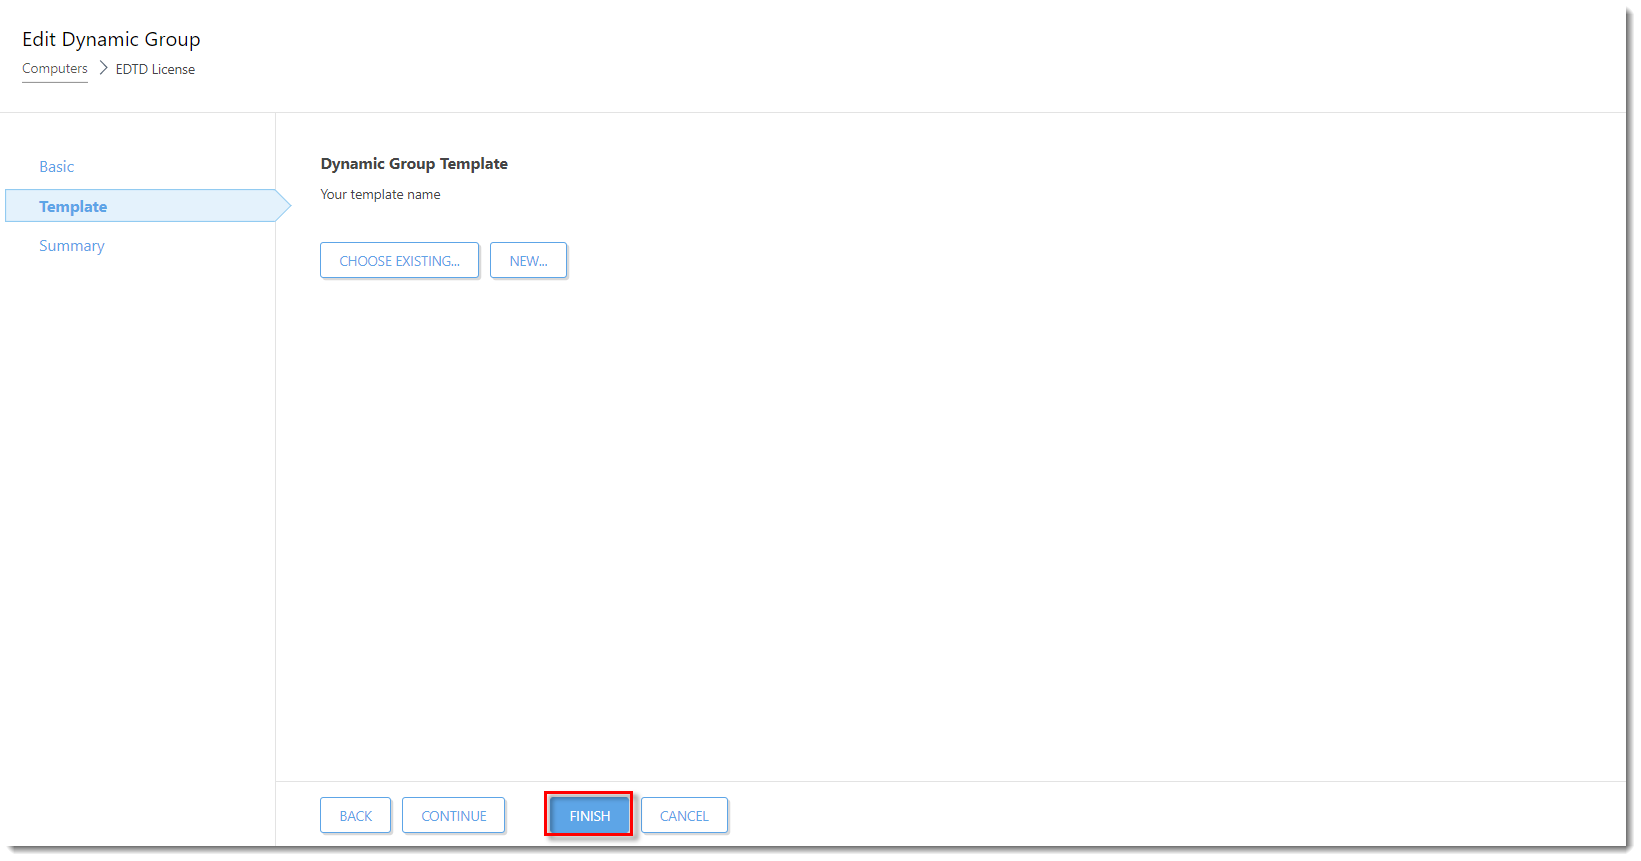
- Click Finish to save the Dynamic group.
Create a dynamic group: Missing EDTD License
Open the ESET PROTECT Web Console in your web browser and log in.
- Click Computers, expand Windows computers → Windows (desktops), and click EDTD Compatible → the gear icon.
 In the pop-up menu window, click New Dynamic Group.
- Type a name for the new group. The Description field is optional.
- Click Template → New.
- Type a name for your template (the Description field is optional) and click Expression.
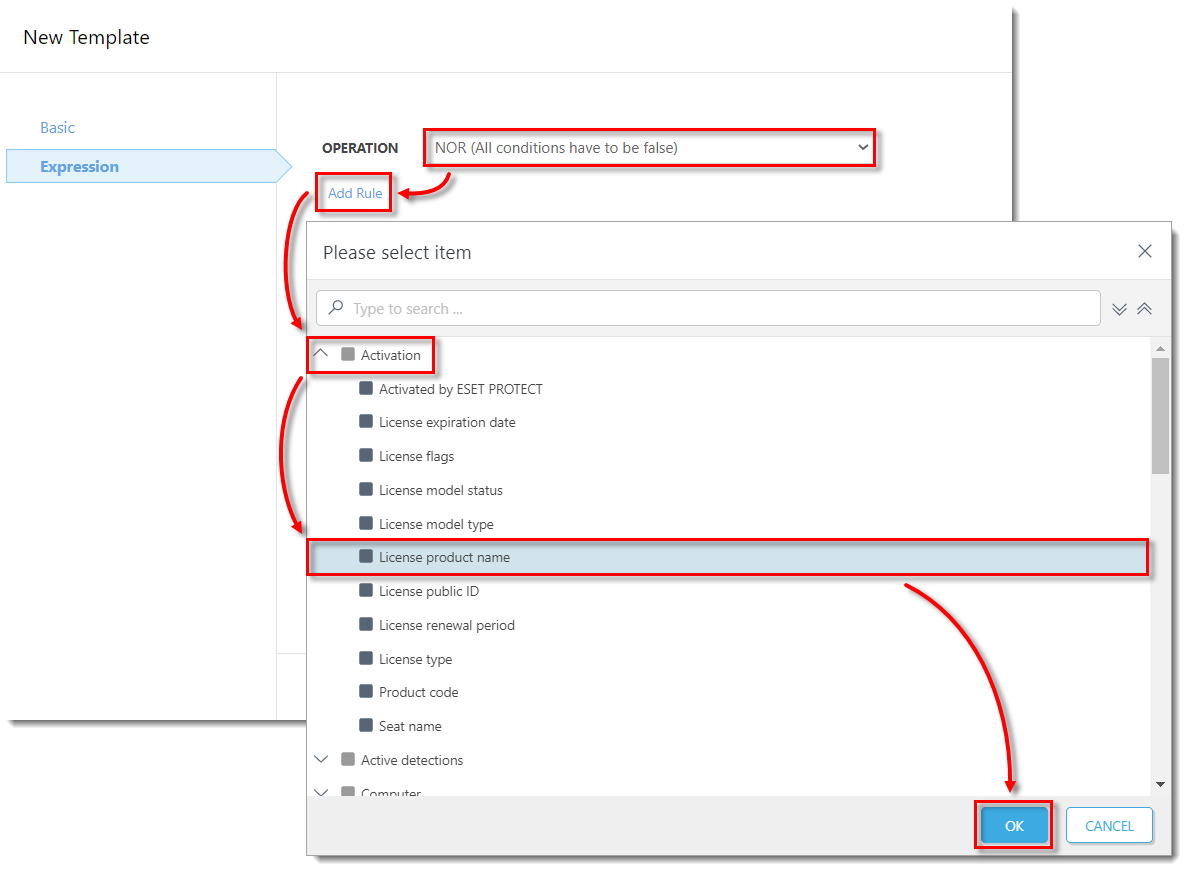
- Select NOR (All conditions have to be false) from the menu next to OPERATION. Click Add Rule and in the dialog window, expand Activation and click License product name → OK
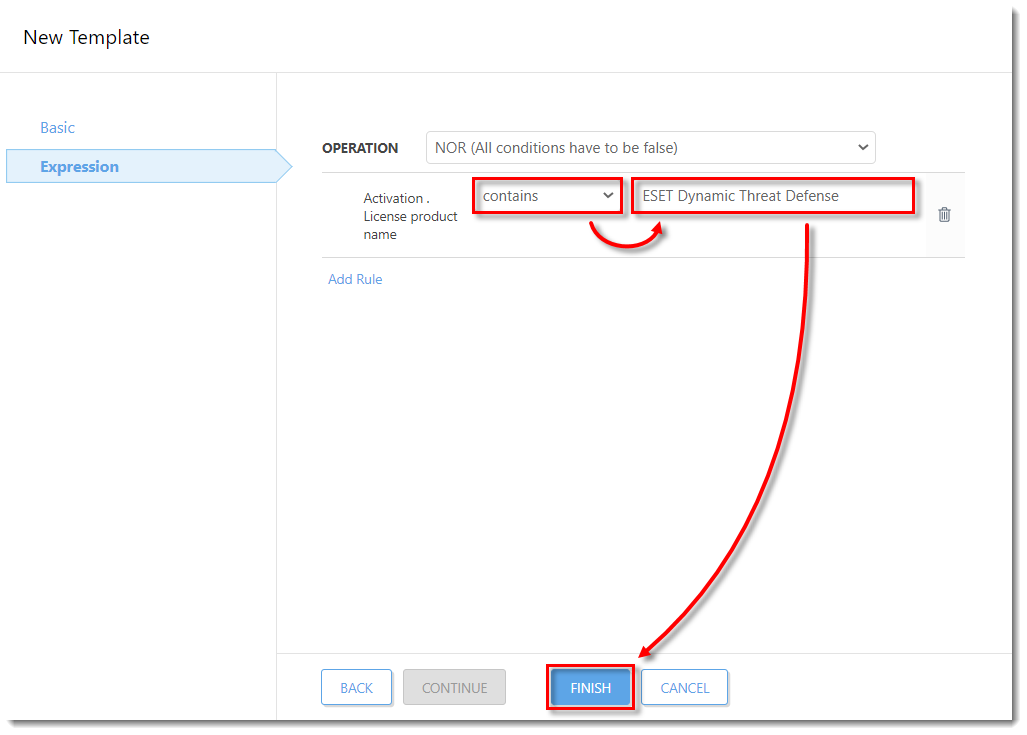
- Change the value to contains in the drop-down menu next to Activation . License product name. Type ESET Dynamic Threat Defense to the respective field and click Finish.
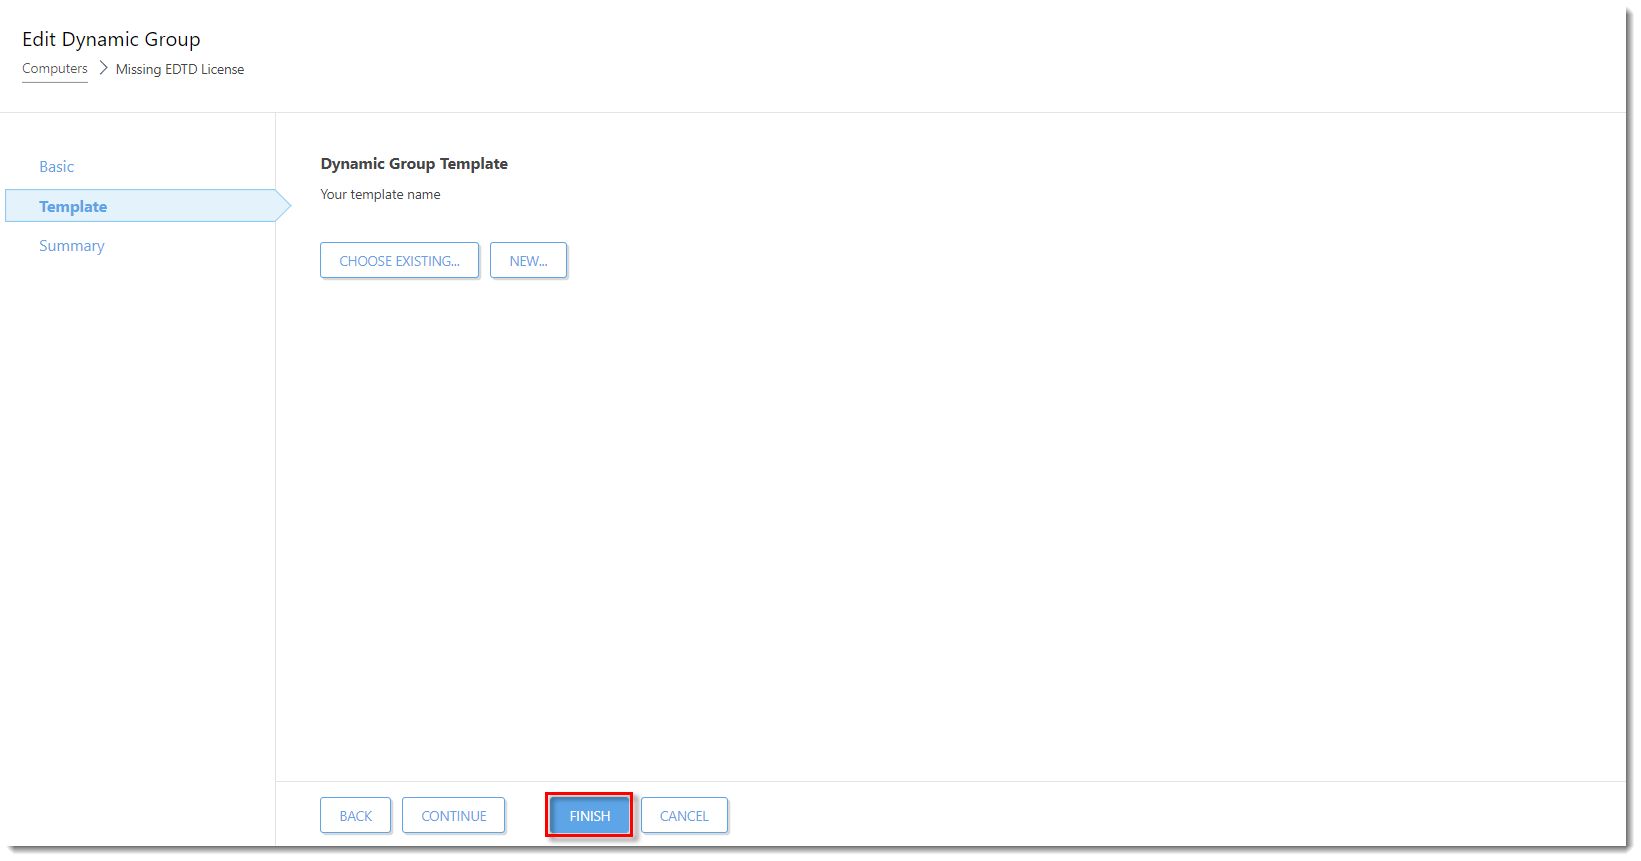
- Click Finish to save the Dynamic group.
Create a dynamic group: EDTD License
- Open the ESET PROTECT Web Console in your web browser and log in.
- Click Computers, expand Windows computers → Windows (desktops), and click EDTD Compatible → the gear icon.
 In the pop-up menu window, click New Dynamic Group.
 - Type a name for the new group. The Description field is optional.
- Click Template → New
- Type a name for your template (the Description field is optional) and click Expression.]
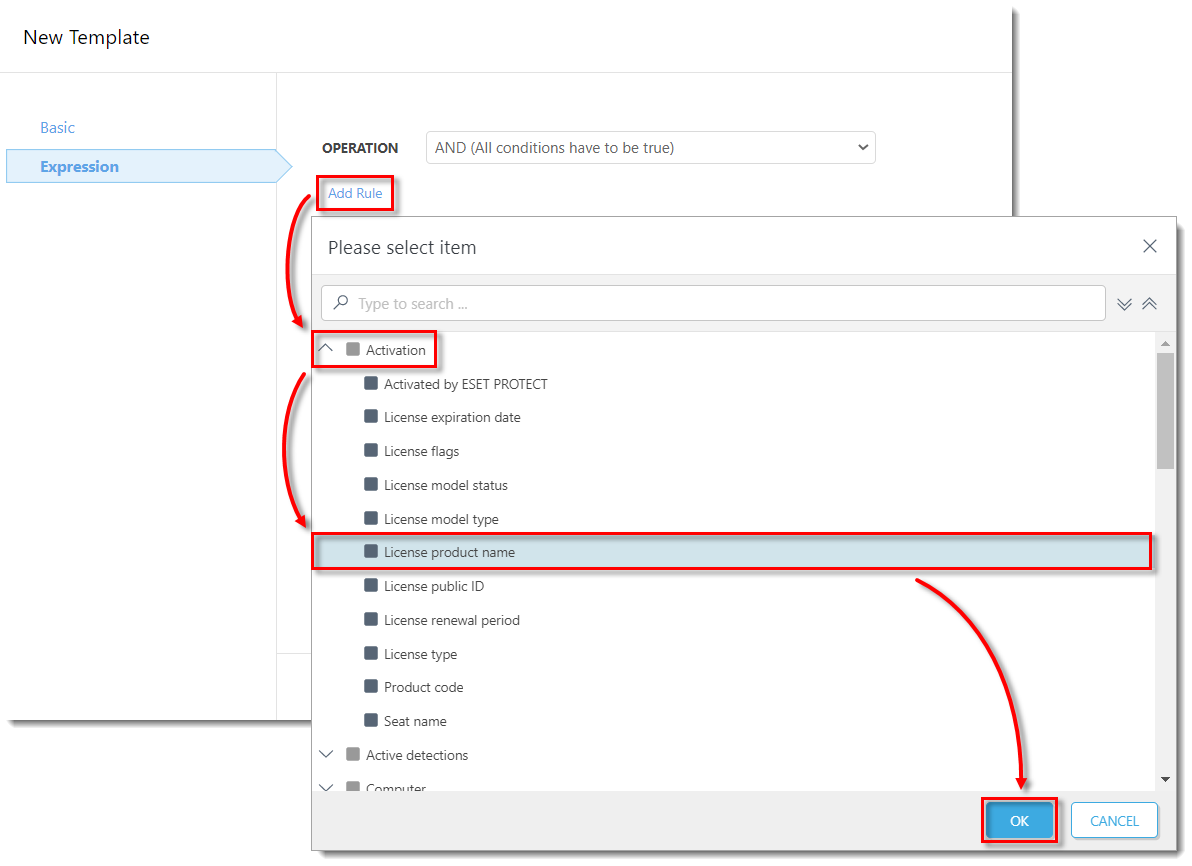
- Click Add Rule and in the dialog window, expand Activation and click License product name → OK.
- Change the value to contains in the drop-down menu next to Activation . License product name. Type ESET Dynamic Threat Defense to the respective field and click Finish.
Click Finish to save the Dynamic group.
Create a policy for EDTD (EES/EEA)
Open the ESET PROTECT Web Console in your web browser and log in.
- Click Policies → New Policy.
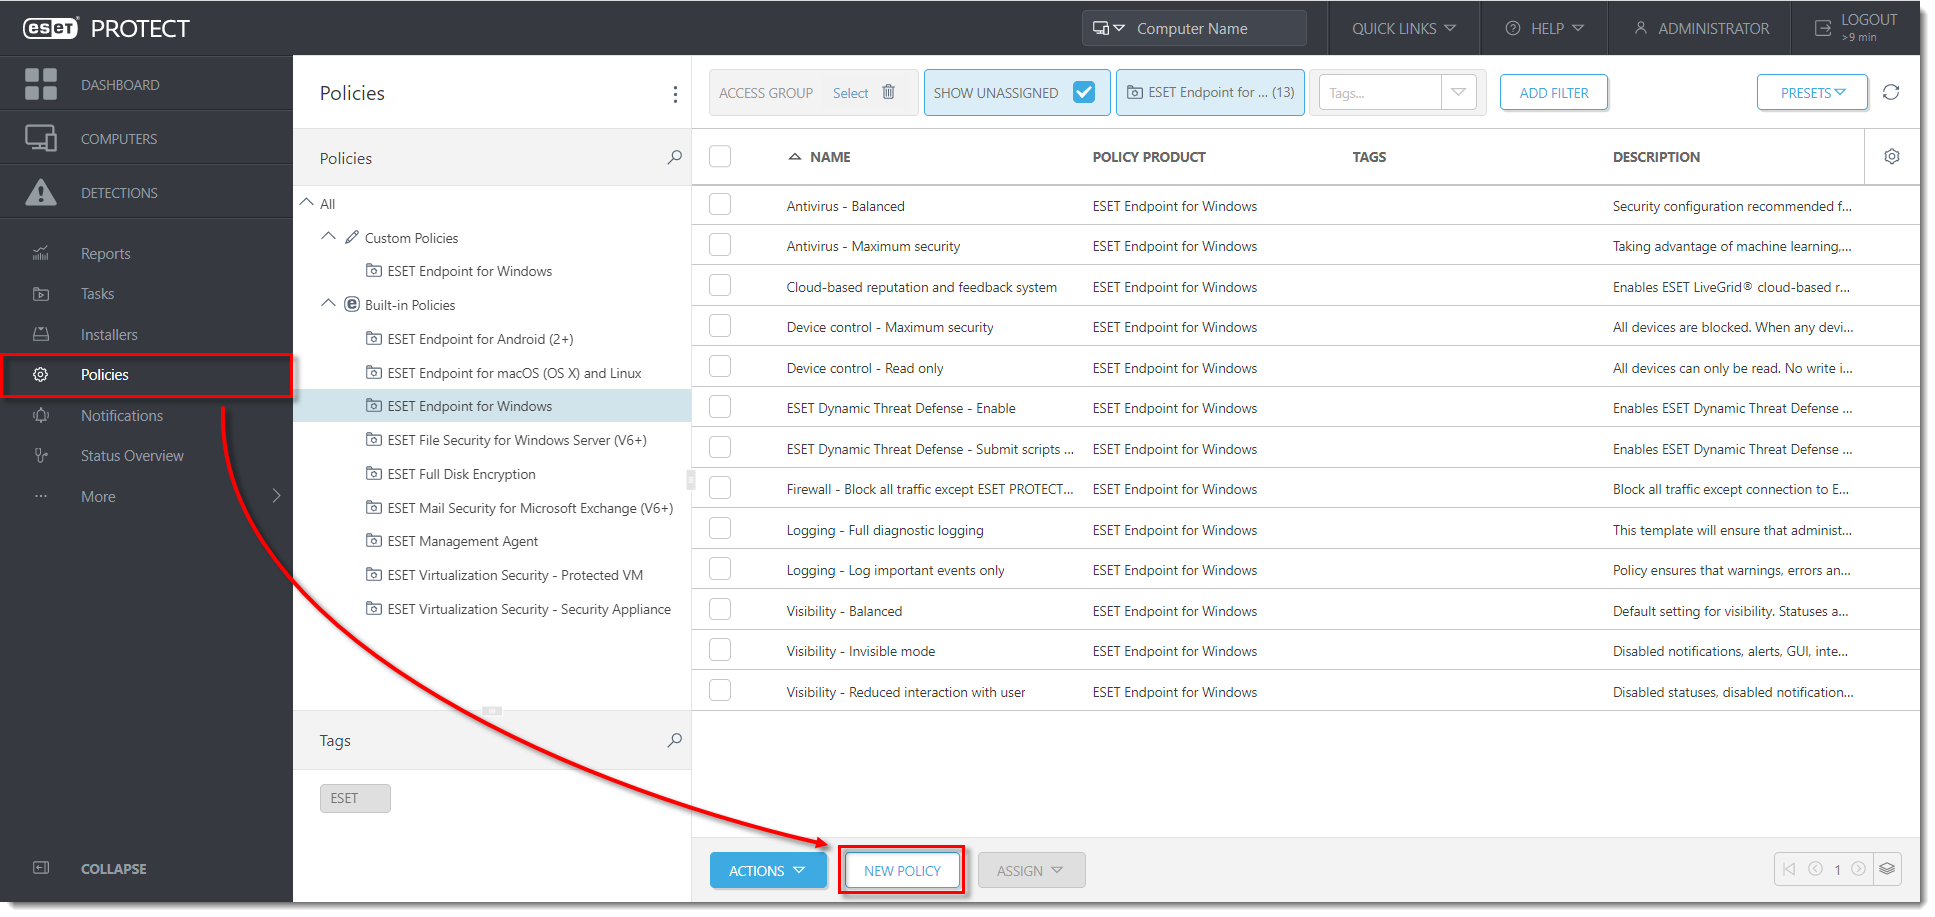
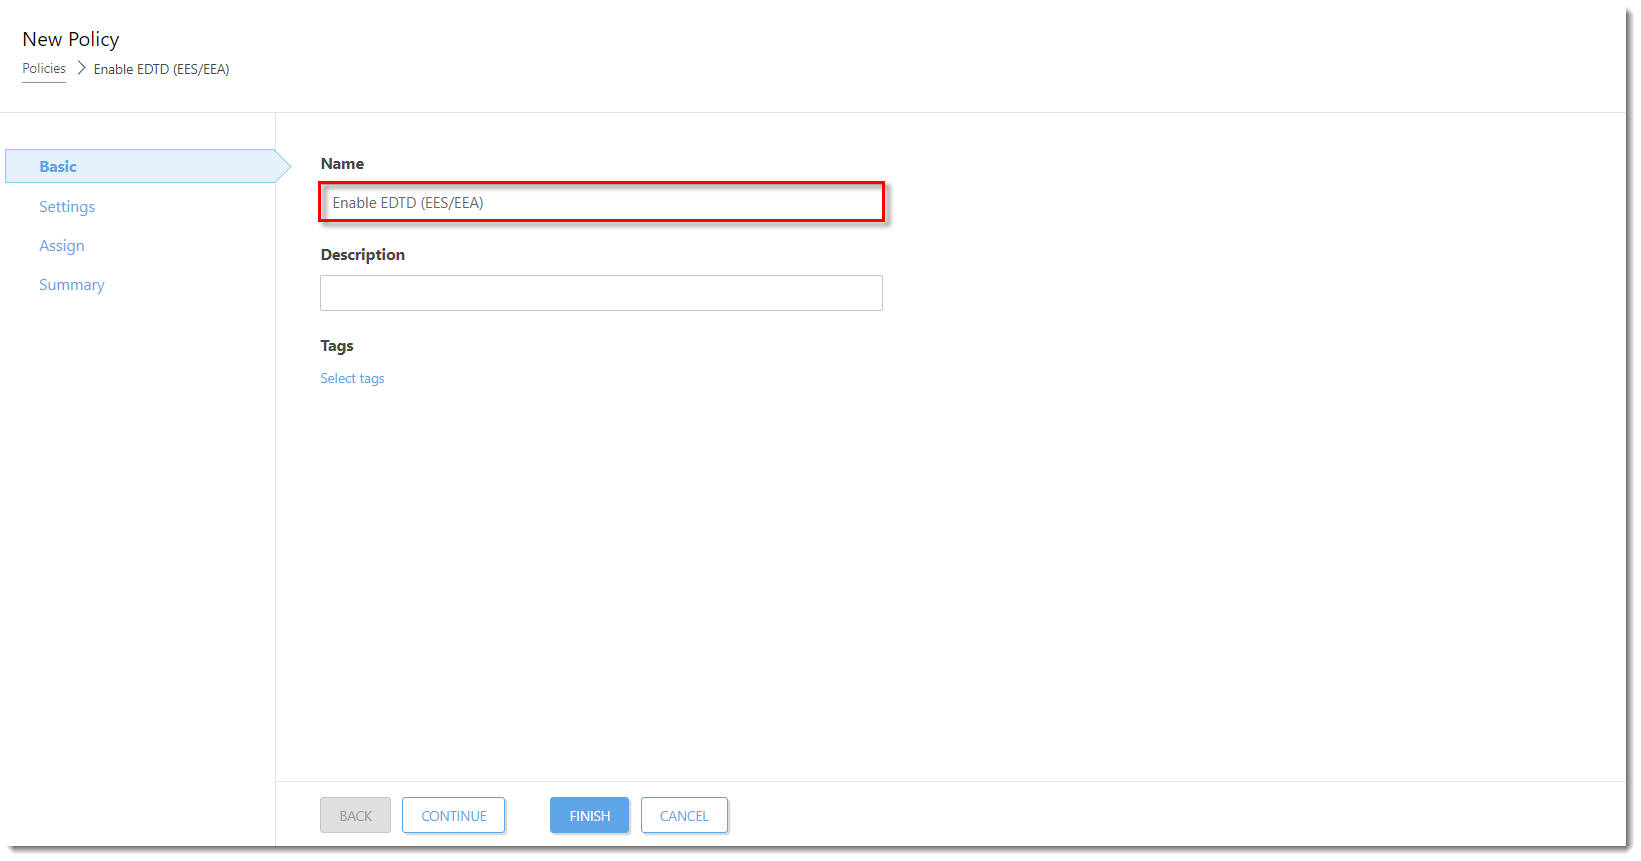
- Type a name for the new policy (in this example, Enable EDTD (EES/EEA). The Description field is optional.
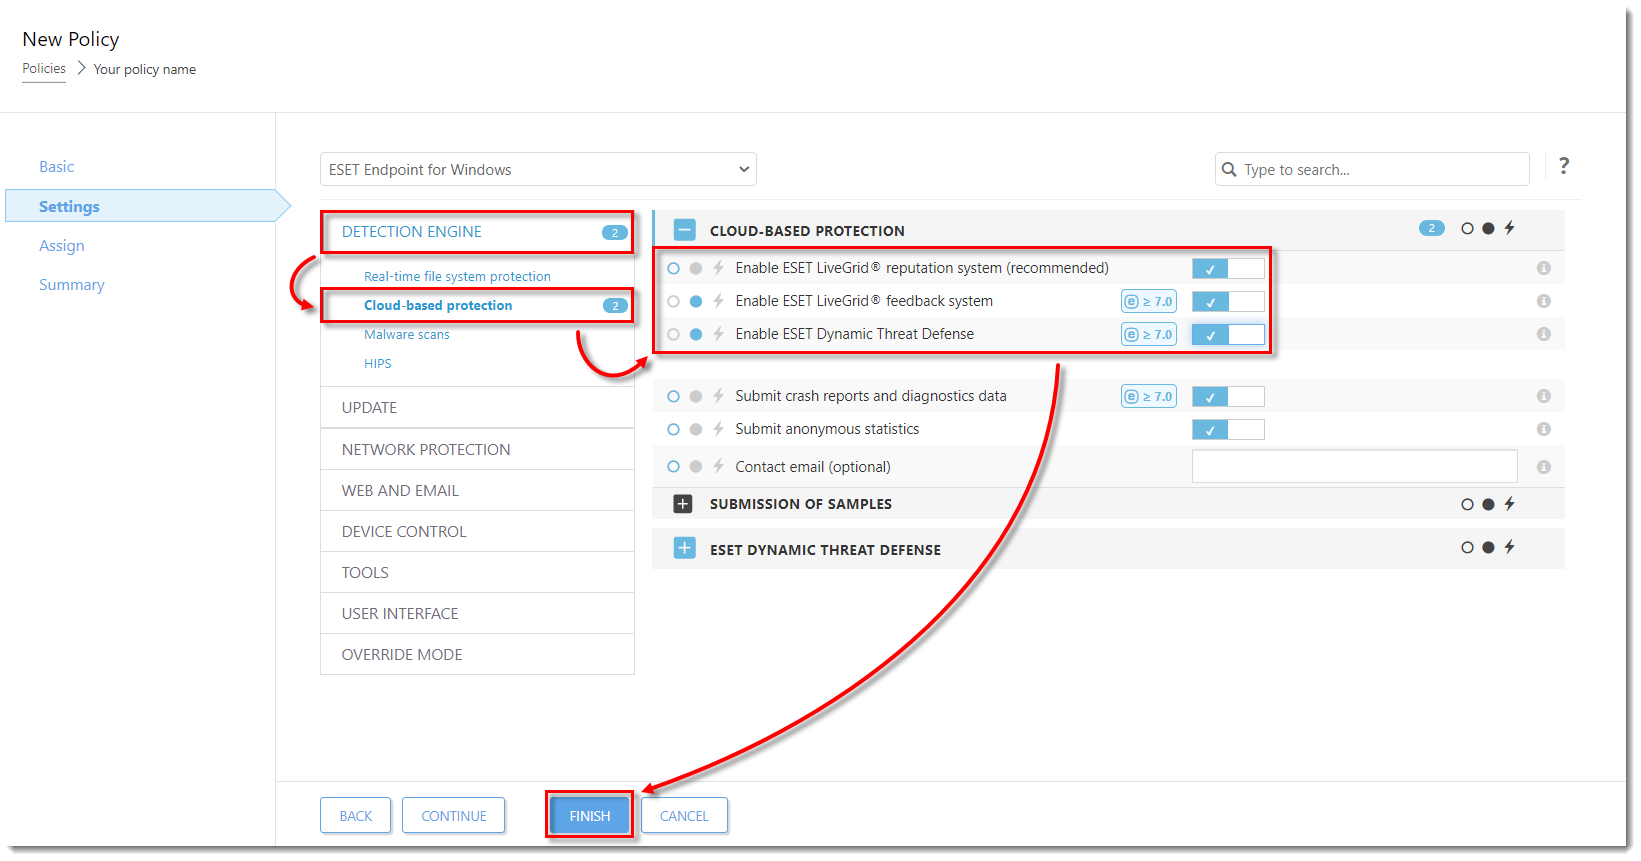
- Click Settings and select ESET Endpoint for Windows from the drop-down menu.
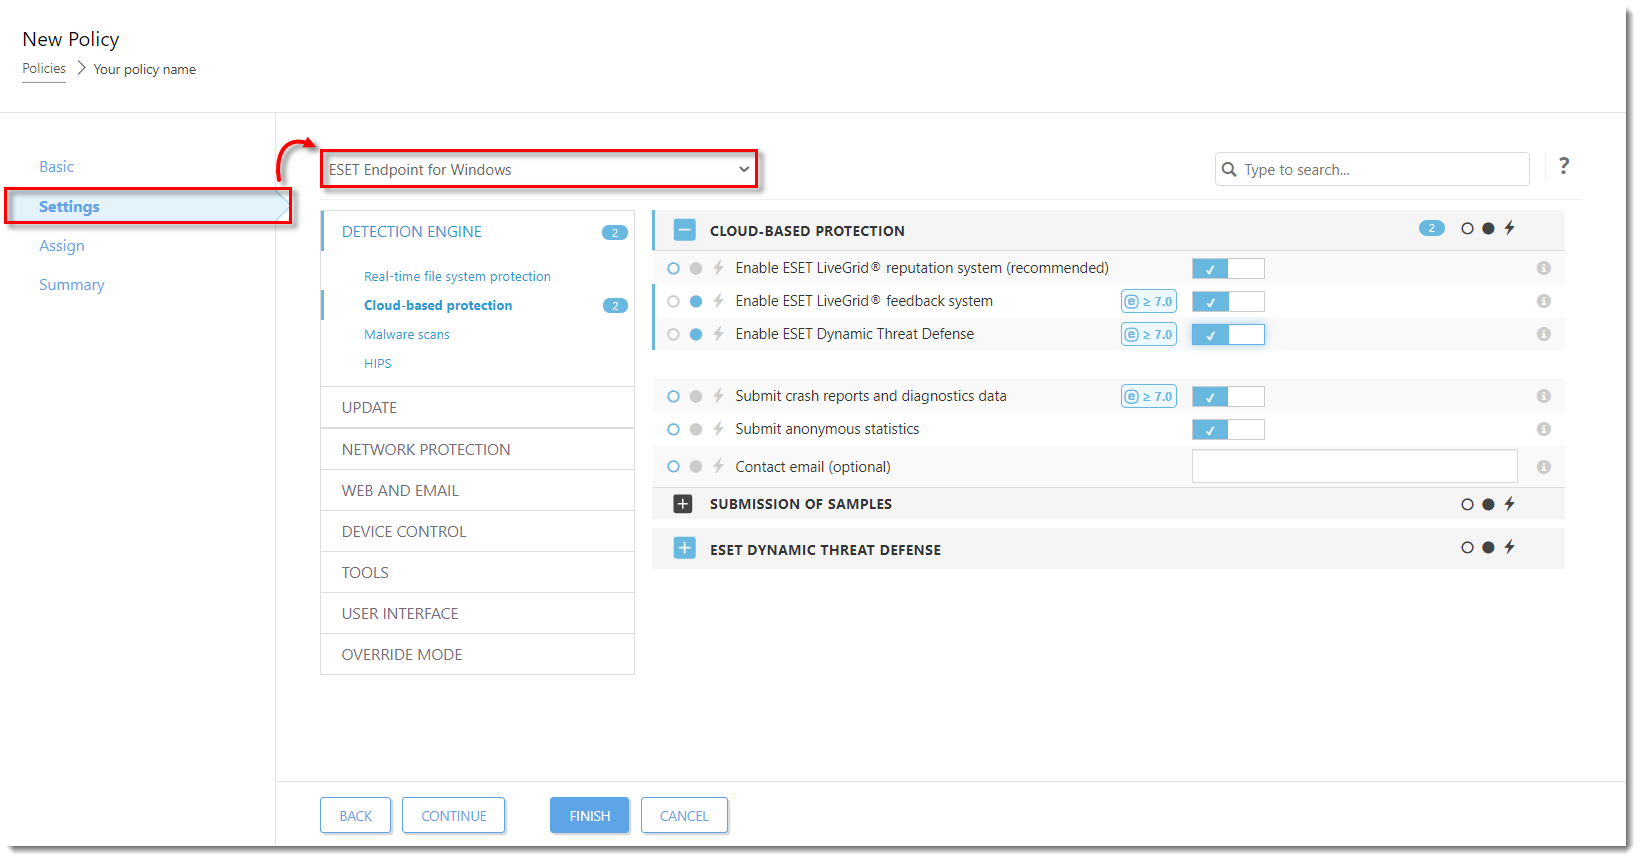
- Expand Detection Engine, click Cloud-based protection and then click the slider bar next to Enable ESET LiveGrid® reputation system (recommended), Enable ESET LiveGrid® feedback system, and Enable ESET Dynamic Threat Defense to enable these options (the slider bar turns blue once enabled). All three settings are necessary on each device where EDTD is enabled. Click Finish to save the policy.
Create a policy for EDTD (EFS)
- Open the ESET PROTECT Web Console in your web browser and log in.
Click Policies → New Policy.
- Type a name for the new policy (in this example, Enable EDTD (EFS). The Description field is optional.
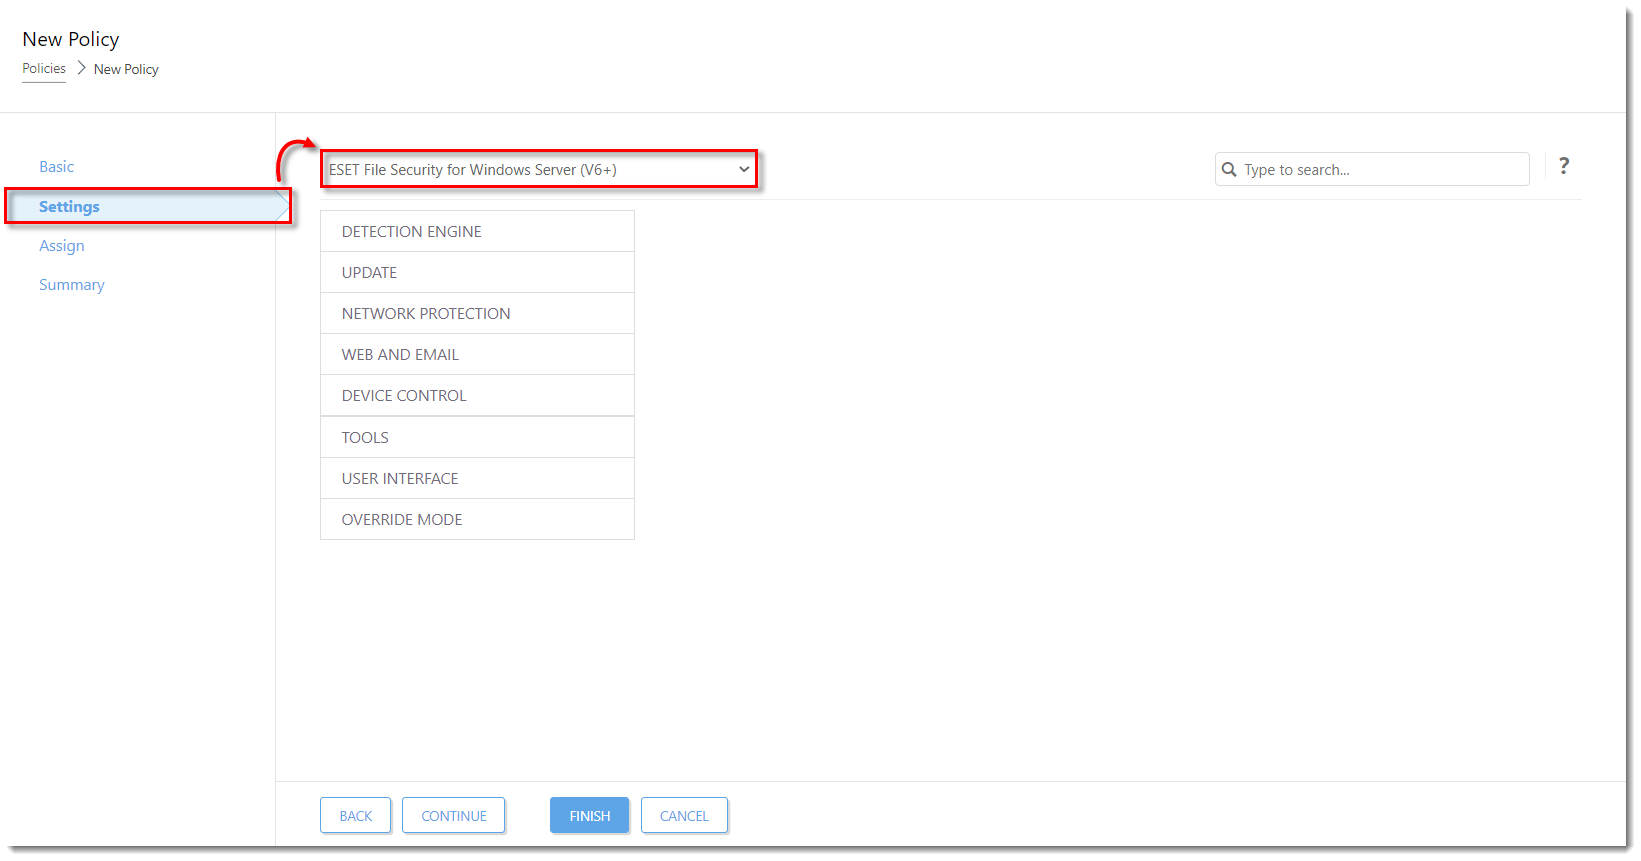
Click Settings and select ESET File Security for Windows Server (V6+) from the drop-down menu.
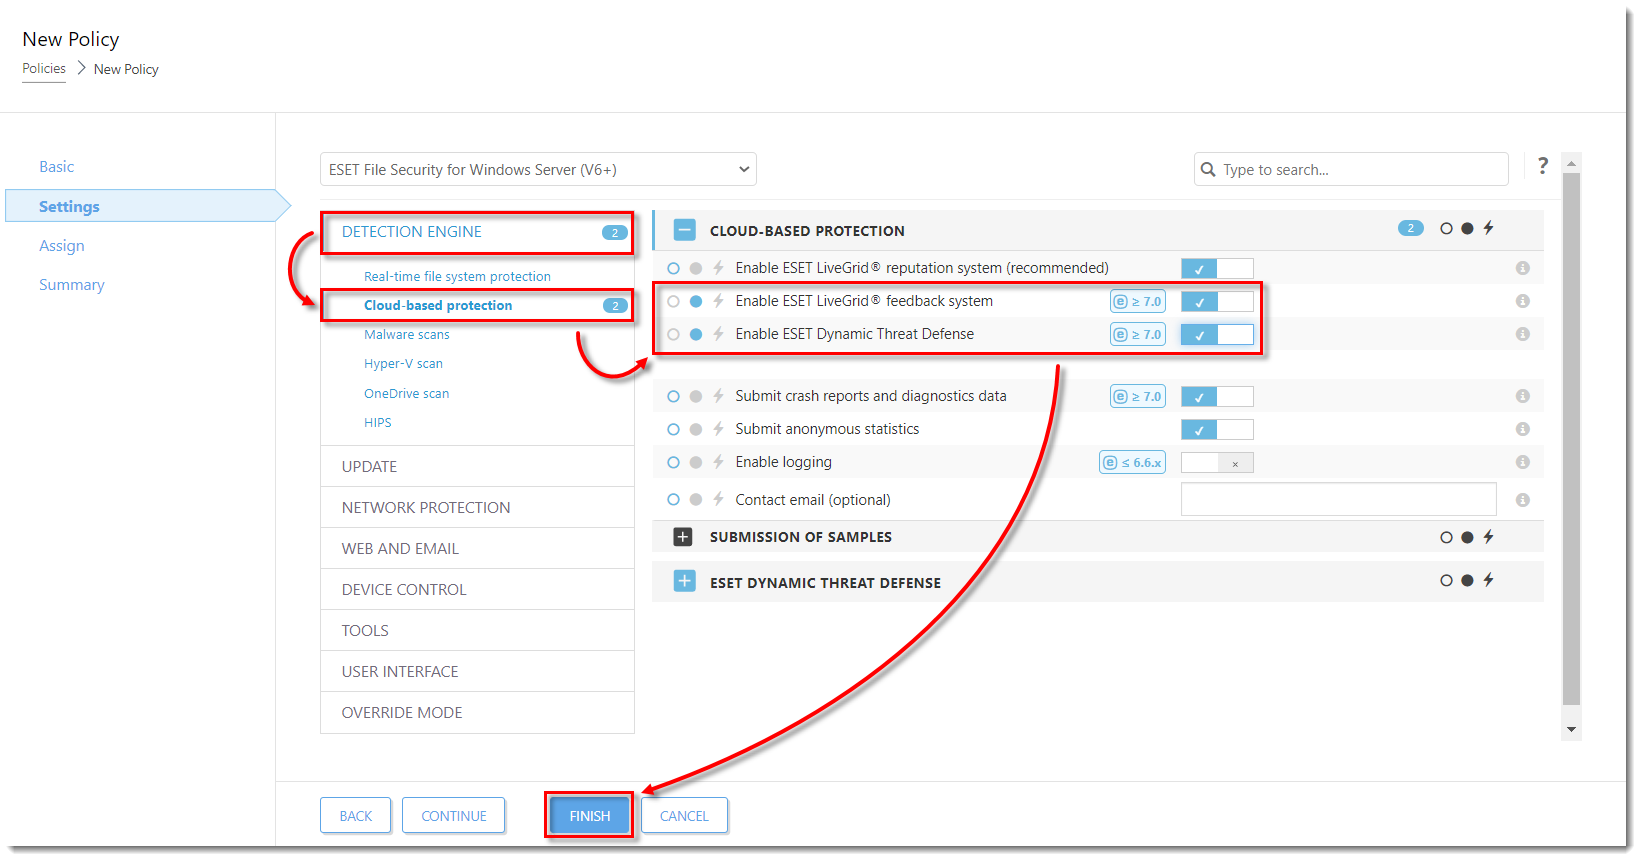
- Expand Detection Engine, click Cloud-based protection and then click the slider next to Enable ESET LiveGrid® feedback system and Enable ESET Dynamic Threat Defense to enable these options (the slider bar turns blue once enabled). Click Finish to save the policy.
Apply policies to that group (EDTD Activated)
- Open the ESET PROTECT Web Console in your web browser and log in.
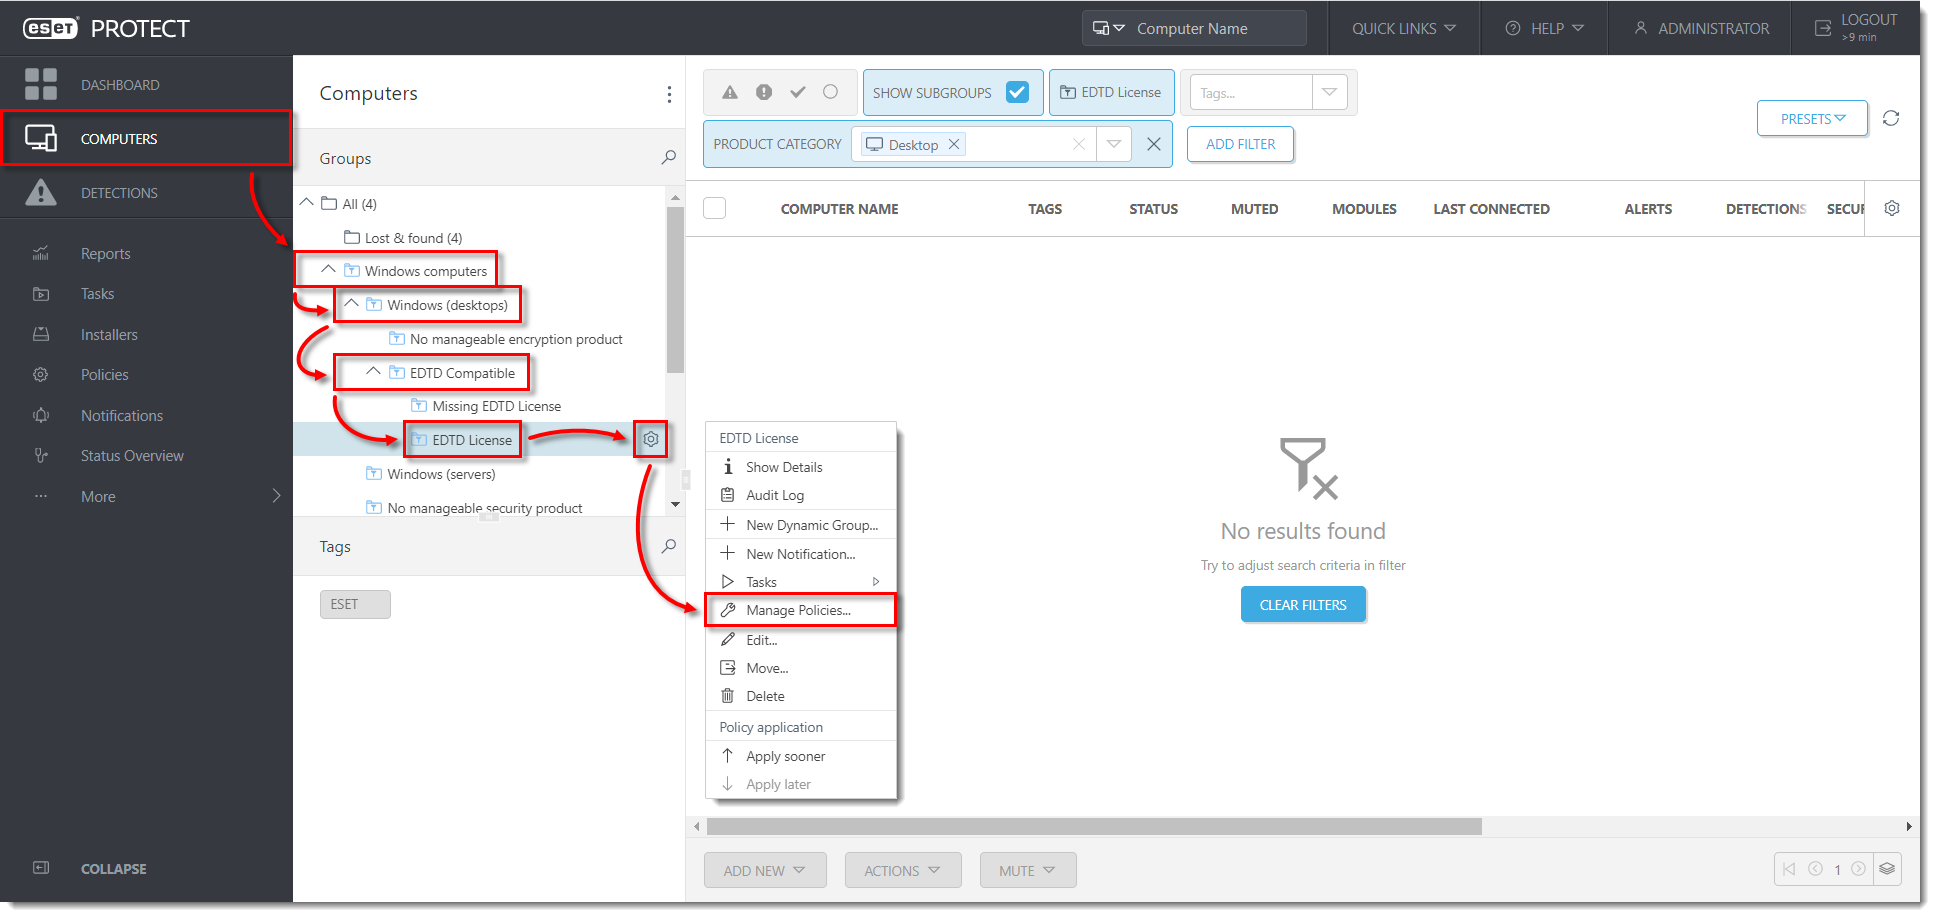
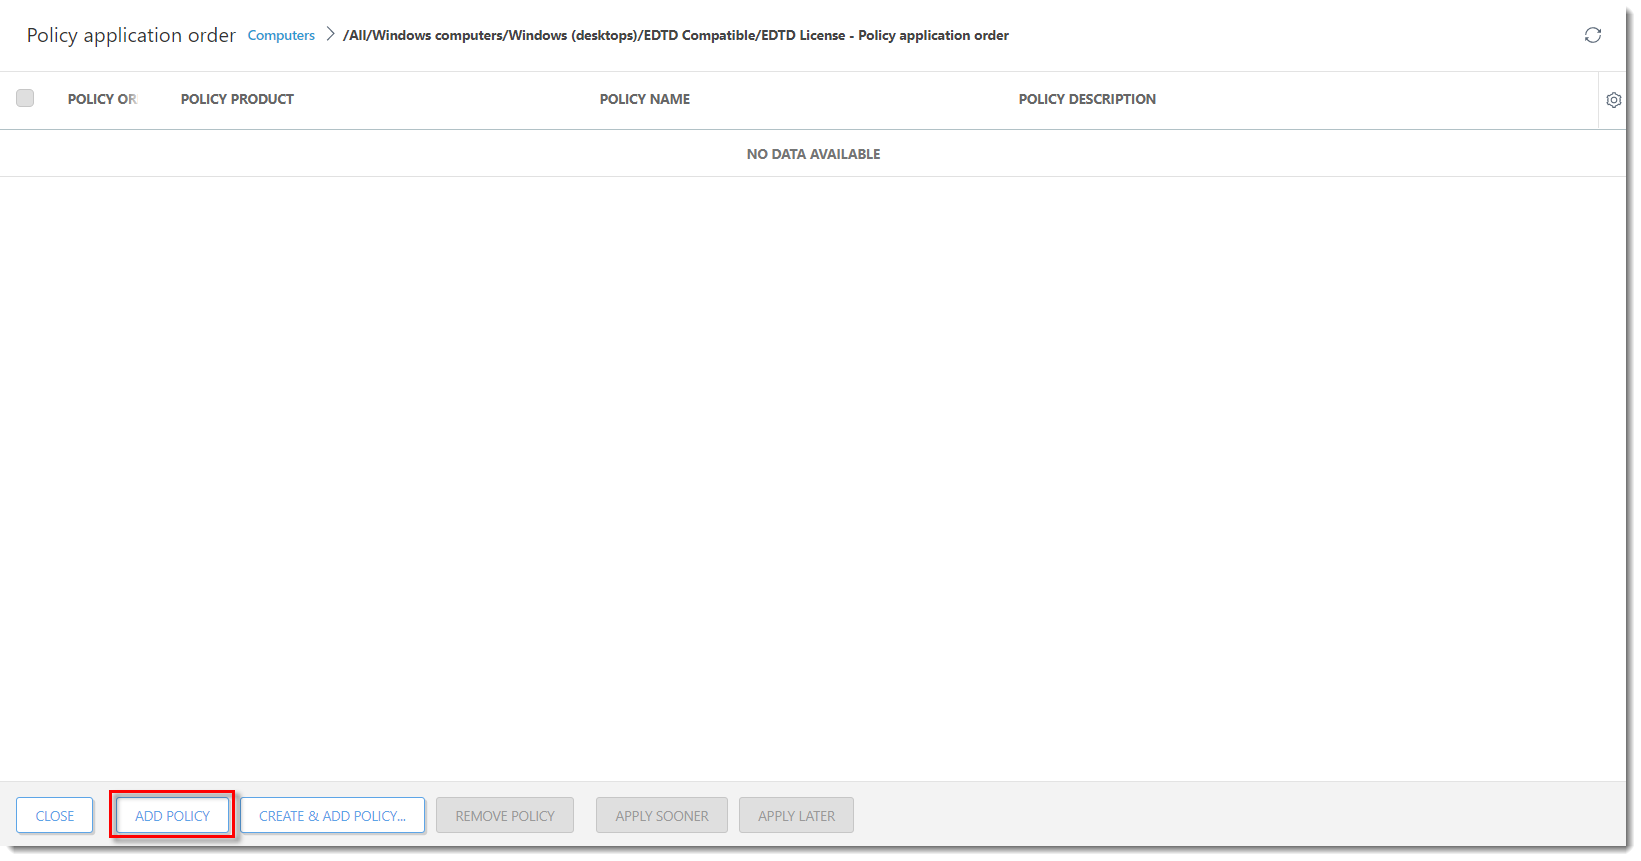
Click Computers, expand Windows computers → Windows (desktops) and click EDTD Compatible → EDTD License dynamic group that you have created in Section → the gear icon. In the pop-up menu window, click Manage Policies.
- Click Add Policy.
- Select the check boxes next to the two policies that you have created in Section 4 and Section 5 and click OK.
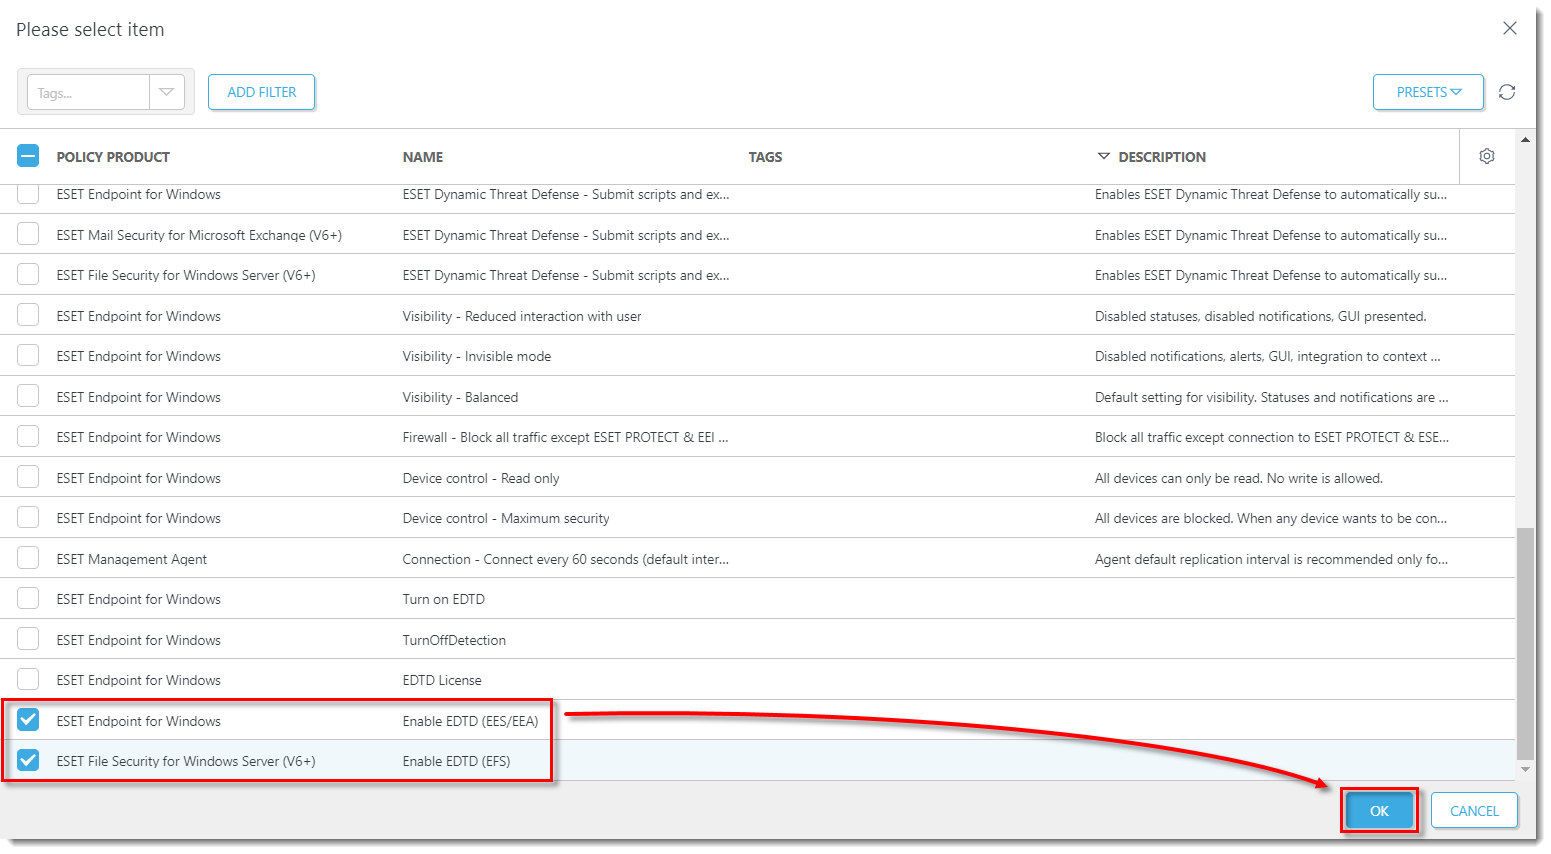
When the ESET Management Agent contacts the ESET PROTECT Server the policies will be applied to the applicable products. Each every connected client machine with a compatible EDTD-activated product receives this policy and enables EDTD.

Reactie toevoegen
Log in of registreer om een reactie te plaatsen.