

Issue
- Configure client workstations/mobile users to download updates directly from ESET update servers if they cannot download updates from the primary update server
I. Create a new profile
Open ESET Security Management Center Web Console (ESMC Web Console) in your web browser and log in.
- Click Policies and select the policy you want to modify.
- Click Policies → Edit.
When creating a new policy
In this example, we will modify an existing policy. If you are creating a new policy, you must enter information about your server (mirror server IP address, for example). If you are using the ESMC or HTTP Proxy for distributing updates, you do not need to specify any of this information in your policy.
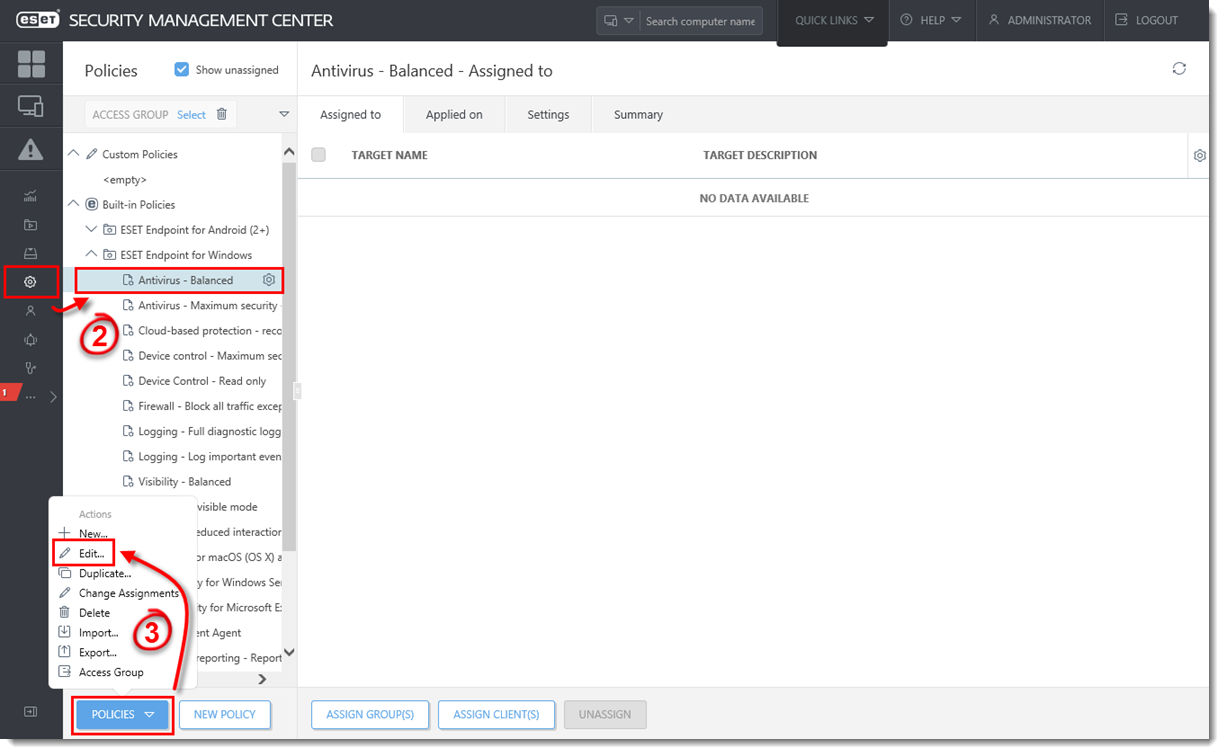
Figure 1-1 Click the image to view larger in new window
- Click Settings.
- Click Update, expand Profiles and click Edit.
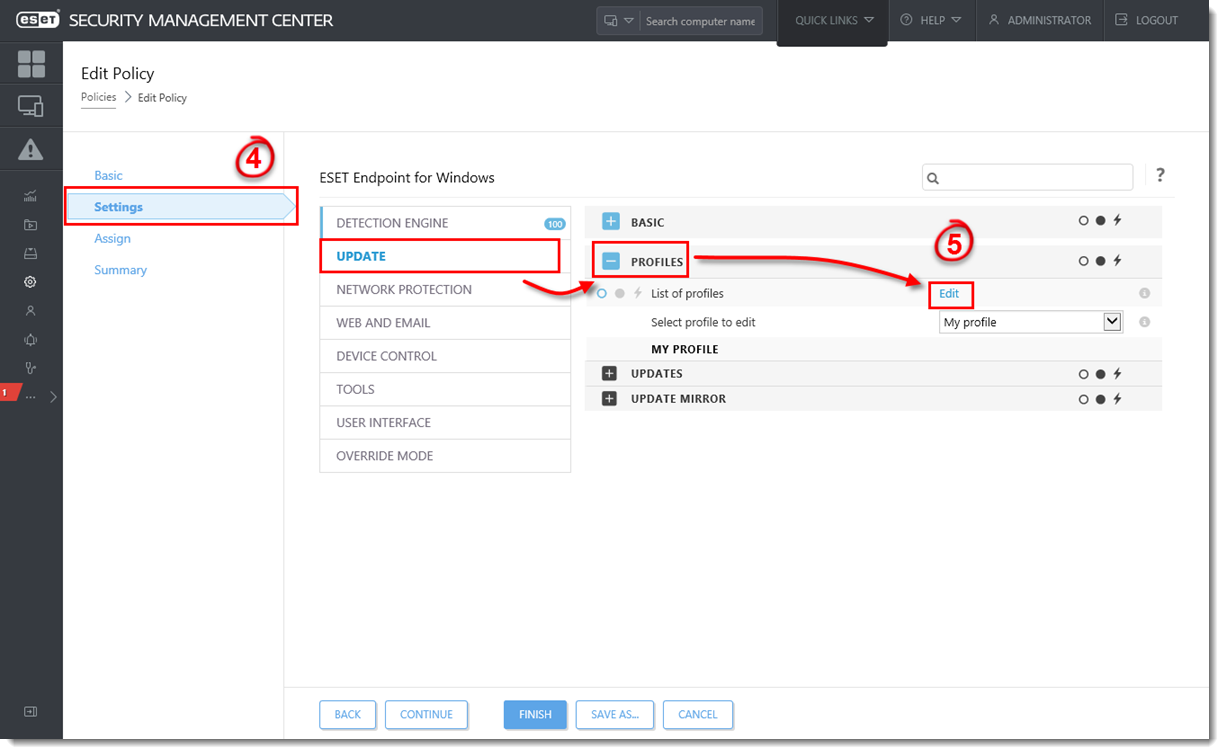
Figure 1-2 Click the image to view larger in new window
- Type a name into the blank field and click Add.
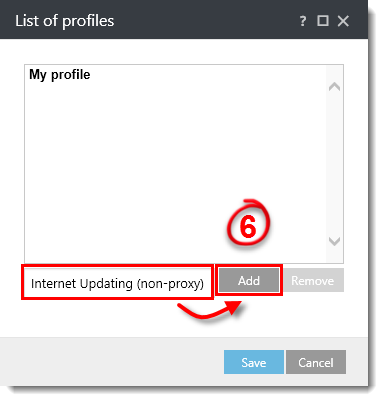
Figure 1-3
- Click Save.
Figure 1-4
- Select the profile you just created from the Select profile to edit drop-down menu.
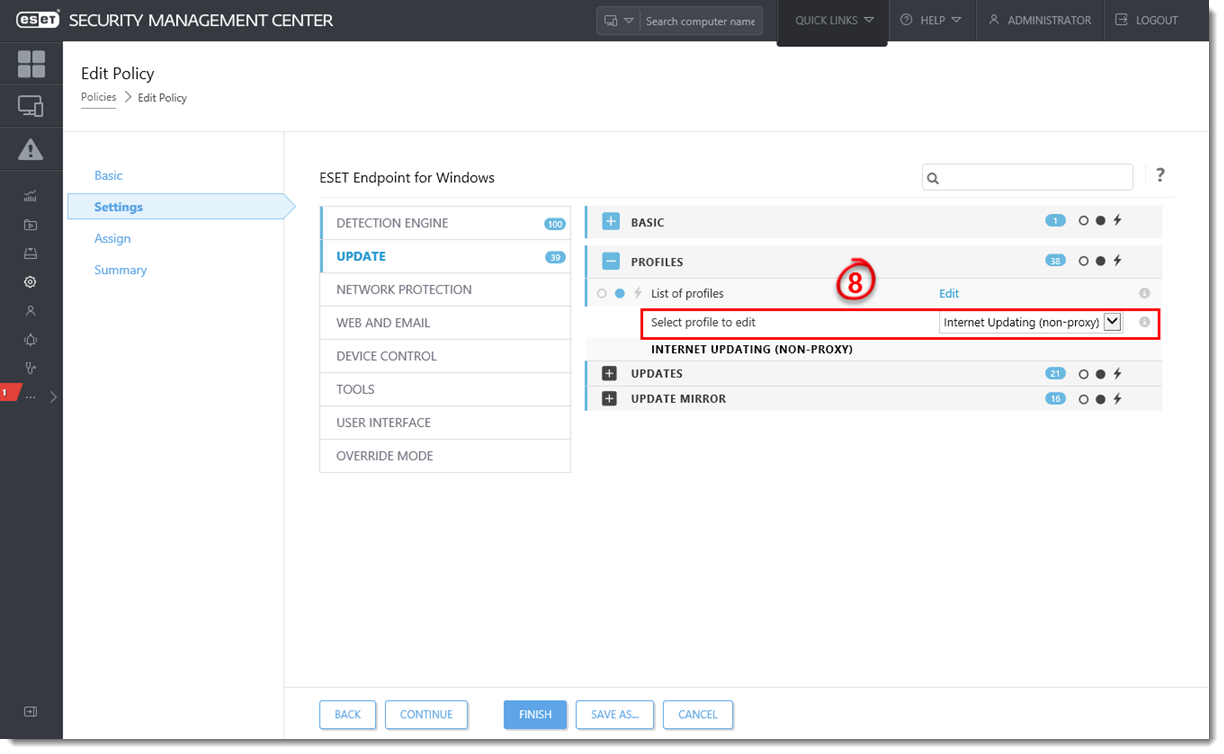
Figure 1-5 Click the image to view larger in new window - Expand Updates → Connection Options. Select Do not use proxy server from the Proxy mode drop-down menu and then click Finish.
In the future, client workstations assigned to the policy you modified (see step II) will first attempt to download updates from the default profile—if this fails, client workstations will then attempt to download updates from ESET servers.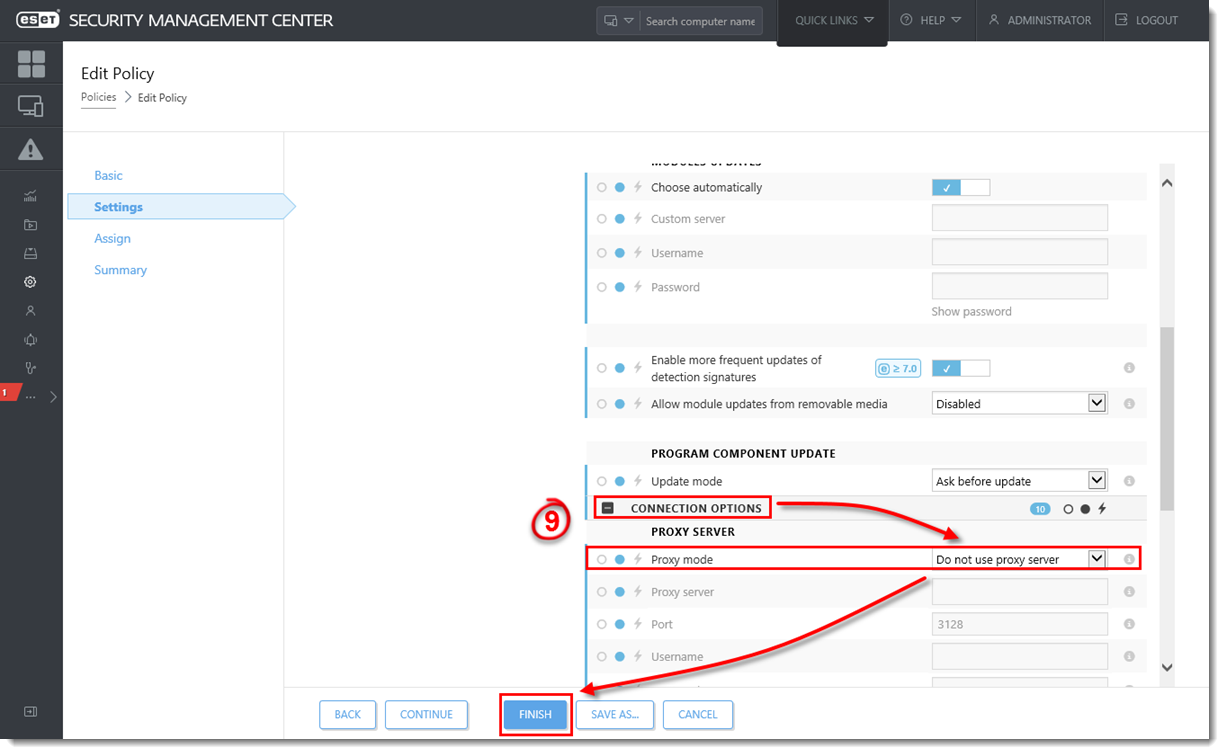
Figure 1-6 Click the image to view larger in new window


II. Modify the regular automatic update task
Complete the steps below to ensure that the latest detection engine updates will be downloaded when an end-user clicks Check for updates in their ESET endpoint product. Manual updates initiated by the user will fail if the regular automatic update task is not modified. However, the ESET endpoint product (assigned to the policy you modified in part I) will still automatically download updates according to the default interval specified in the regular automatic update task.
- Open the ESET Security Management Center Web Console (ESMC Web Console) in your web browser and log in.
- Click Policies and select the policy you want to modify.
- Click Policies → Edit.

Figure 2-1 Click the image to view larger in new window
- Click Settings and make sure ESET Security Product for Windows is selected from the drop-down menu.
- Click Tools, expand Scheduler and then click Edit.
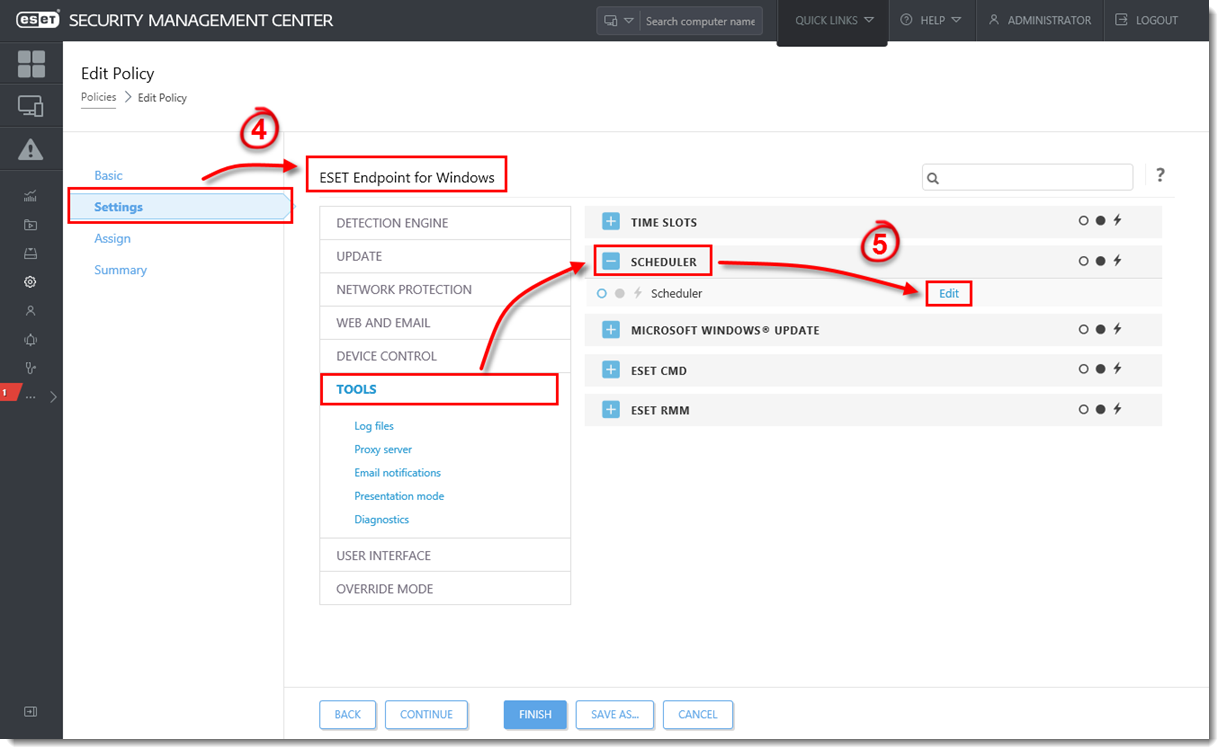
Figure 2-2 Click the image to view larger in new window
- Select Regular automatic update and click Edit.
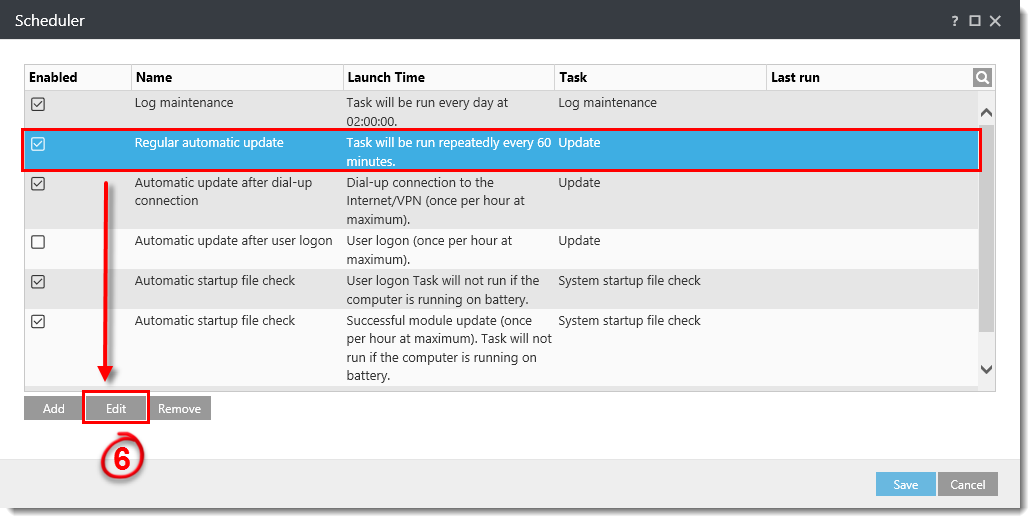
Figure 2-3 Click the image to view larger in new window
- Click Next.
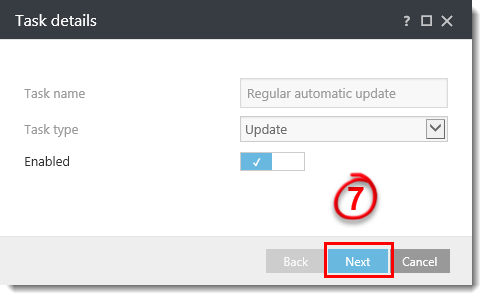
Figure 2-4
- Click Next.
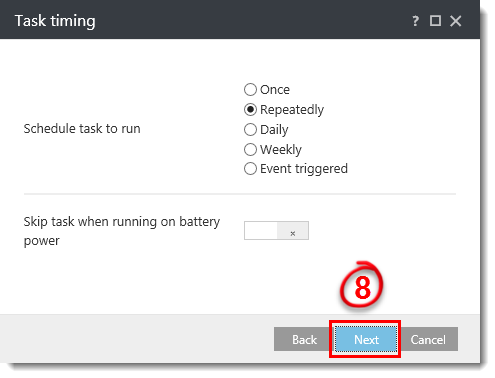
Figure 2-5
- Leave the Interval between task execution (min.) at 60 and click Next.

Figure 2-6
- Make sure that At the next scheduled time is selected and click Next.

Figure 2-7
- Click the slider bar next to Use active update profile (under Profile to use for update) and make sure that the default profile (My profile) is selected from the Profile drop-down menu.
- Click the slider bar next to Use active update profile (under Secondary profile to be used for update), select the profile that you created in part I (Internet Updating (non-proxy)) and then click Finish.
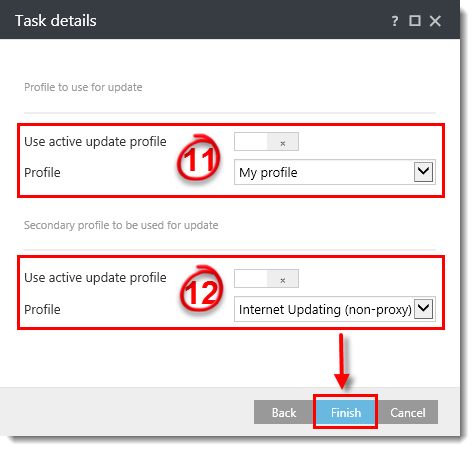
Figure 2-8
- Click Save.

Figure 2-9 Click the image to view larger in new window
- Click Finish.
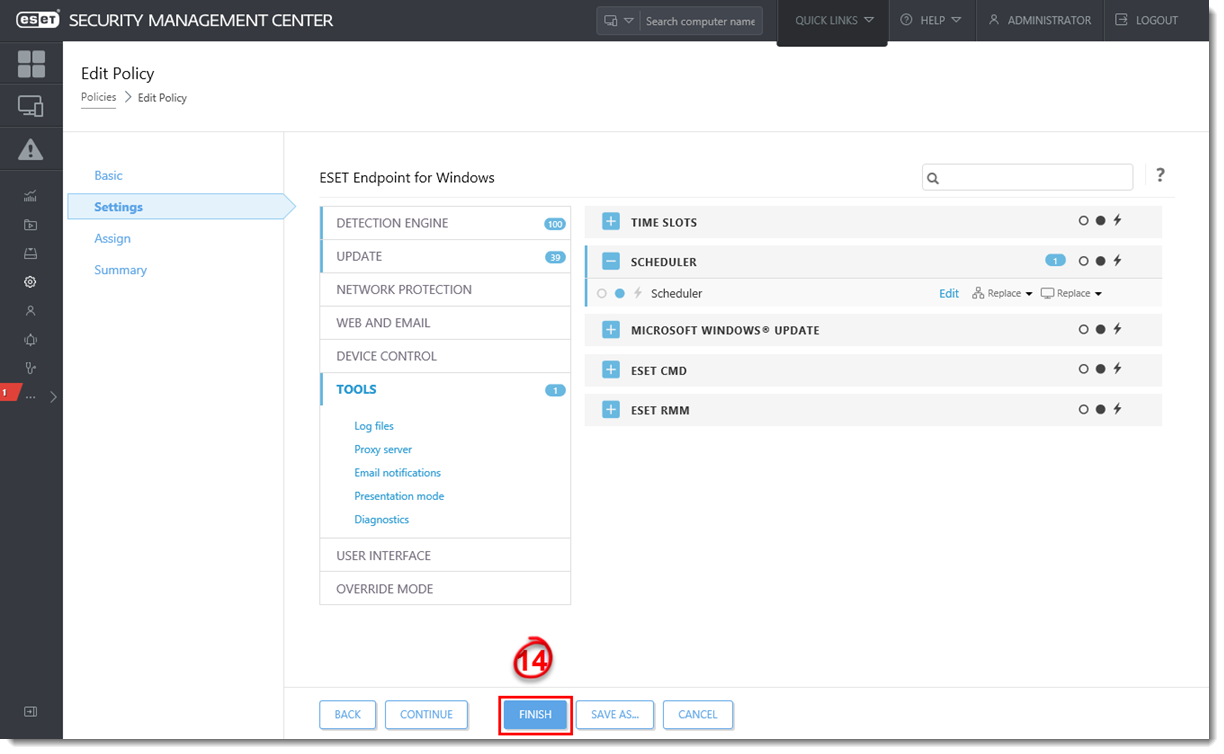
Figure 2-10 Click the image to view larger in new window
- To test the new profile configuration, perform the following steps on a client computer.
Click Tools → Scheduler.
Figure 2-11 Click the image to view larger in new window
- Select the appropriate Update task, right-click it and select Run Now.
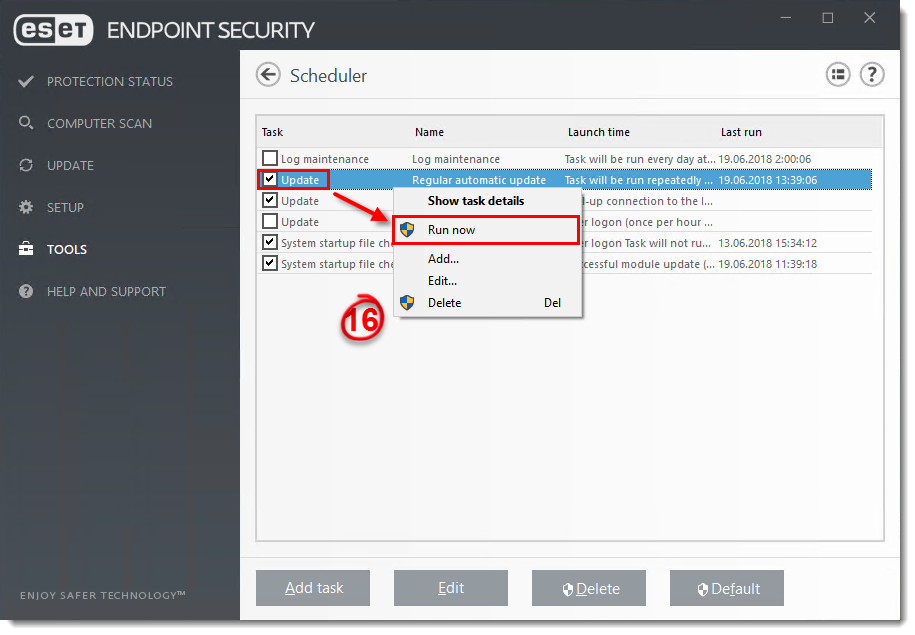
Figure 2-12 Click the image to view larger in new window
- Click Run now.
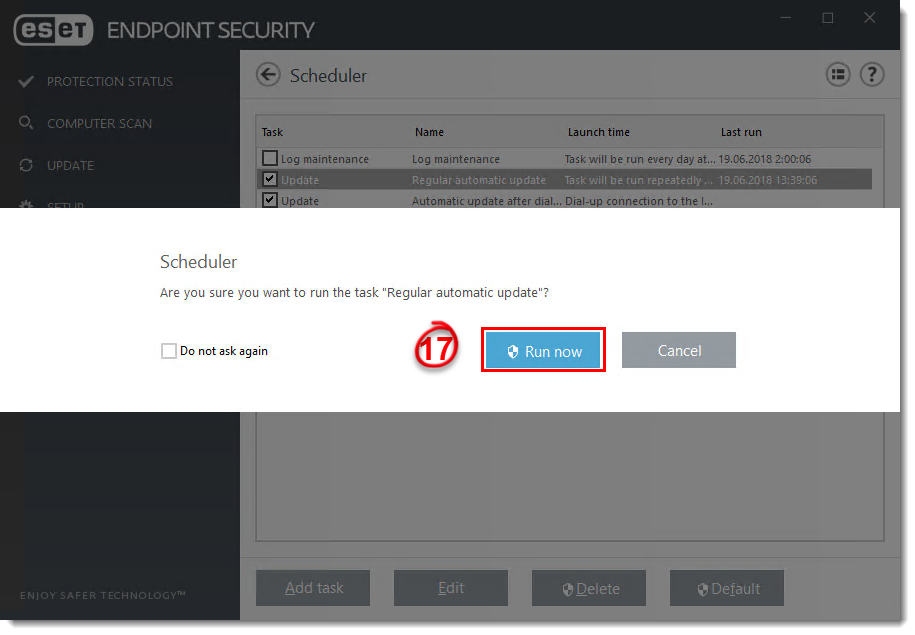
Figure 2-13 Click the image to view larger in new window


Configure dual update profiles for ESET macOS and Linux products
Open ESET Security Management Center Web Console (ESMC Web Console) in your web browser and log in.
- Click Policies and select your macOS and Linux policy.
- Click Policies → Edit.
- Click Settings, click Update → Primary Server.
- To configure the settings:
- Expand HTTP Proxy and select Connection through a proxy server in the Proxy mode drop-down menu.
- Type the IP address into the Proxy server field and port number (default is 3128) into the Port field.
If the proxy requires login credentials, enter them in the Username and Password fields (for example, within your company's network).
- Expand HTTP Proxy and select Connection through a proxy server in the Proxy mode drop-down menu.

Figure 3-1 Click the image to view larger in new window
- Click Secondary Server to configure:
- Expand Basic and make sure that the Update server drop-down menu is set to Choose automatically (it is by default).
- Leave the Username and Password field empty (because the product is already activated and these credentials are not needed).
- Expand Basic and make sure that the Update server drop-down menu is set to Choose automatically (it is by default).
- Click Finish to save your changes.

Figure 3-2 Click the image to view larger in new window
Reactie toevoegen
Log in of registreer om een reactie te plaatsen.