

Issue
- Remotely Deploy ESET Endpoint Security for Android to client devices using ESET PROTECT
Solution
Prerequisites
- ESET PROTECT and ESET Mobile Device Connector must be installed and activated. For more help, visit the ESET PROTECT Installation guide.
- You must have a valid ESET license. ESET Mobile Device Connector is activated with your ESET Endpoint Security license. How do I purchase a license?
- Managed devices must be running on Android version 5 and later.
To enroll Android devices in ESET Mobile Device Connector (MDC), follow the steps in each section:
- Create an MDM Certificate
- Create an MDM Policy
- Register your Android device in ESET PROTECT
- Enroll your Android device
- Create an Activation task for Android MDM
I. Create an MDM certificate
If you already have an MDM certificate, proceed to Section II: Create an MDM Policy.

Open the ESET PROTECT Web Console in your web browser and log in.
Expand More, click Peer Certificate → New → Certificate.

- In the Basic section, type the Description of the certificate and select Mobile Device Connector from the Product drop-down menu. Type the IP address or Hostname of the server where Mobile Device Connector is installed in the Host field and type the Passphrase into respective fields. In the Attributes (Subject) section, type the organization name used in ESET PROTECT in the Organization name field. Click Continue.


- In the Sign section, click Select certification authority.

- Select the check box next to the certification authority that you want to use and click OK.

- Click Finish and proceed to Create an MDM Policy.
II. Create an MDM Policy
Open the ESET PROTECT Web Console in your web browser and log in.
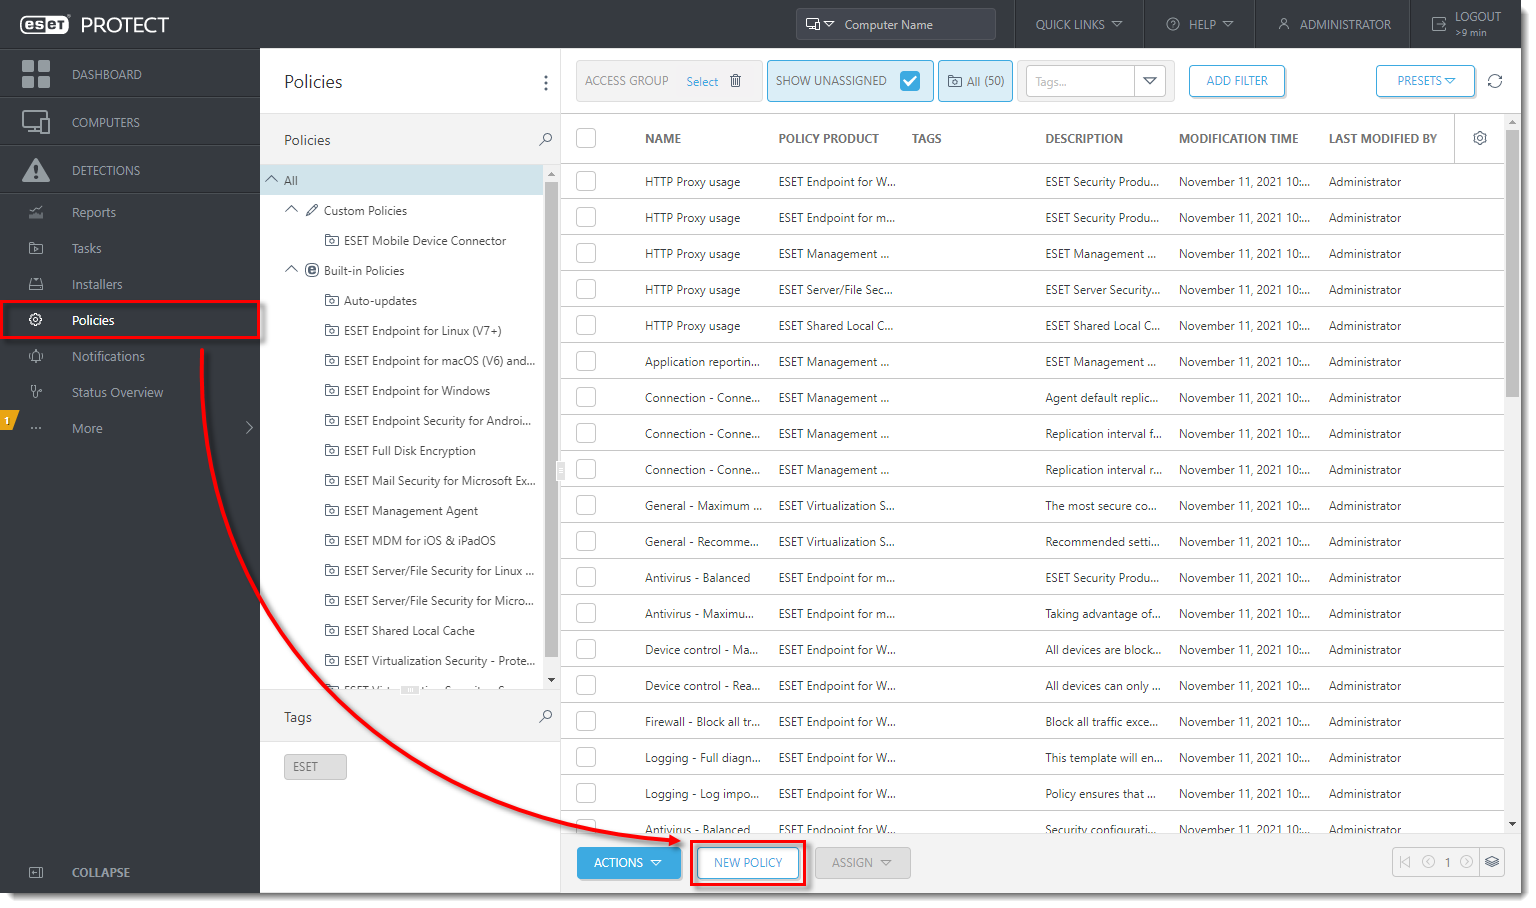
Click Policies → New Policy.

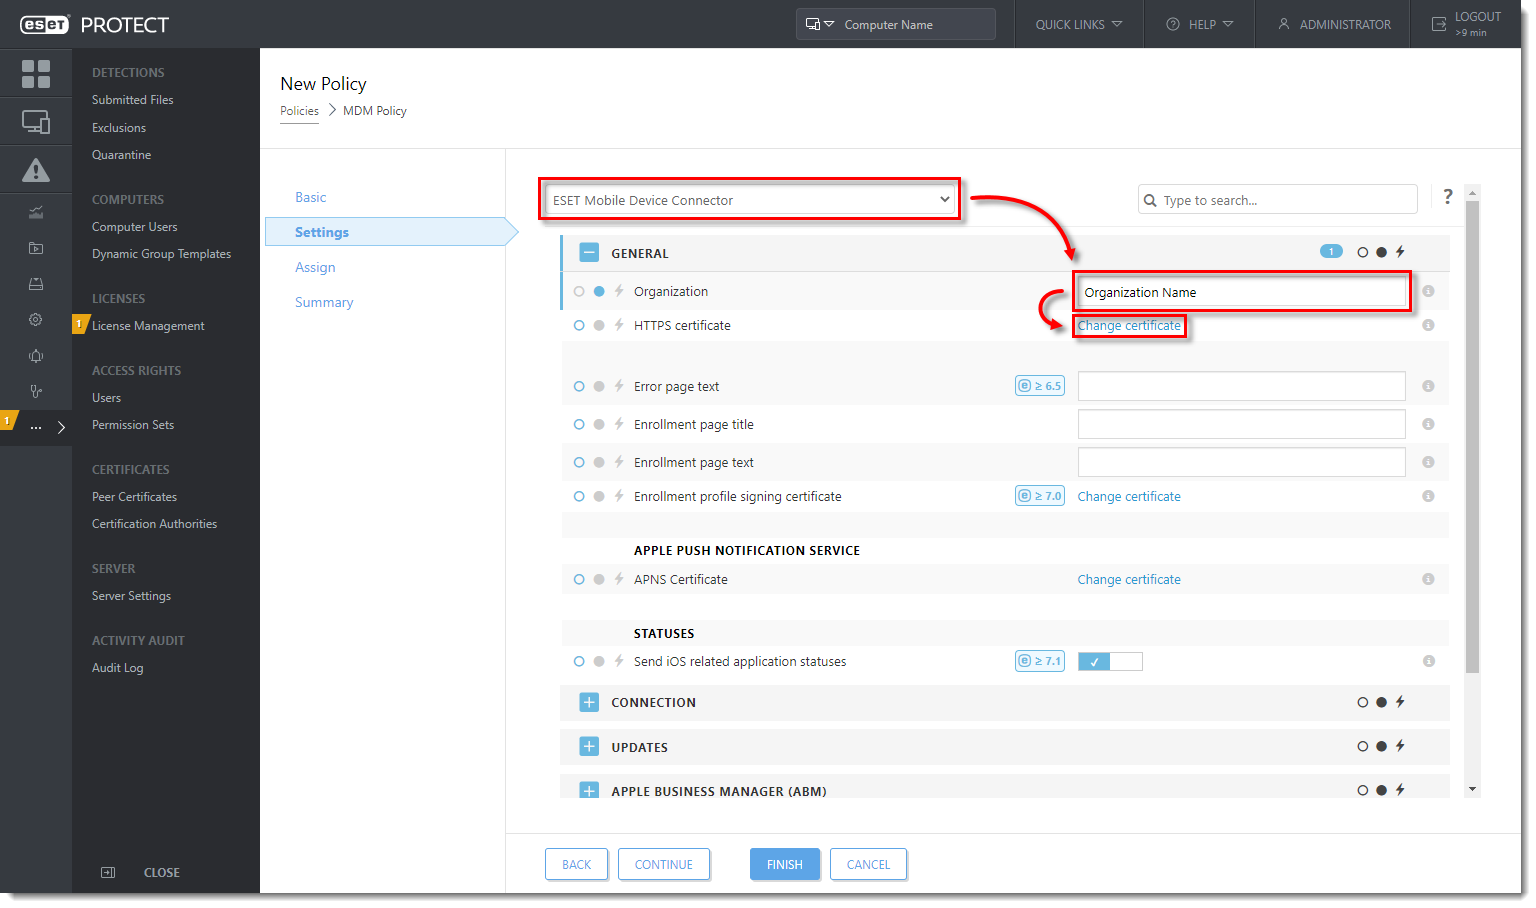
In the Basic section, type a name for the policy in the Name field (the Description field is optional). Click Continue. In the Settings section, select ESET Mobile Device Connector from the drop-down menu. Type the organization name used in ESET PROTECT into the Organization field. This name will be used by the enrollment profile generator to update the profile. Click Change certificate next to HTTPS certificate. 
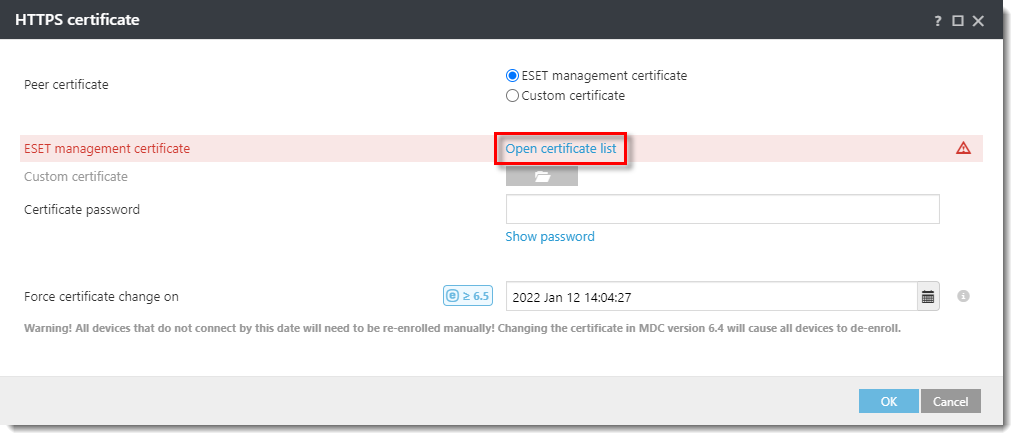
Click Open certificate list. 

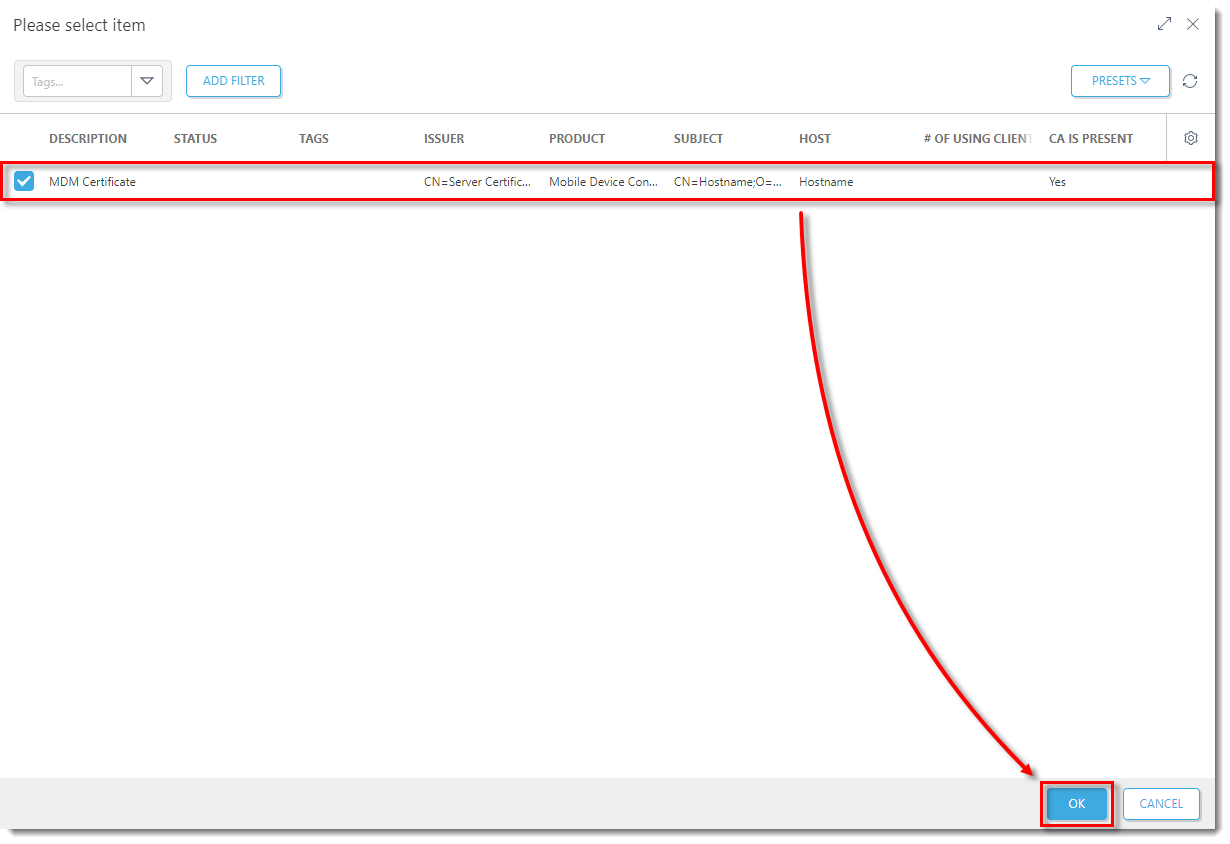
Select the MDM Certificate created in Section I and click OK. 
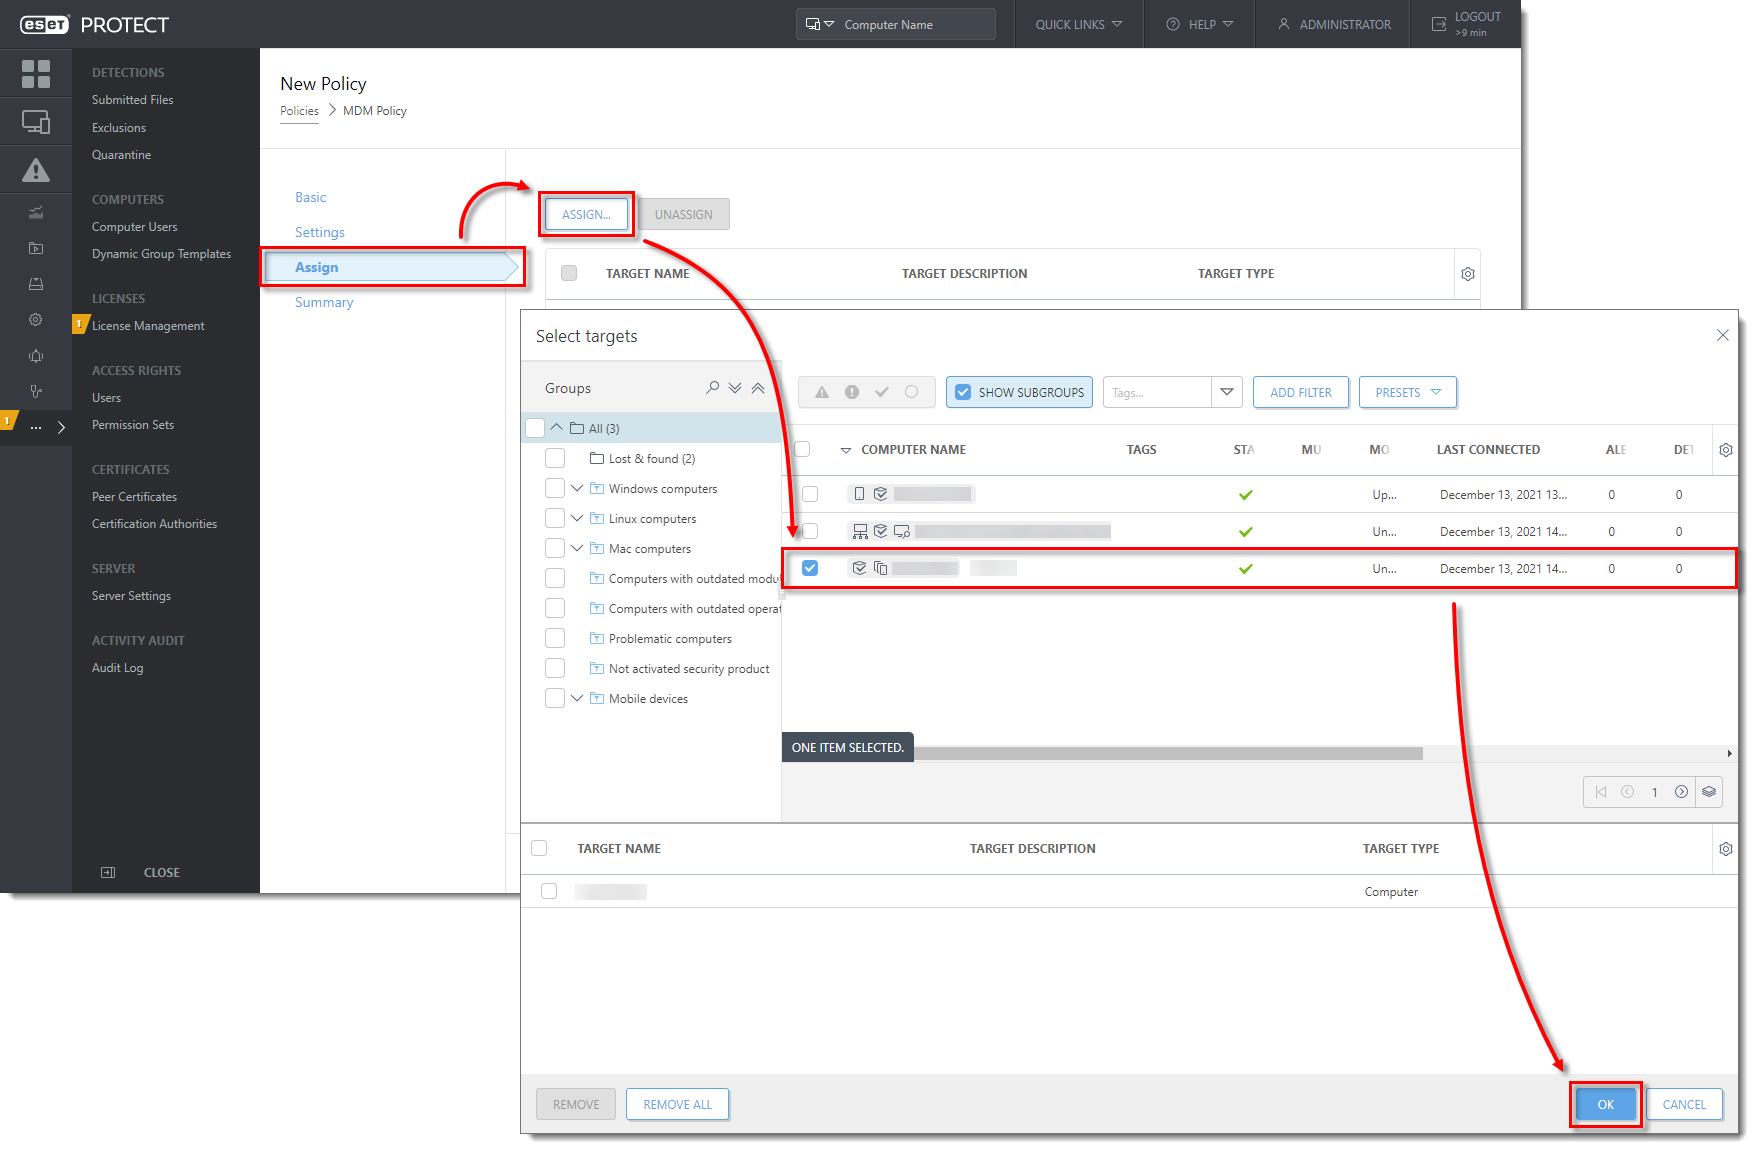
In the Assign section, click Assign to display all Static and Dynamic Groups and their members. Select the check box next to the Mobile Device Connector instance to which you want to apply the policy and click OK. 

When you are finished, proceed to Section III: Register your Android device in ESET PROTECT and send an enrollment link.
III. Register your Android device in ESET PROTECT and send an enrollment link
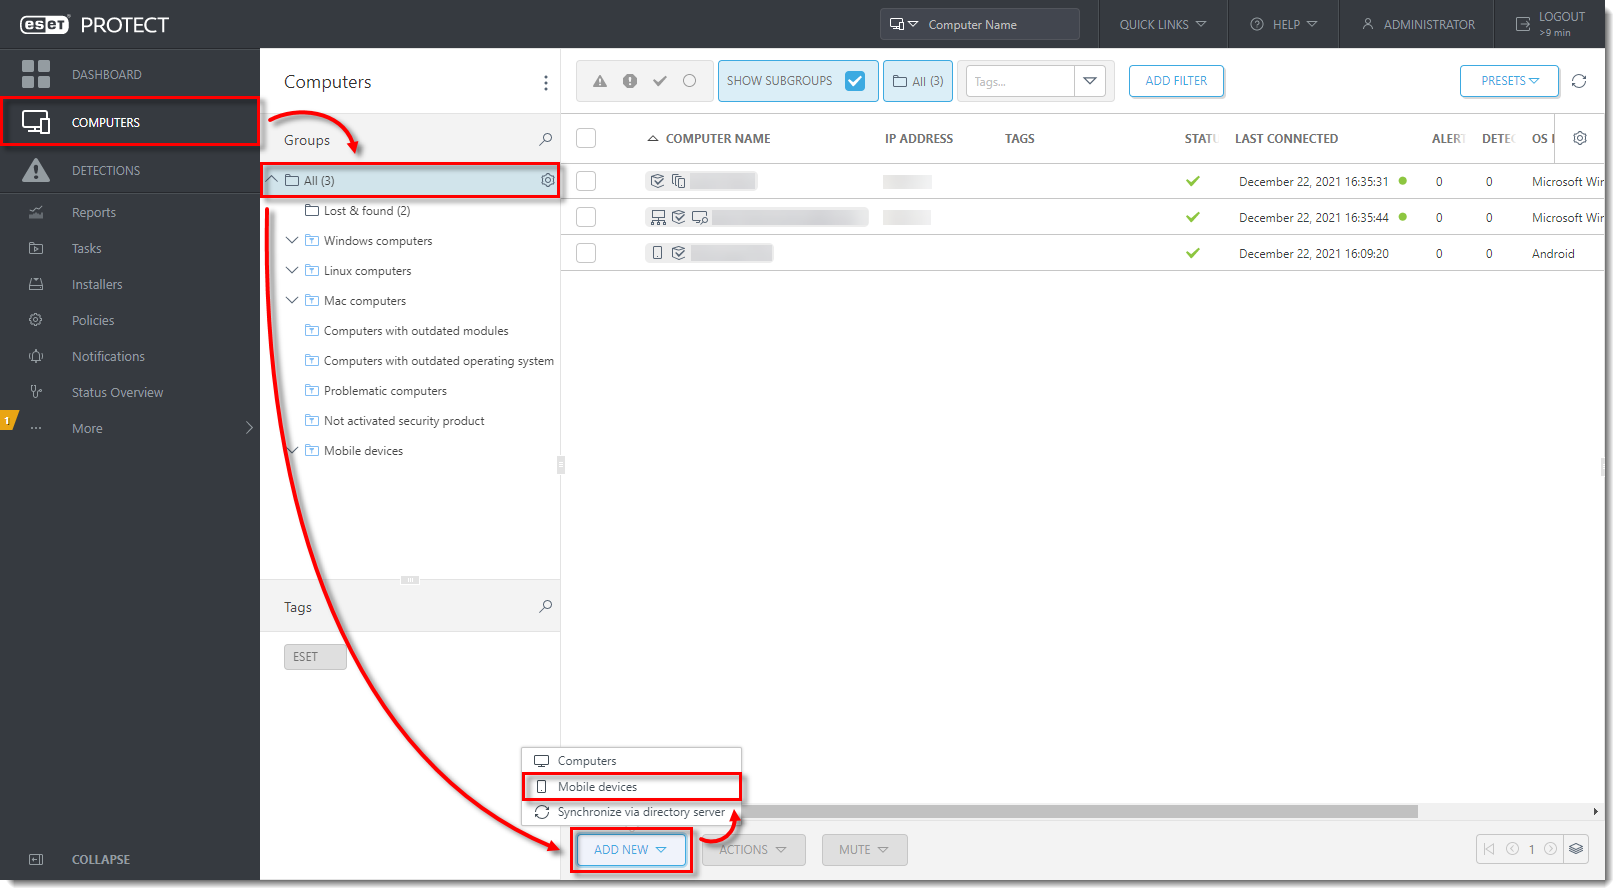
Open the ESET PROTECT Web Console in your web browser and log in.
Click Computers, select the group to which you want to add your mobile device and then click Add New → Mobile devices.

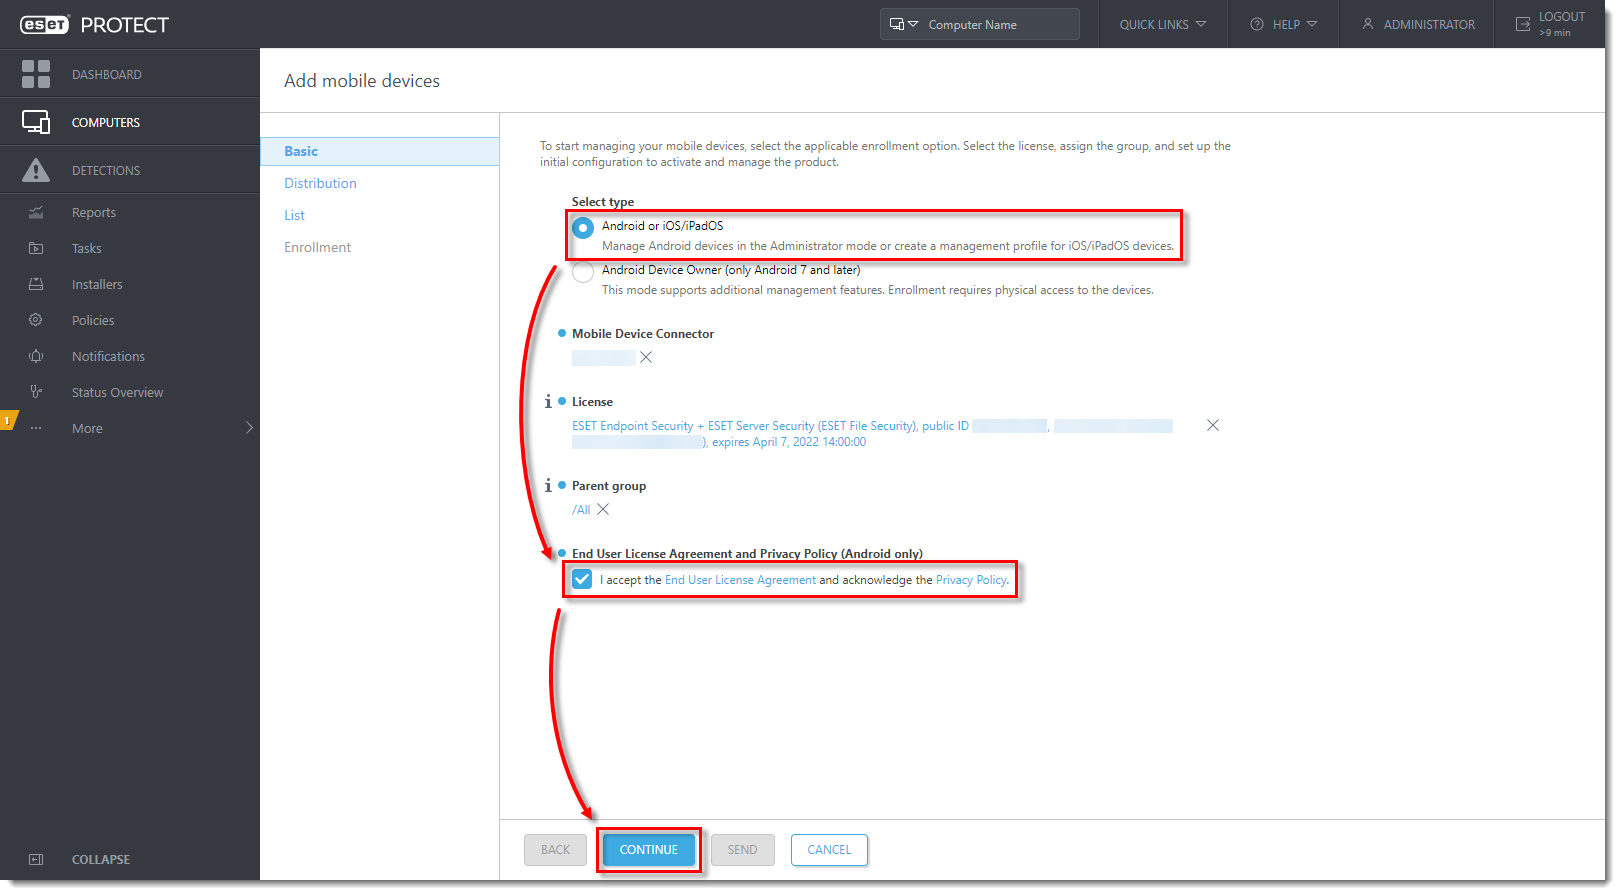
- In the Basic section, ensure that Android or iOS/PadOS is selected. Select the check box next to I accept the End User License Agreement and acknowledge the Privacy Policy and click Continue.

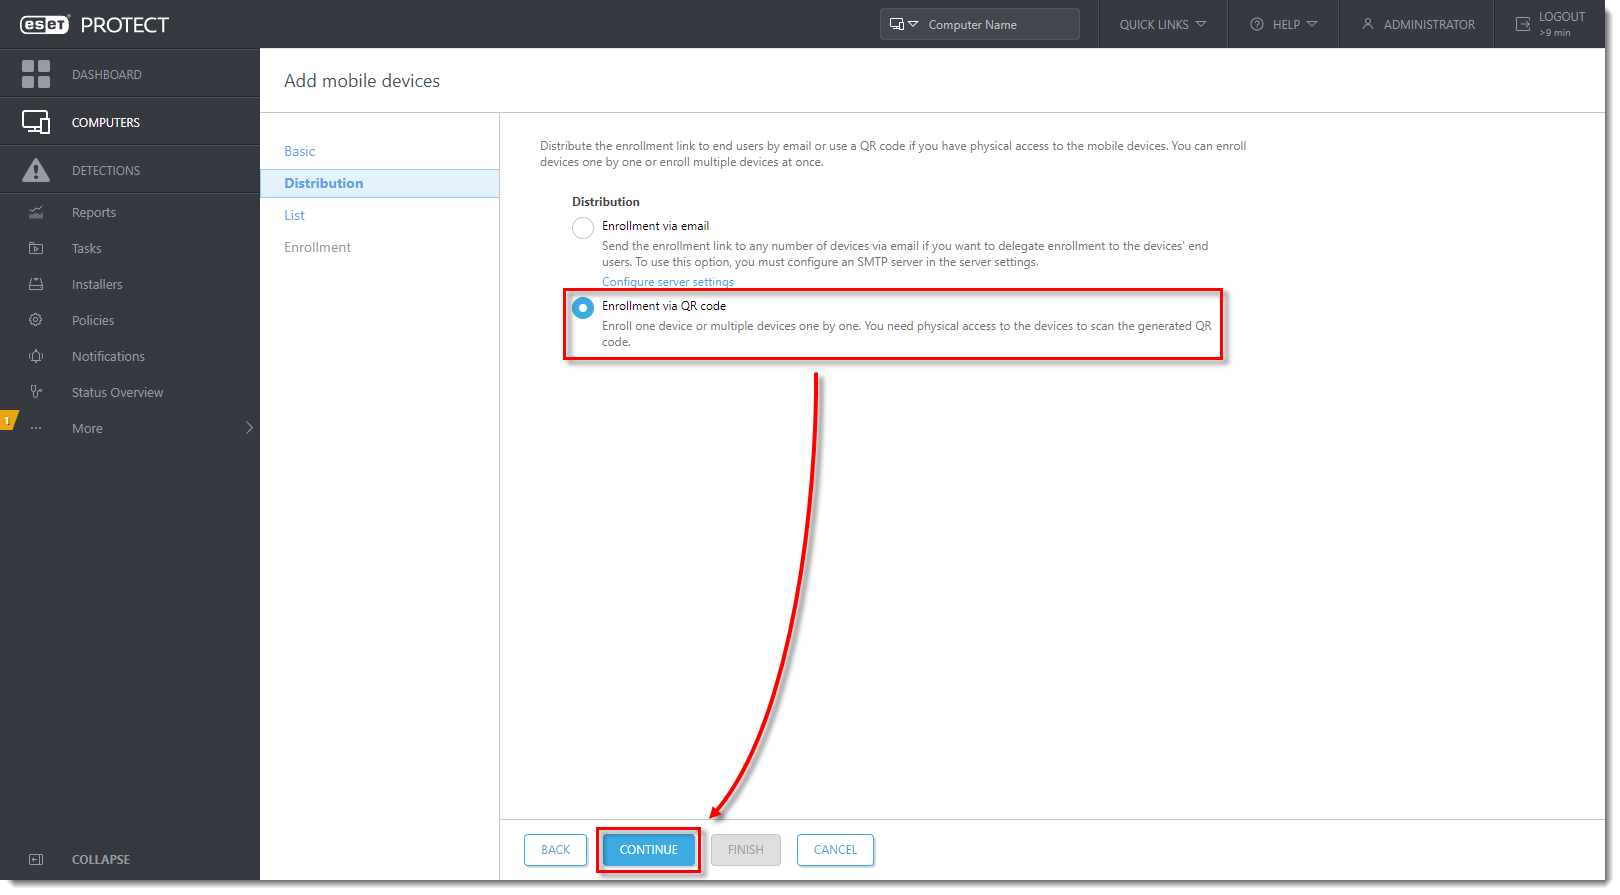
- In the Distribution section, select Enrollment via email and click Configure server settings. Enroll a single device at a time.


Follow steps 2-3 of this section again. Select Enrollment via email and click Continue. 
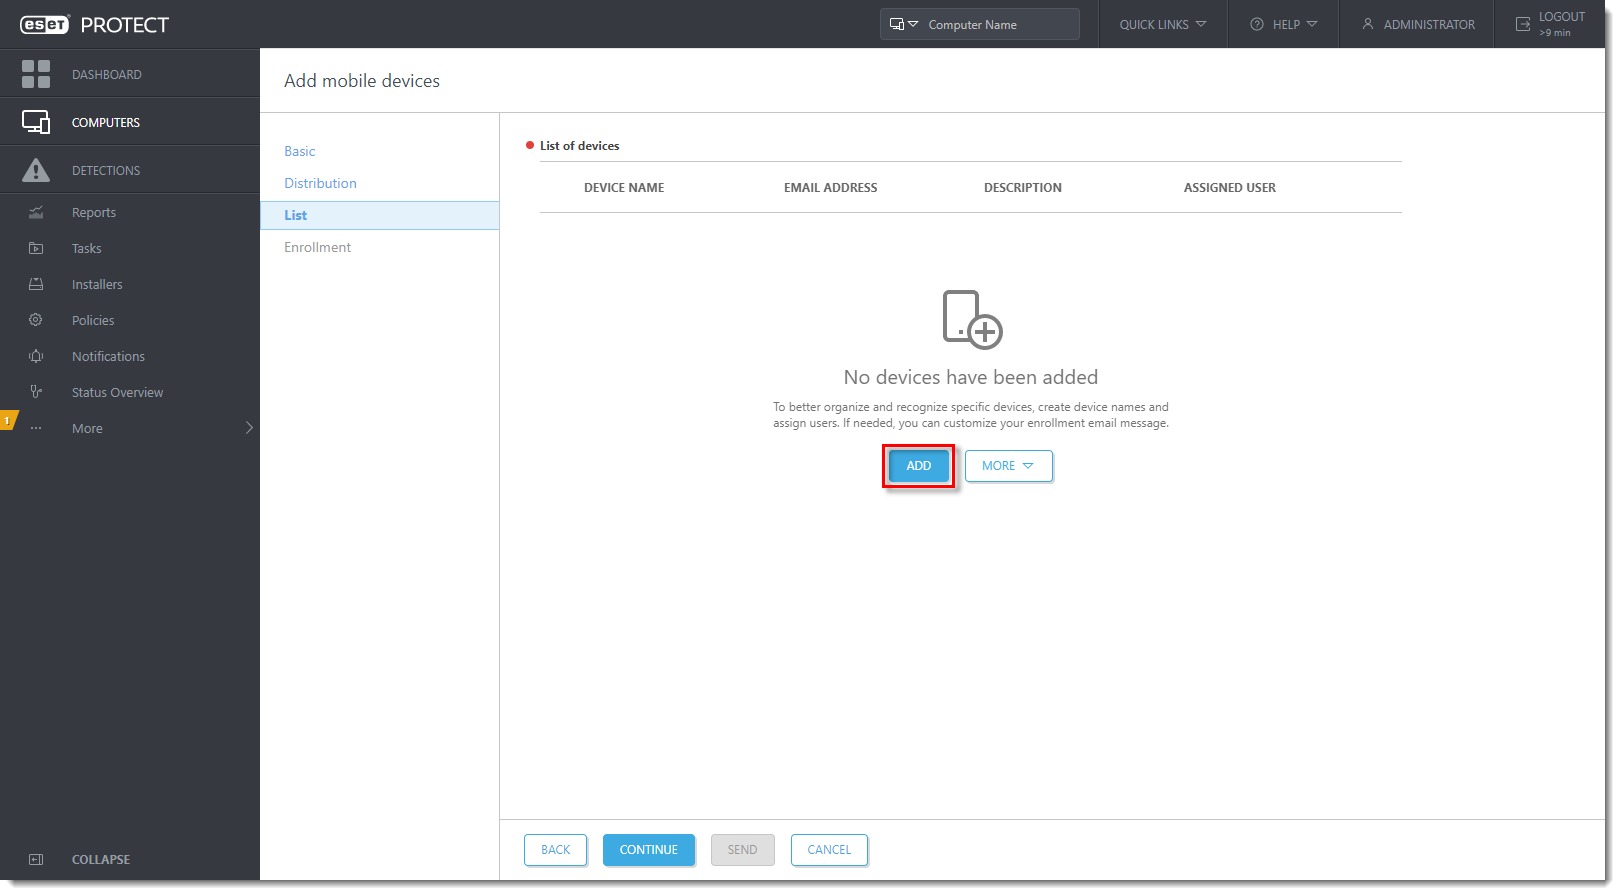
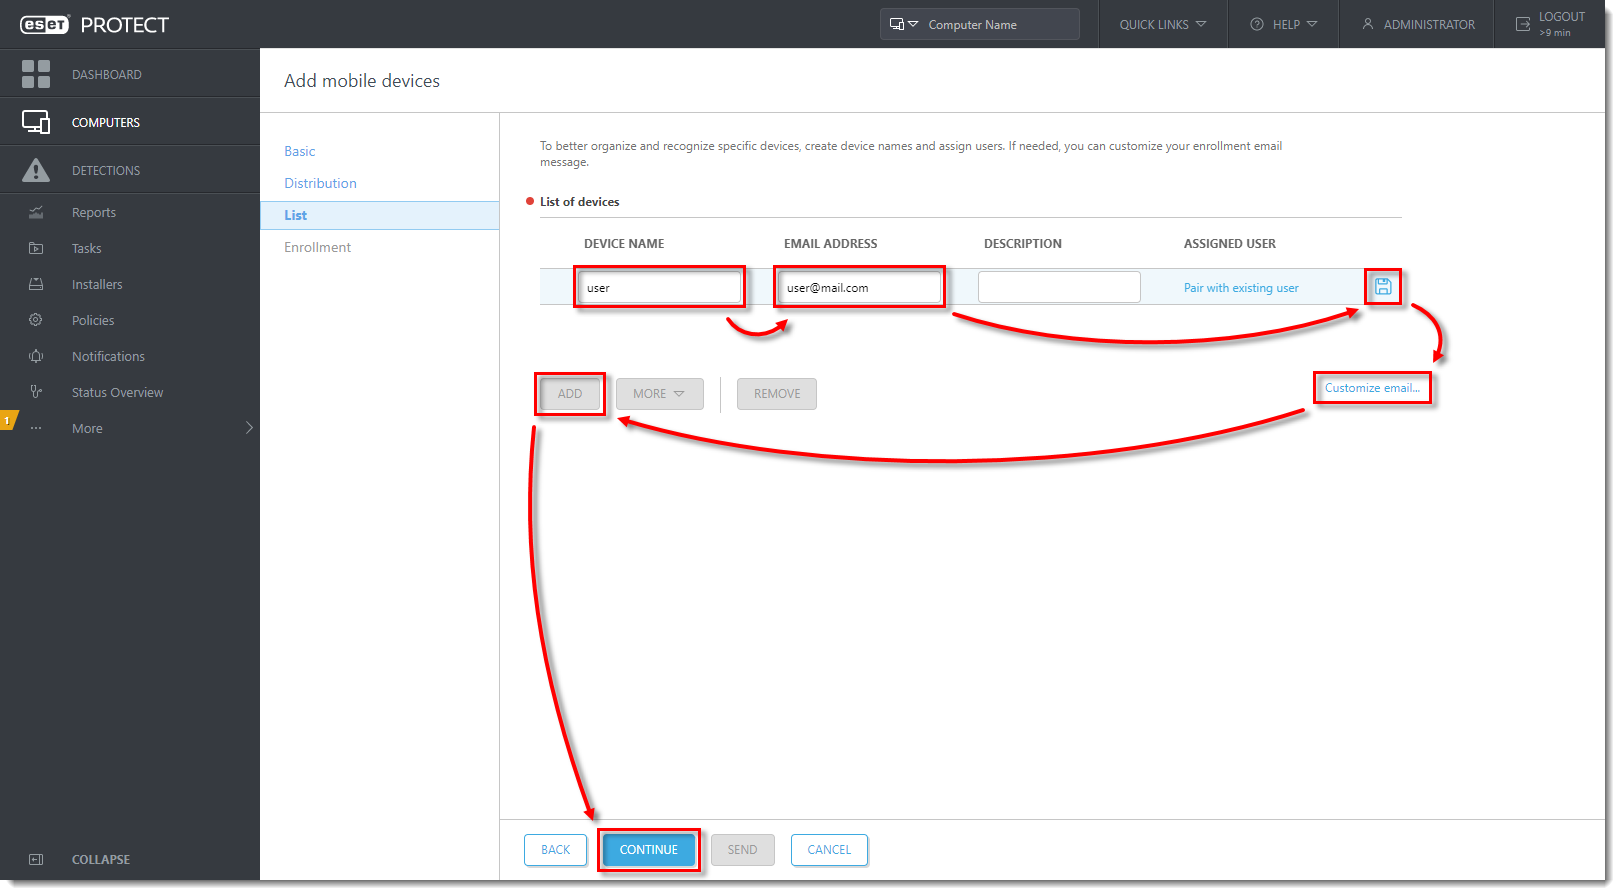
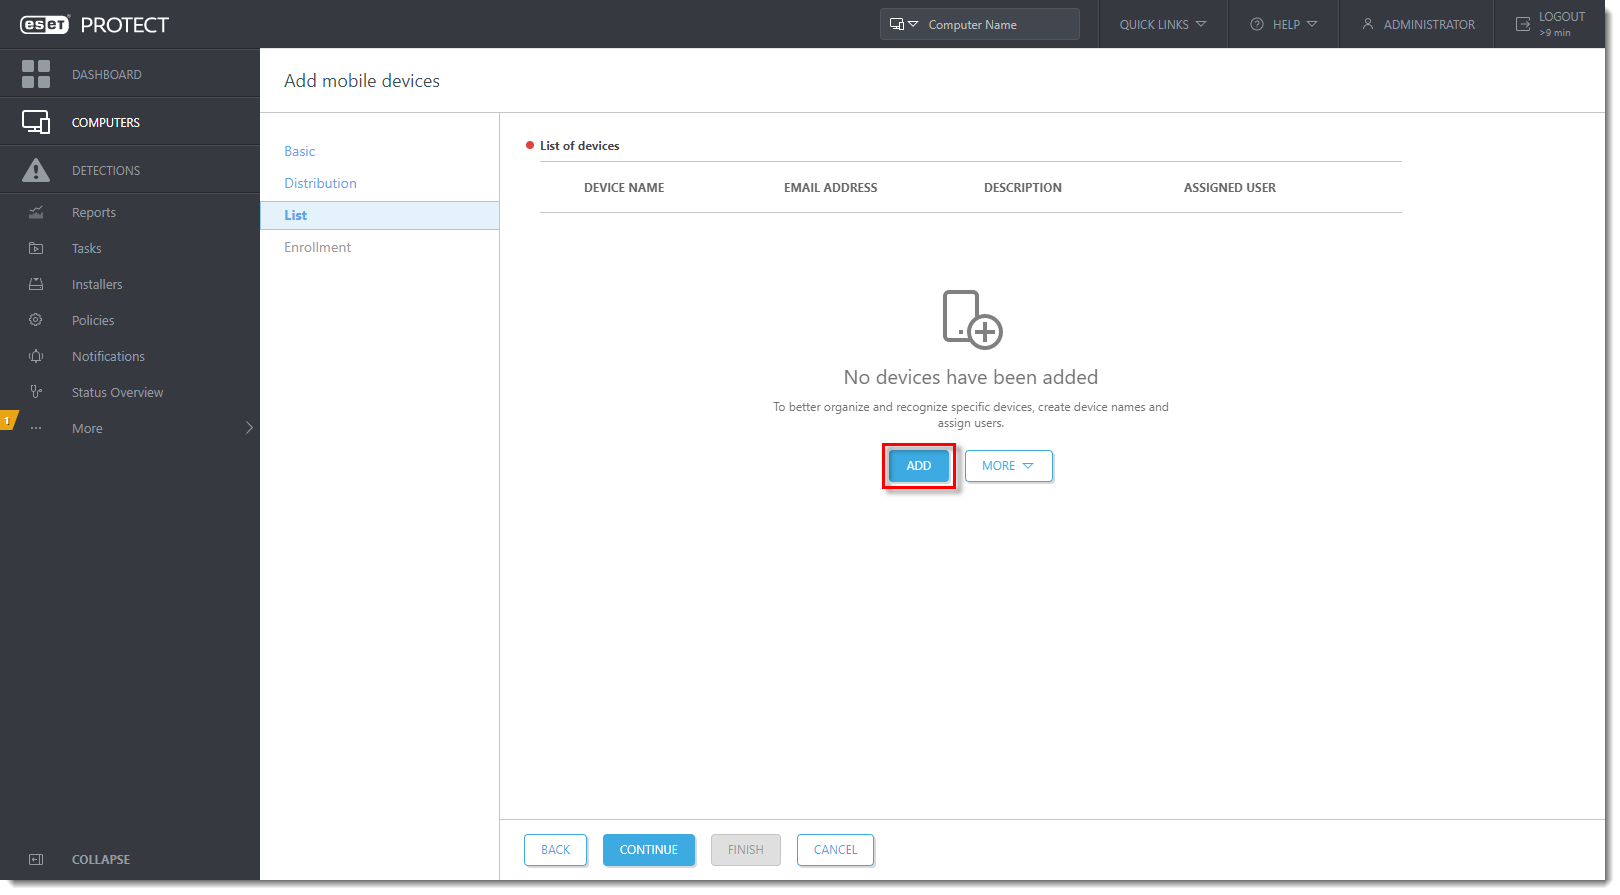
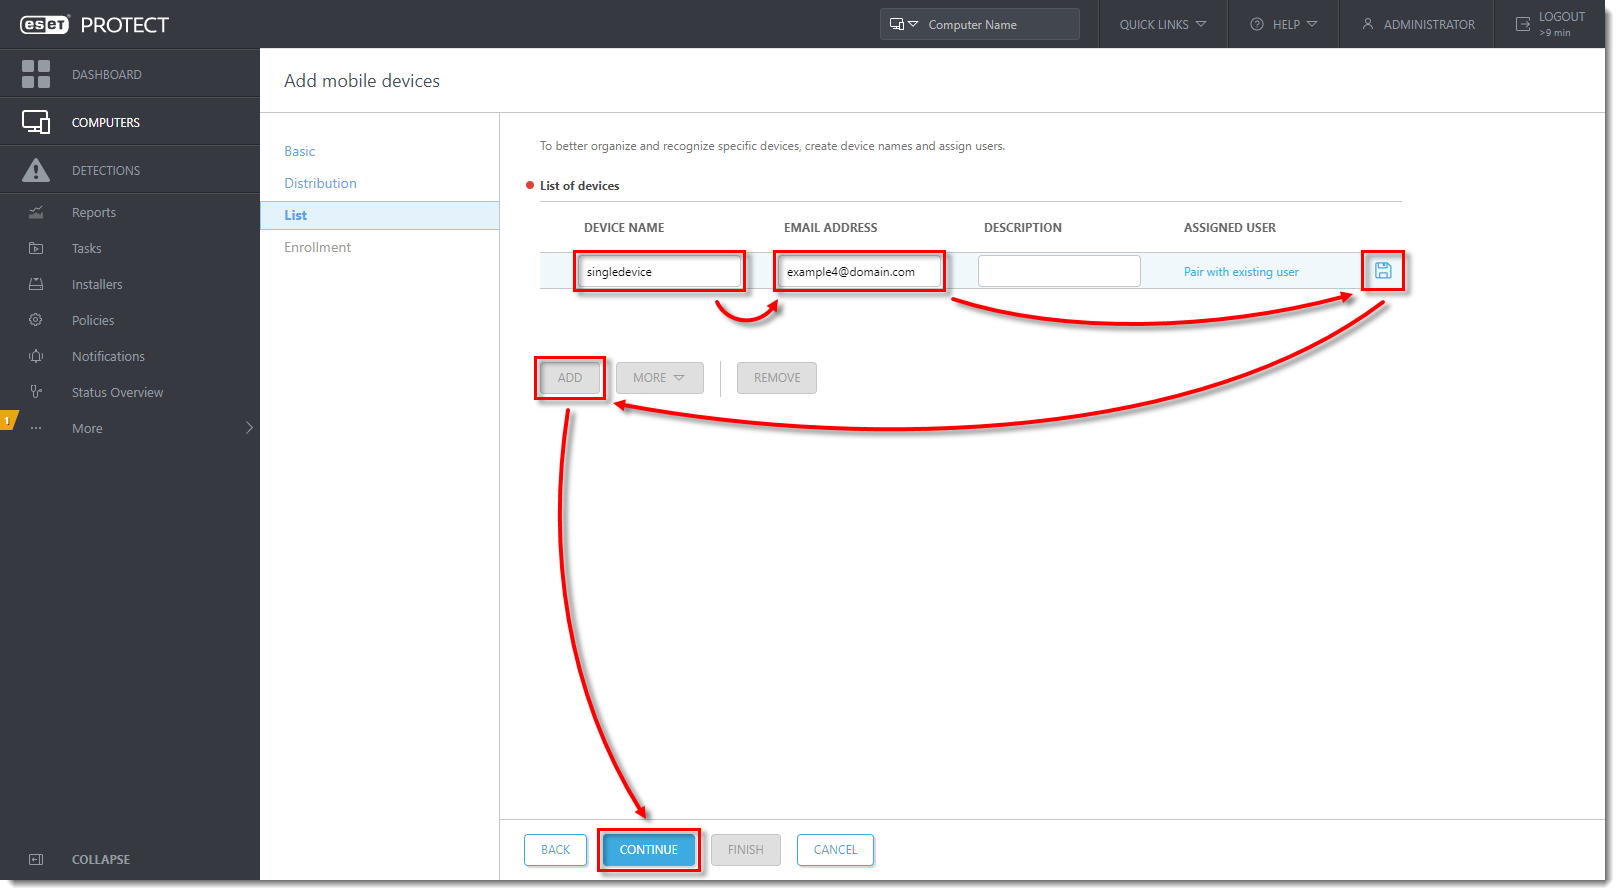
In the List section, click Add.

Type in the Device name and Email Address (this email address will be used to deliver the enrollment email message). The Description field is optional. To assign a specific user, click Pair with existing user to match it to an existing Computer User. Click the Save
 icon to save the device. Click Customize email if you want to make changes to the enrollment email. To add another device, click Add. Click Continue when you are finished adding devices.
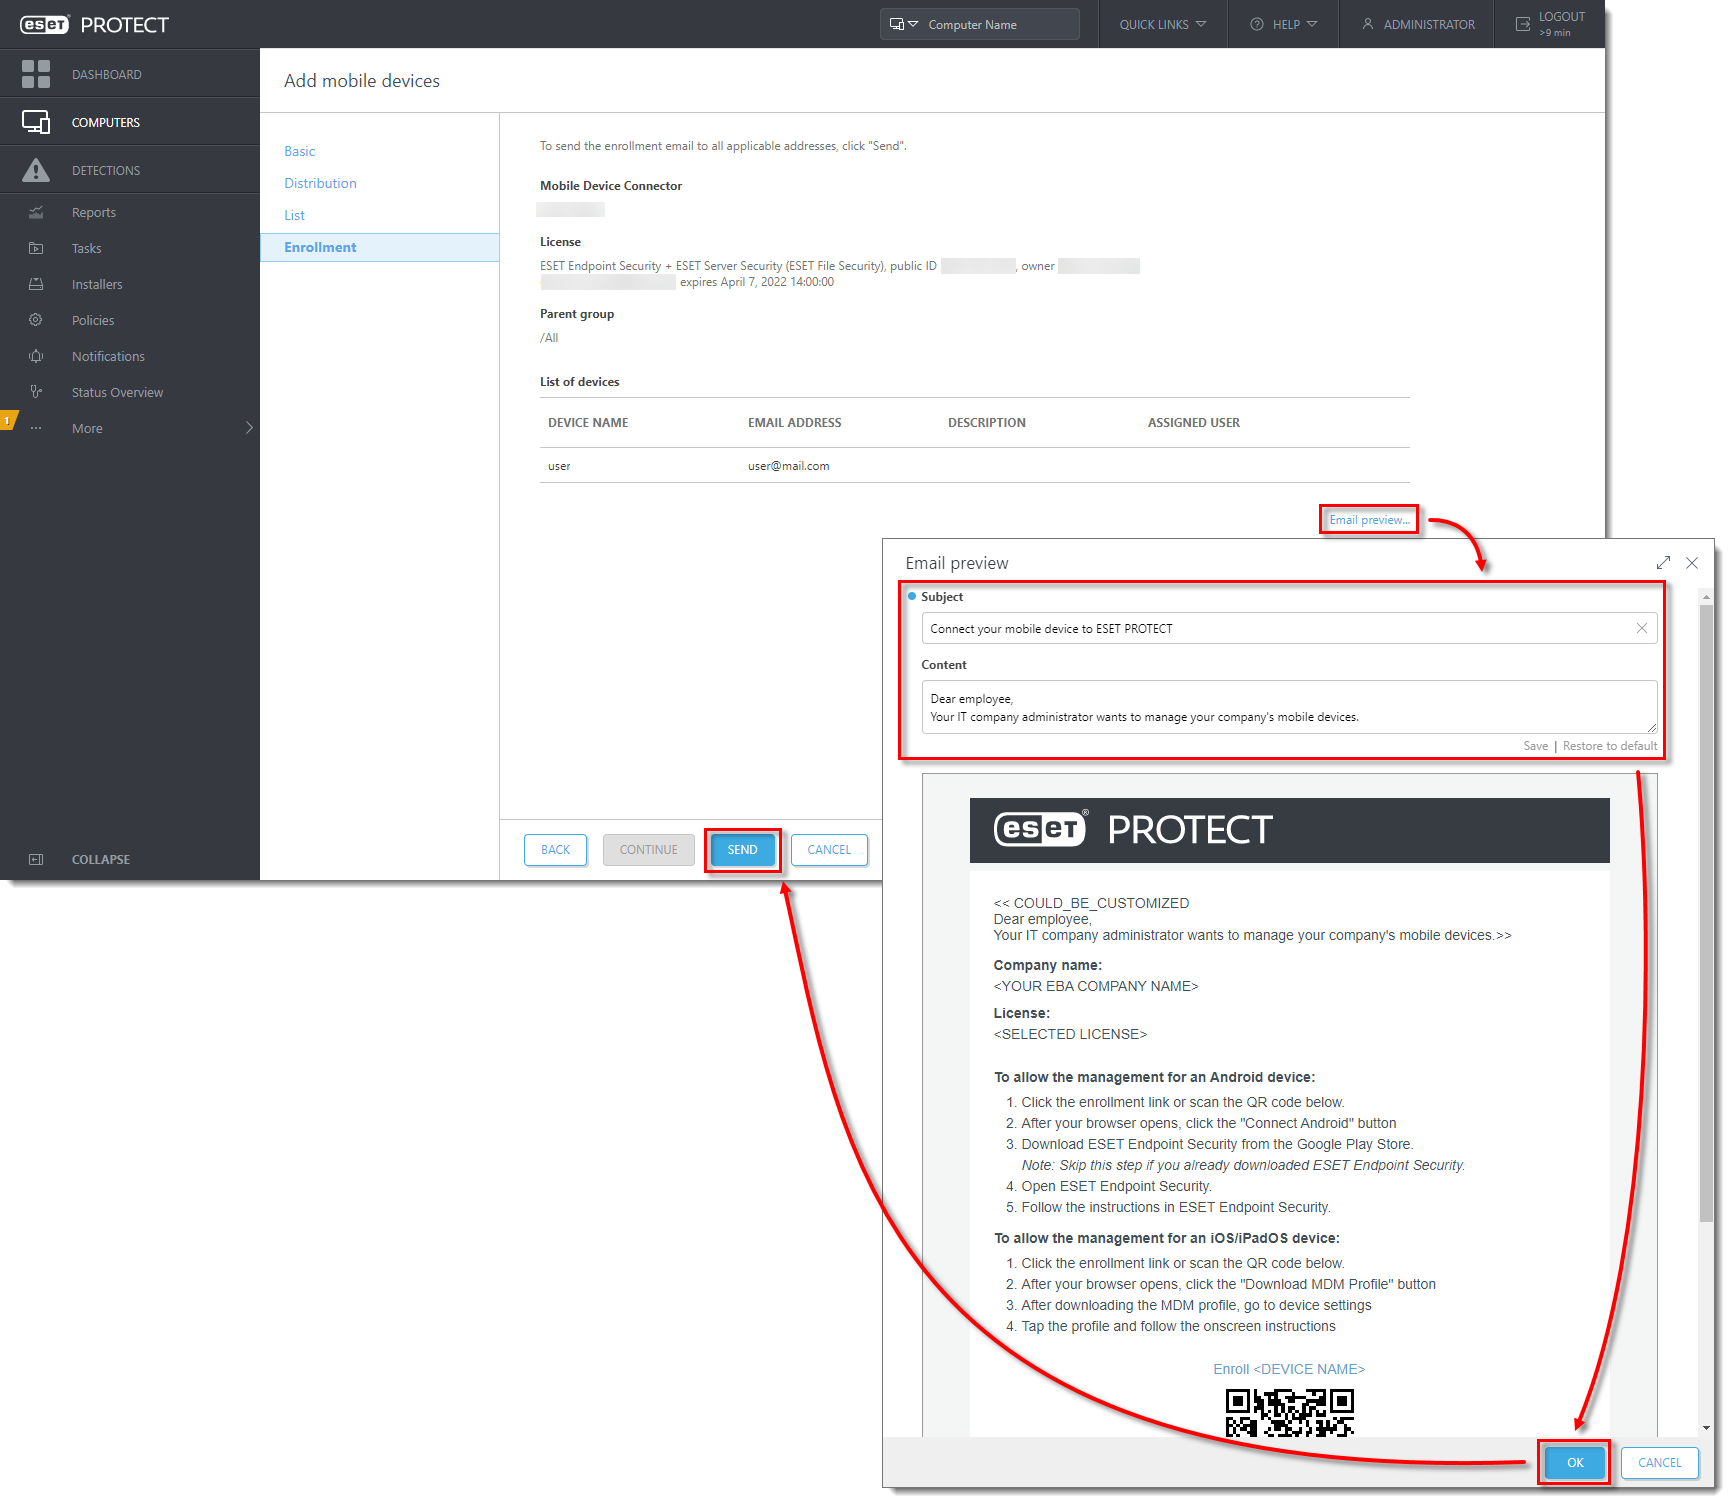
- In the Enrollment section, click Send. The enrollment link will be sent to chosen devices.

Enroll a single device
Follow steps 2-3 of Register your Android device in ESET PROTECT and send an enrollment link section above.
In the Distribution section, select Enrollment via QR code and click Continue.

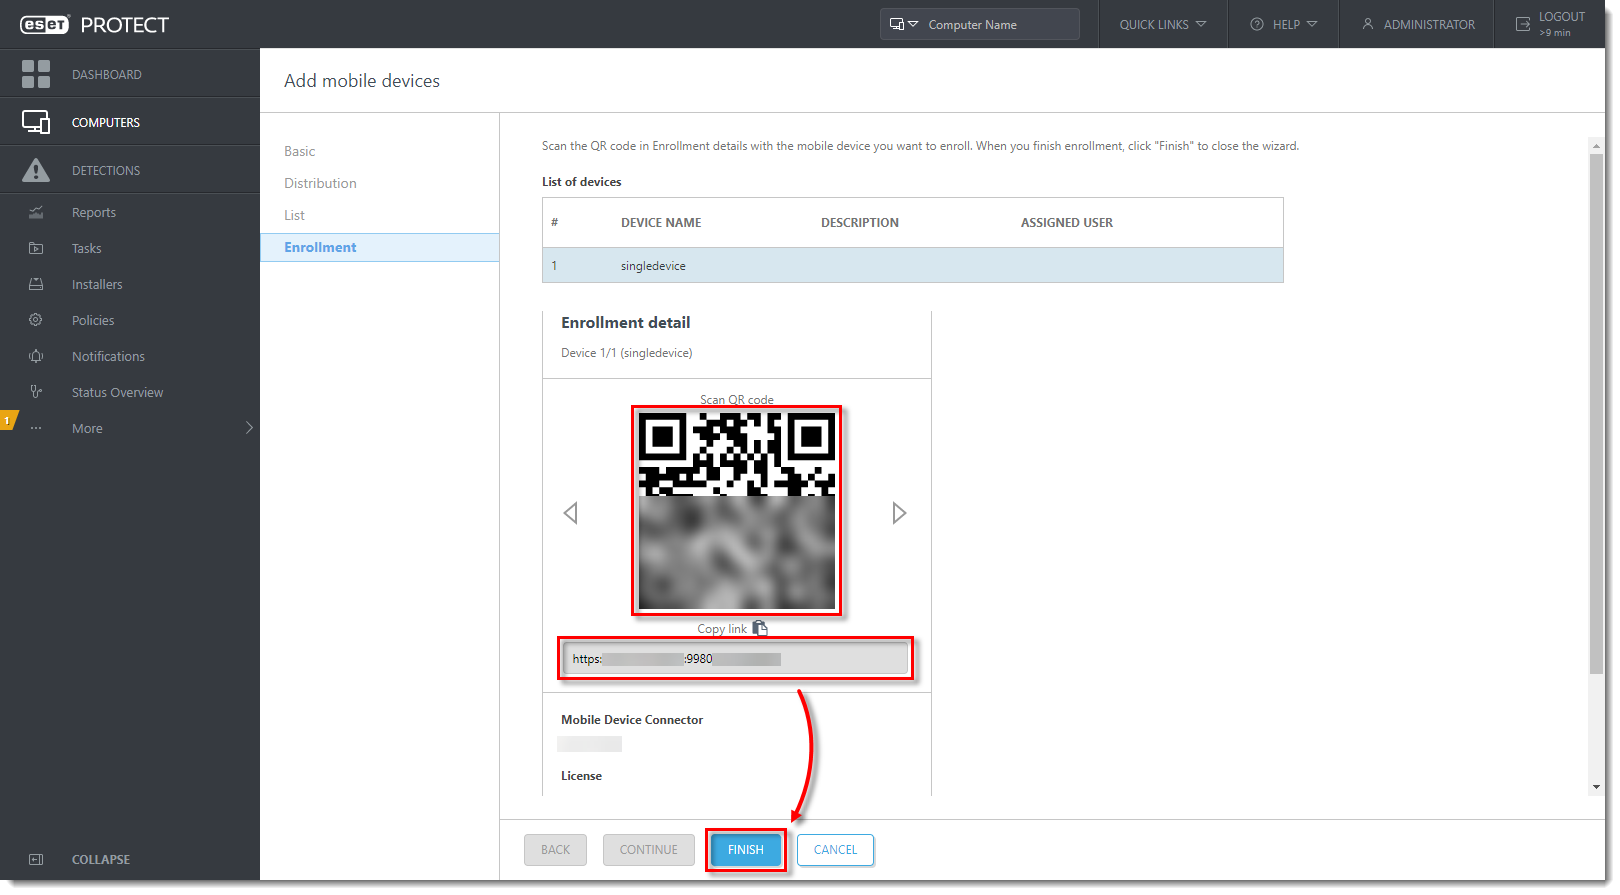
In the List section, click Add.

Type the Device name and Email address in the appropriate fields. The Description field is optional. To assign a specific user, click Pair with existing user to match it to a designated policy. Click the Save (floppy disk) icon to save the device. To add another device, click Add. Click Continue when you are finished adding devices.

In the Enrollment section, the preview window will display a summary of the enrollment, including the download link and the QR code. Send the enrollment link to the mobile device using email or an instant messaging application if the device is not physically present. If the device is physically present, scan the QR code with the mobile device and proceed to Section IV: Enroll your Android device and deploy ESET Endpoint Security for Android. To enroll another device, click Finish and repeat the process described in this sub-section.
IV. Enroll your Android device and deploy ESET Endpoint Security for Android
- On the mobile device, open the enrollment email that was sent in Section III above and tap the enrollment link.


- Tap Connect.

- You will be redirected to Google Play Store. Tap Install and wait for the installation to finish. Tap Open.

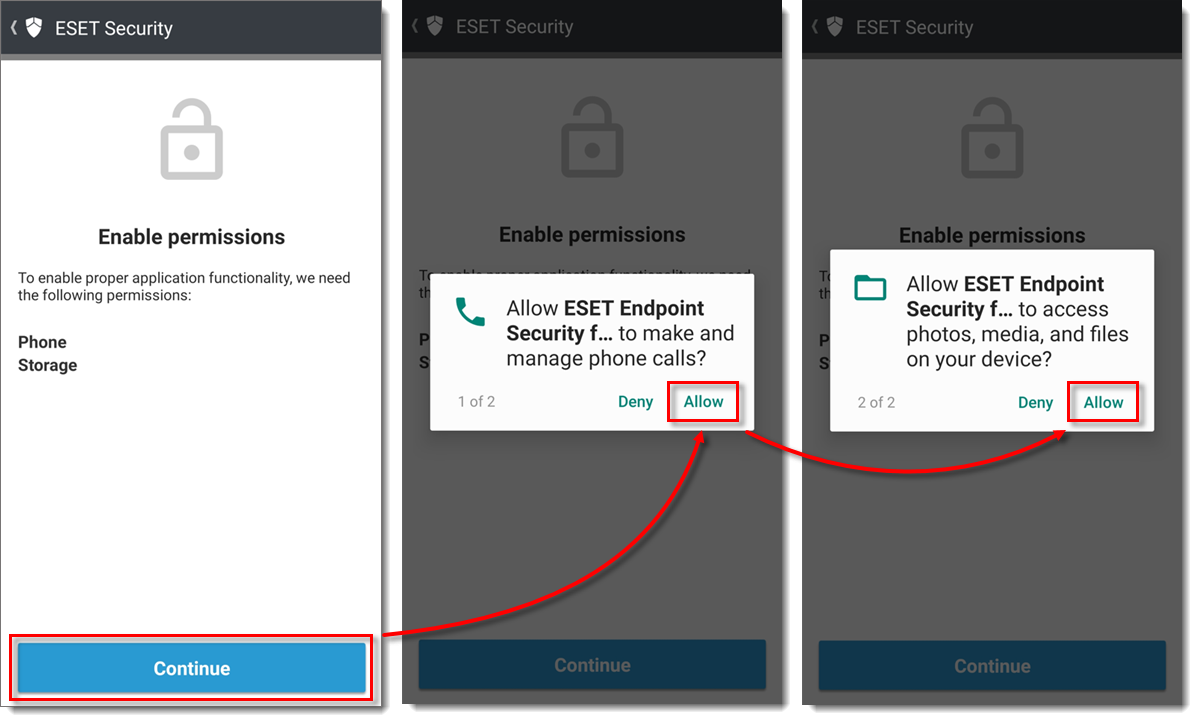
- Tap Continue and tap Allow → Allow.

- Tap Allow → Allow.

- Tap Allow if you want to allow the ESET LiveGrid feedback system.

- Type your name into the Name field and tap Save. This will help the administrator recognize your device.

- Tap Continue and tap the slider bar next to Allow permission to enable it.

Tap Enable to enable uninstall protection. Uninstall protection restricts unauthorized users from uninstalling ESET Endpoint Security for Android. 
Tap Activate to activate the Admin app. 
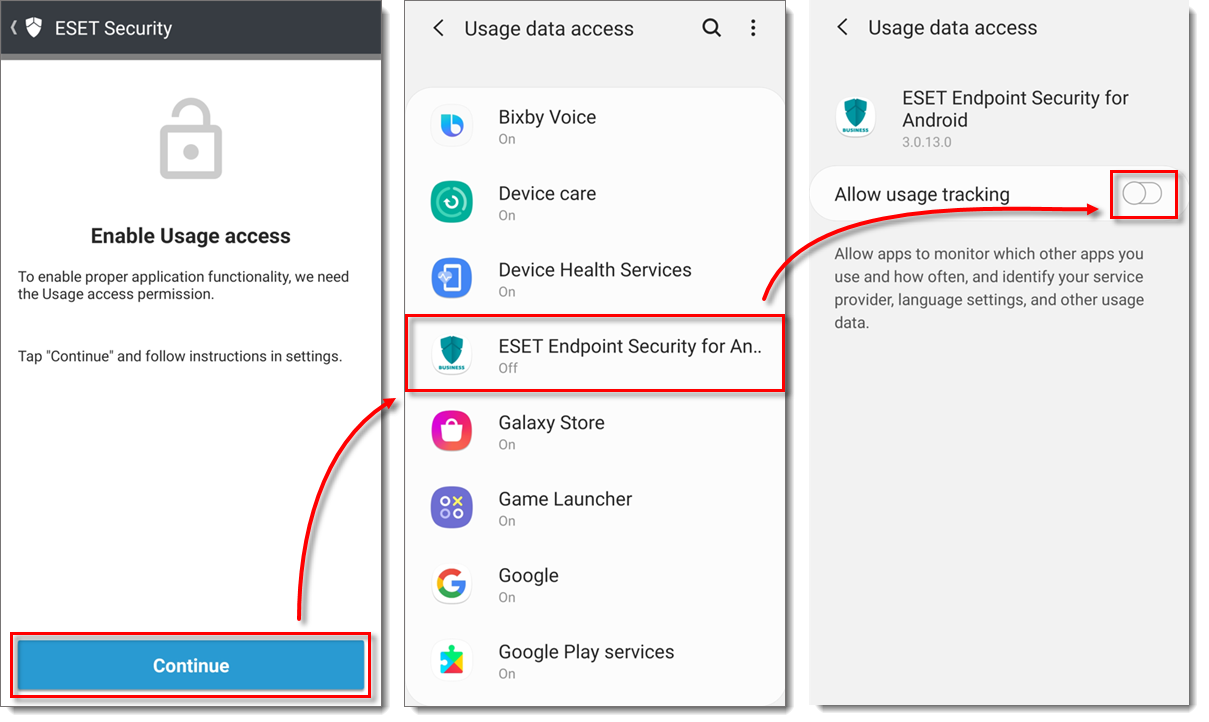
Tap Continue → ESET Endpoint Security for Android. Tap the slider bar next to Allow usage tracking to enable it. 
Tap Finish to activate ESET Endpoint Security for Android as Device Administrator.

The Android device is now protected.

Proceed to Section V: Create activation task for Android MDM.

V. Create activation Task for Android MDM
After completing sections I-IV above, the device will appear in the Computers section of ESET PROTECT under Lost & Found and will automatically be added to the dynamic group Mobile devices → Android devices.
Follow the instructions to activate ESET business products using ESET PROTECT.
Reactie toevoegen
Log in of registreer om een reactie te plaatsen.