

prerequisites
- ESA Installed
- fqdn (esa.company.com for example)
- valid SSL Certificates for above fqdn (can be self signed)
Installing nginx on windows
- Download nginx for windows via http://nginx.org/en/download.html
- Download nssm for windows via https://nssm.cc/download
- unpack nginx and place it in a logic location (C:\nginx or C:\Program Files\nginx for example)
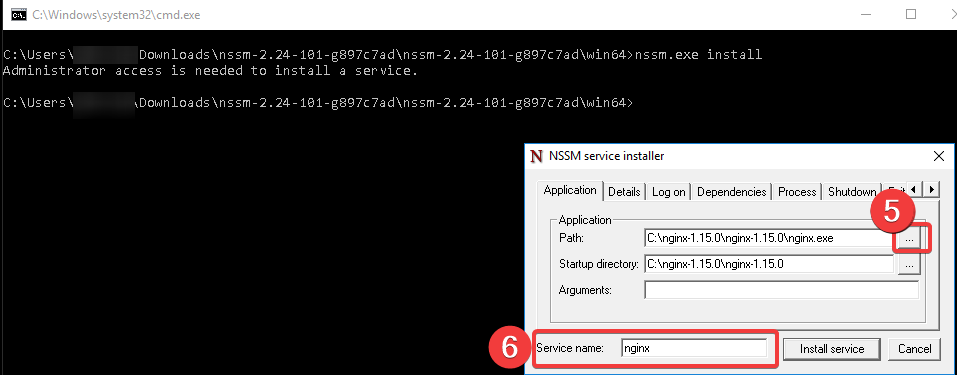
- open command prompt and run nssm.exe install
- browse to the nginx.exe location (step 3)
- fill in a service name (nginx for example)
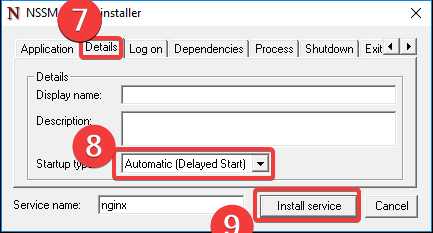
- go to the details tab
- set the startup type to "Automatic (Delayed start)
- Click on install service
- open the nginx.conf file (%nginx-directory%/conf/nginx.conf)
- add the following to the bottom of this config file:
# HTTPS server#
server {
listen 443 ssl;
server_name esa.company.com;
ssl_certificate "C:\path\to\certificate.pem";
ssl_certificate_key "C:\path\to\certificate-privatekey.pem";
ssl_session_cache shared:SSL:1m;
ssl_session_timeout 5m;
ssl_ciphers HIGH:!aNULL:!MD5;
ssl_prefer_server_ciphers on;
location / {
proxy_pass https://127.0.0.1:8001;
}
}
- change the paths to the certificates and chance the proxy_pass ip-adress to that of the ESA Core service if not installed on the same machine.
- start the nginx service.
Adding a stand-alone computer
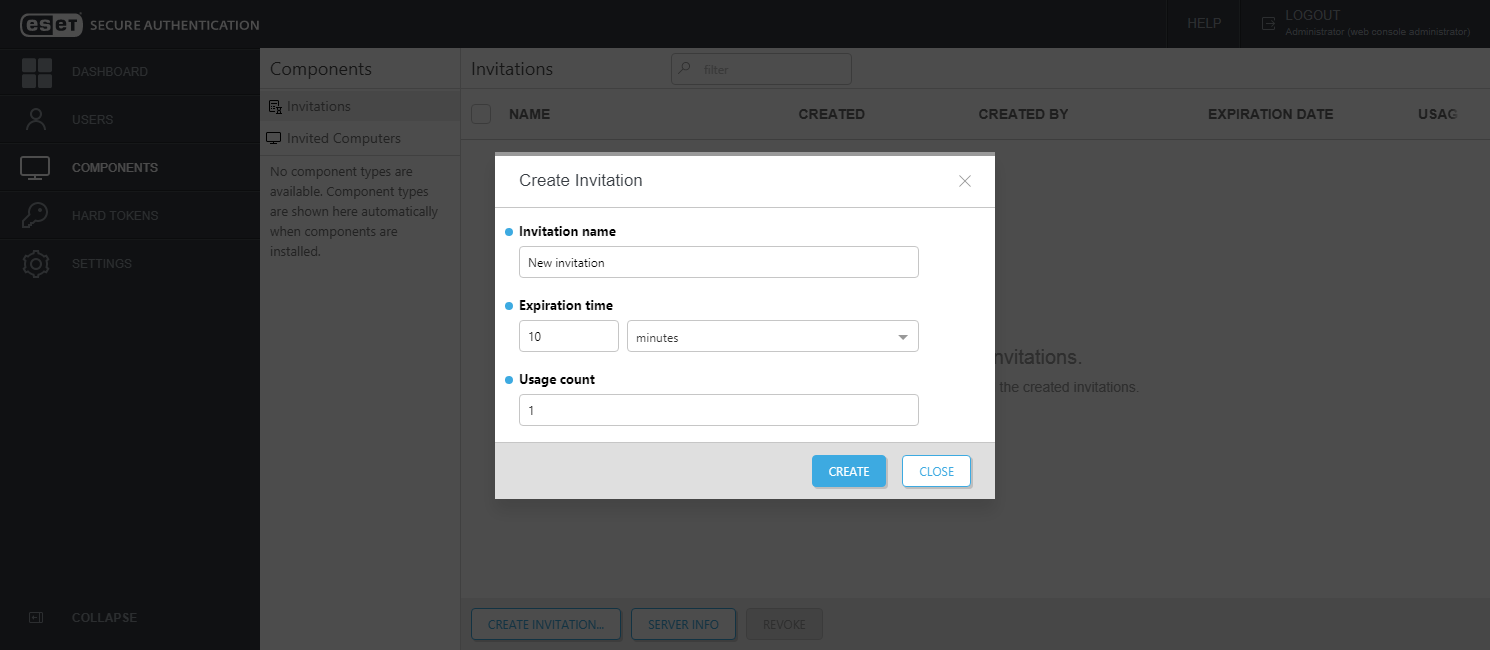
- In the ESA Web Console, click Components > Invitations.
- Click Create invitation....
- Enter an invitation name, expiration time and usage count. Click Create.
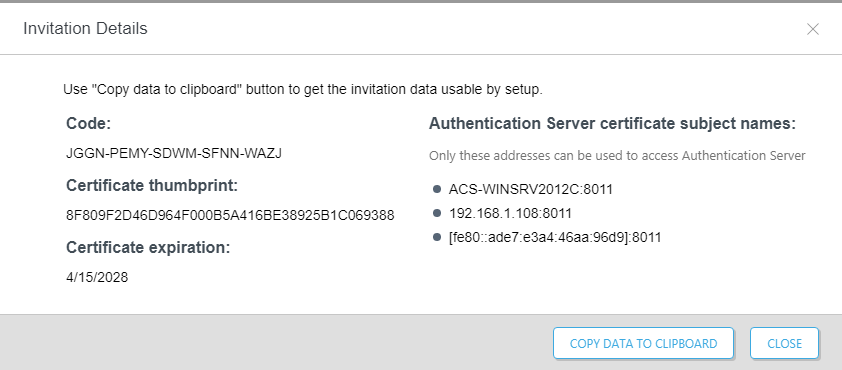
- The invitation details displays. To save the details to a text file or to copy elsewhere, click Copy data to clipboard.
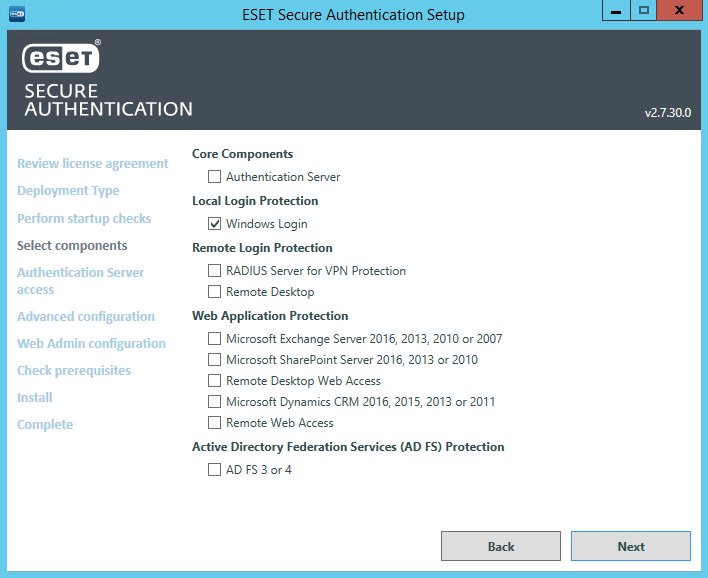
- Start the ESA installation on the desired stand-alone system
- When prompted, click Select components, select the desired components
- Paste the invitation data generated during step 4 in the "invitation data" box.
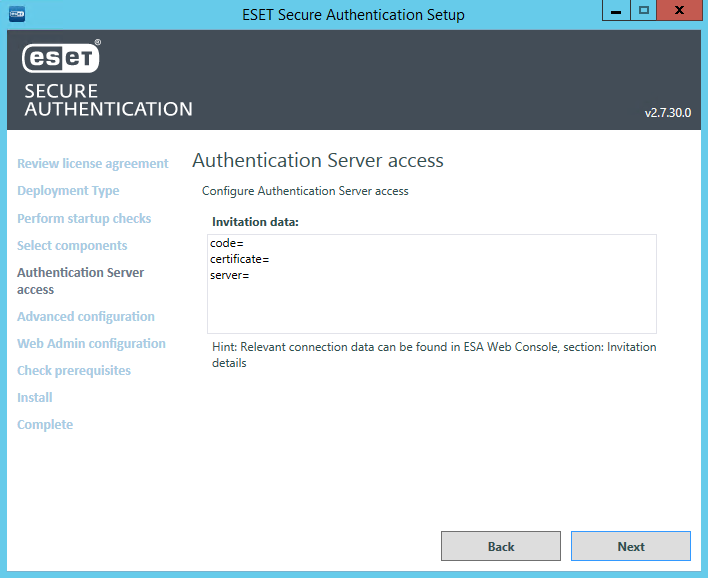
- change the "server=" variable from local hostname to the fqdn (esa.company.com)
- click next to finish installation.
Reactie toevoegen
Log in of registreer om een reactie te plaatsen.