

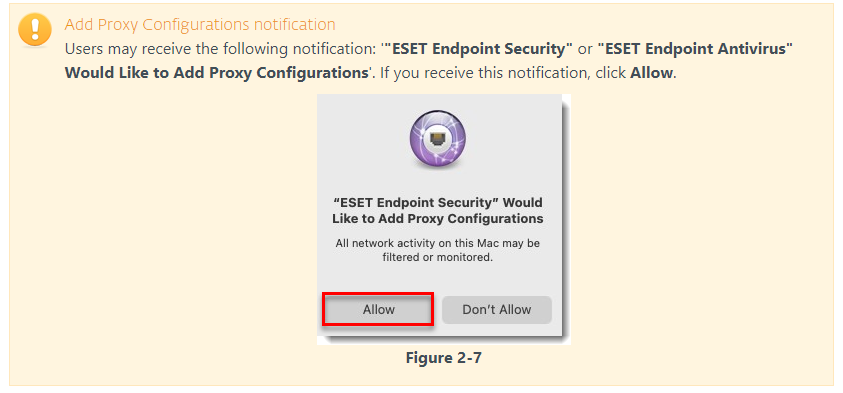
Issue
- Jamf Pro deployment for ESET Endpoint for macOS Big Sur
- Configure System Extensions and Privacy Preference Policy Control (PPPC)
- Create Policies
- Additional Options
- Jamf Pro deployment for ESET Endpoint for macOS (earlier versions)
Solution
Follow the instructions below to deploy ESET Endpoint for macOS Big Sur using Jamf Pro to manage using ESET Security Management Center/ESET PROTECT.
I. Configure System Extensions and Privacy Preference Policy Control (PPPC) profile

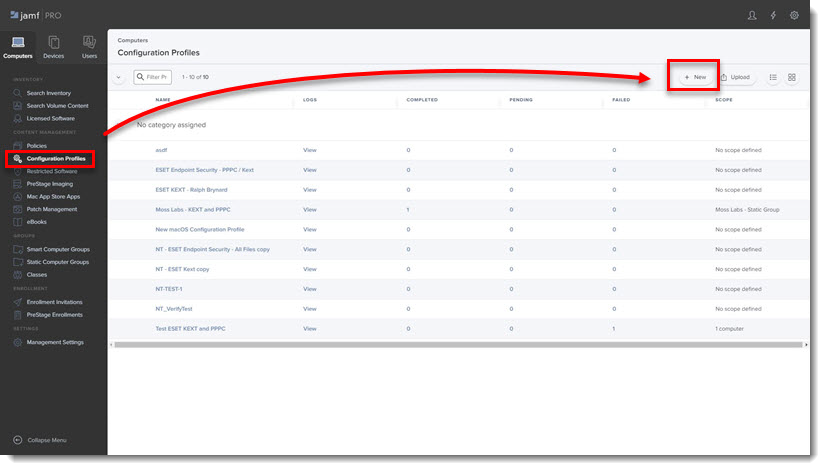
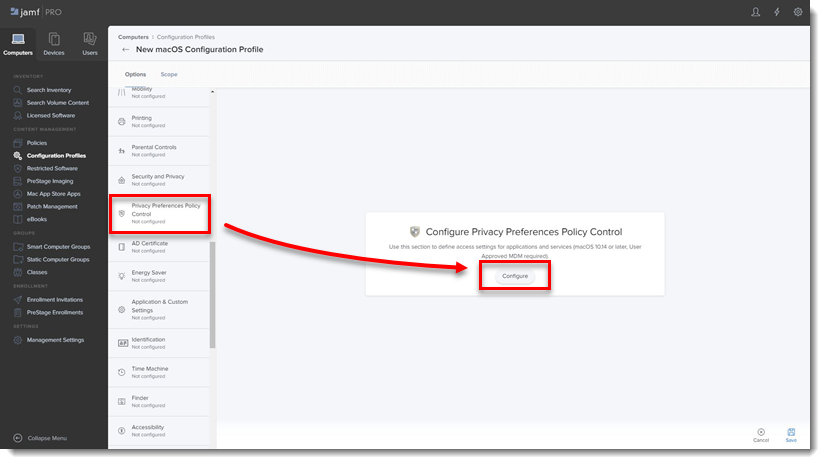
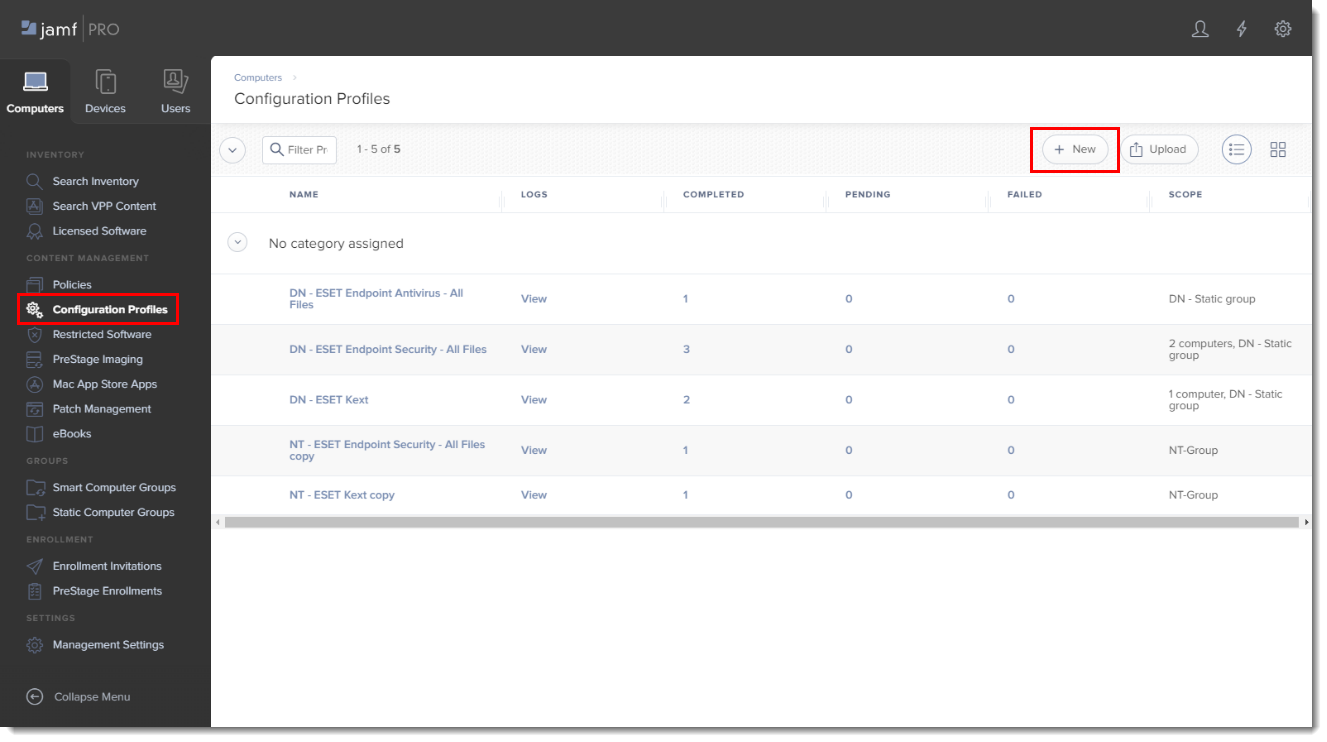
- Click Configuration Profiles to set the approval for System Extensions and PPPC and then click New to add a new configuration profile (one configuration profile can contain both System Extension and PPPC settings).
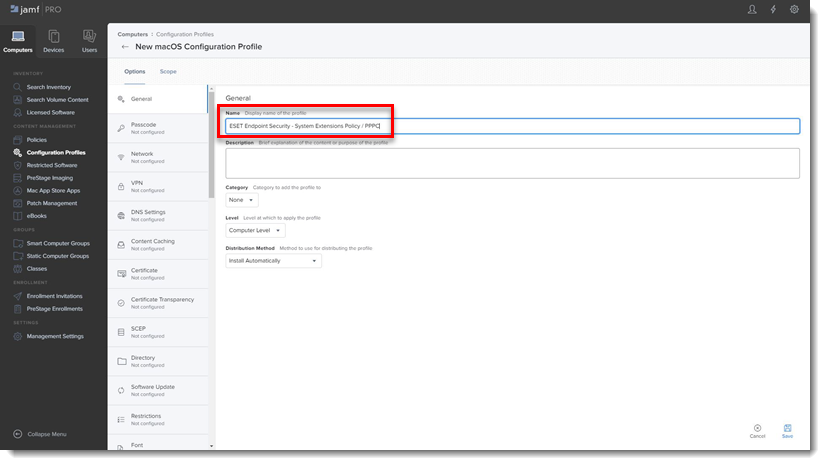
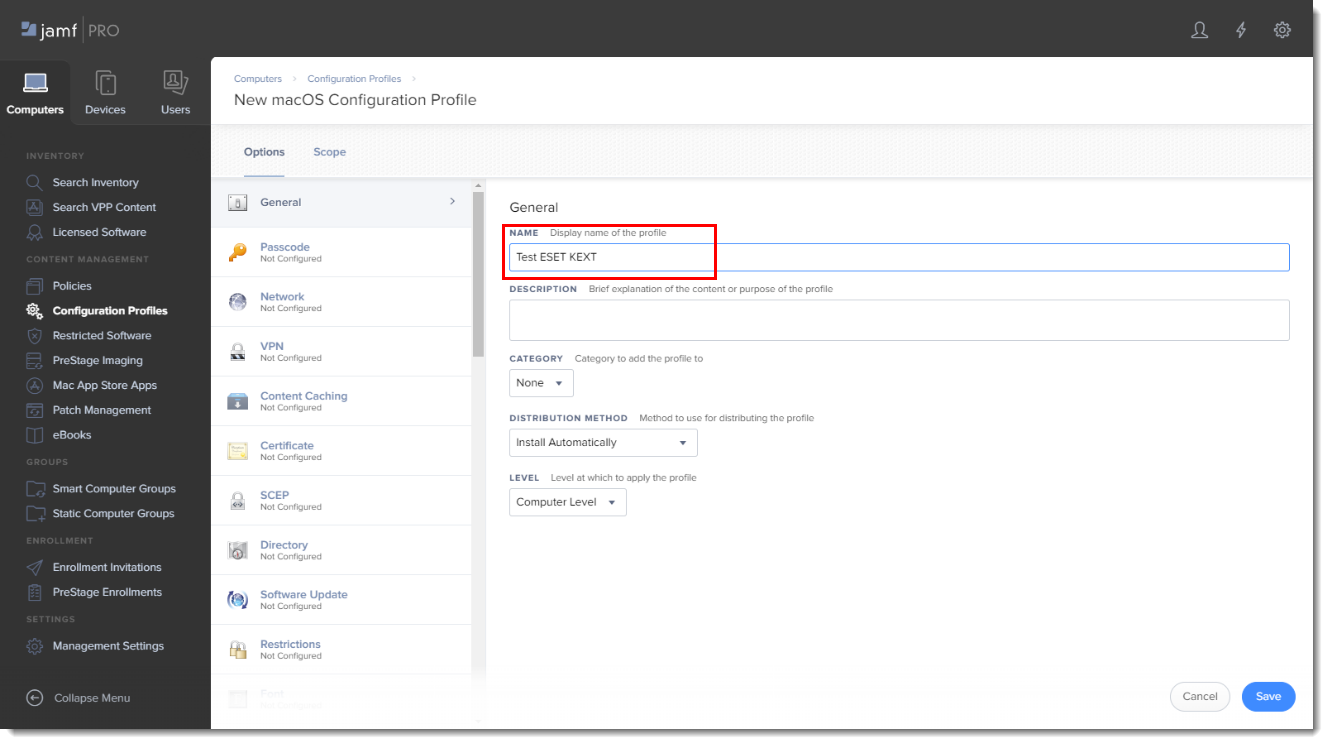
- Type a Name for the profile.
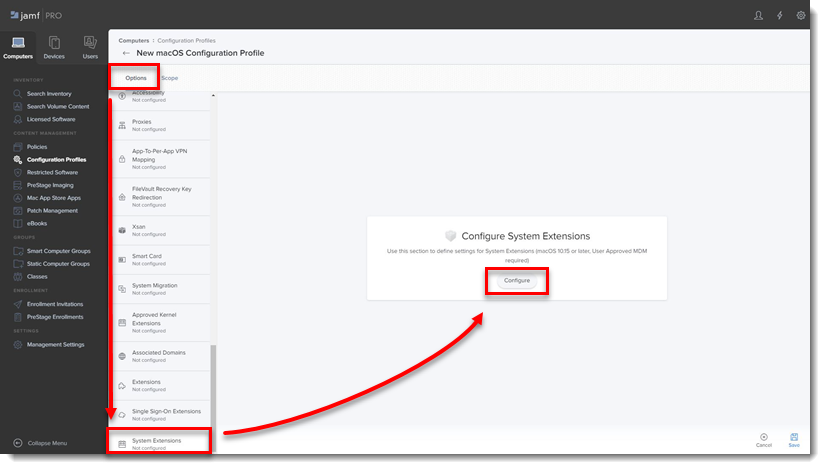
- In the Options tab, scroll down and click System Extensions → Configure.
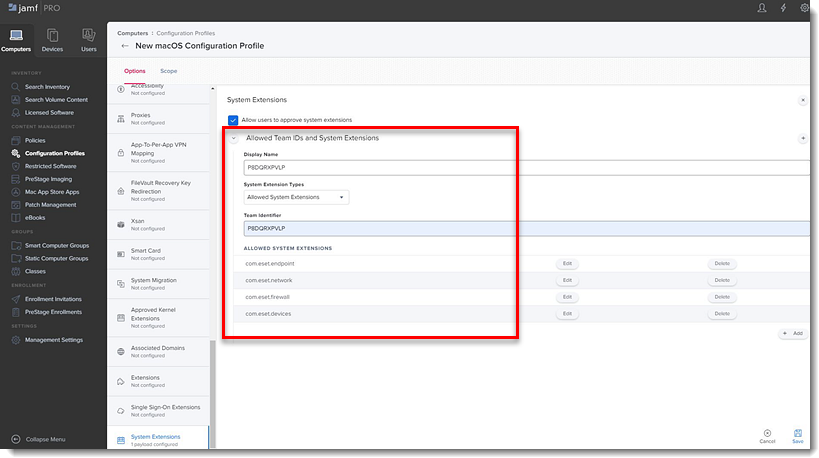
- In the Allowed TEAM IDs and System Extensions section, enter the following information:
- Display Name: ESET SE [you can choose any name you want]
- System Extension Types: Allowed System Extensions
- Team Identifier: P8DQRXPVLP
- Allowed System Extensions:
- com.eset.endpoint
- com.eset.network
- com.eset.firewall
- com.eset.devices
- In the Options tab, scroll down and click Privacy Preferences Policy Control → Configure.
- Add in the following information for your applicable ESET product:

ESET Endpoint Antivirus:- Identifier: com.eset.eea.6
- Identifier Type: Bundle ID
- Code Requirement: identifier "com.eset.eea.6" and anchor apple generic and certificate 1[field.1.2.840.113635.100.6.2.6] /* exists */ and certificate leaf[field.1.2.840.113635.100.6.1.13] /* exists */ and certificate leaf[subject.OU] = P8DQRXPVLP
- App or Service: SystemPolicyAllFiles
- Access: Allow
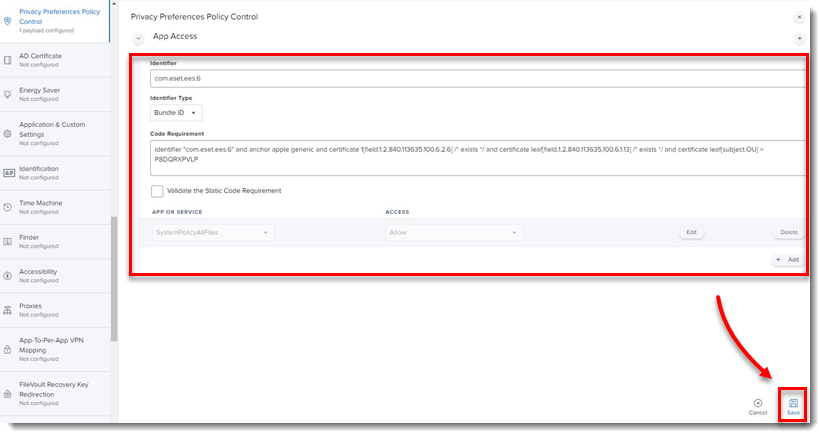
ESET Endpoint Security:
- Identifier: com.eset.ees.6
- Identifier Type: Bundle ID
- Code Requirement: identifier "com.eset.ees.6" and anchor apple generic and certificate 1[field.1.2.840.113635.100.6.2.6] /* exists */ and certificate leaf[field.1.2.840.113635.100.6.1.13] /* exists */ and certificate leaf[subject.OU] = P8DQRXPVLP
- App or Service: SystemPolicyAllFiles
- Access: Allow
7. Click Save to apply your changes.
II. Create policies
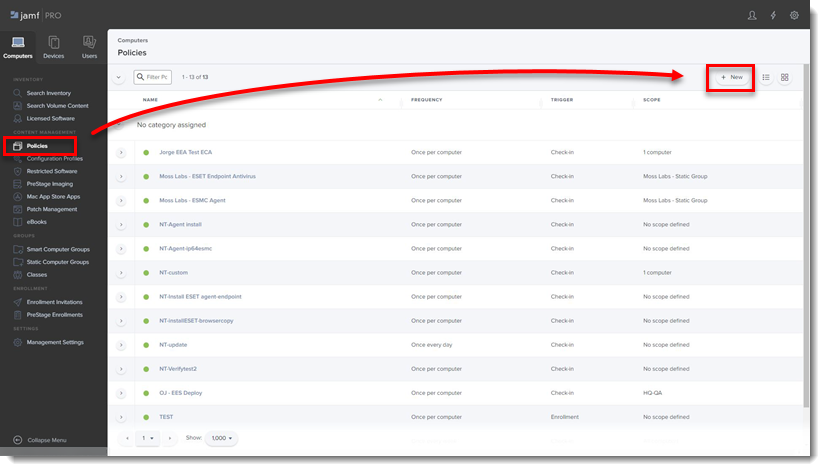
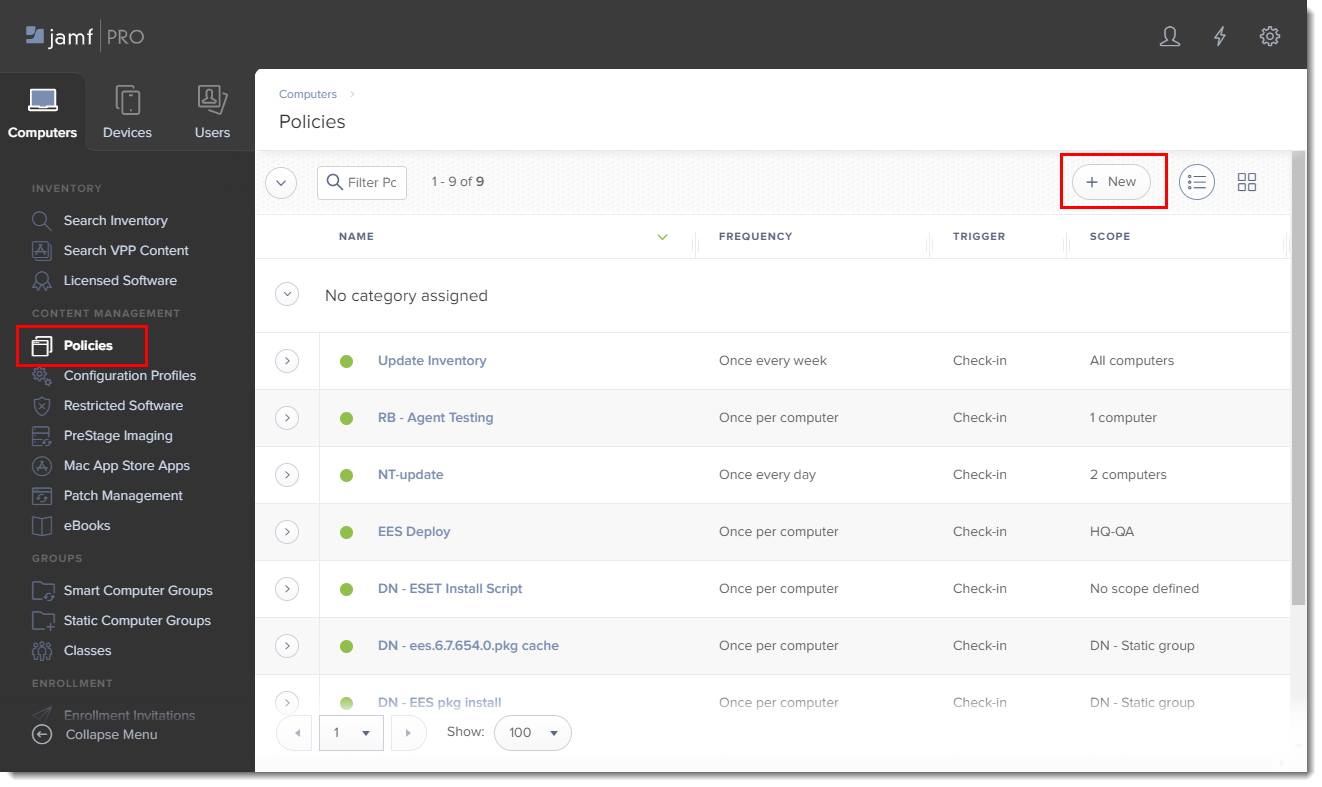
- Click Policies in the left menu and click New.
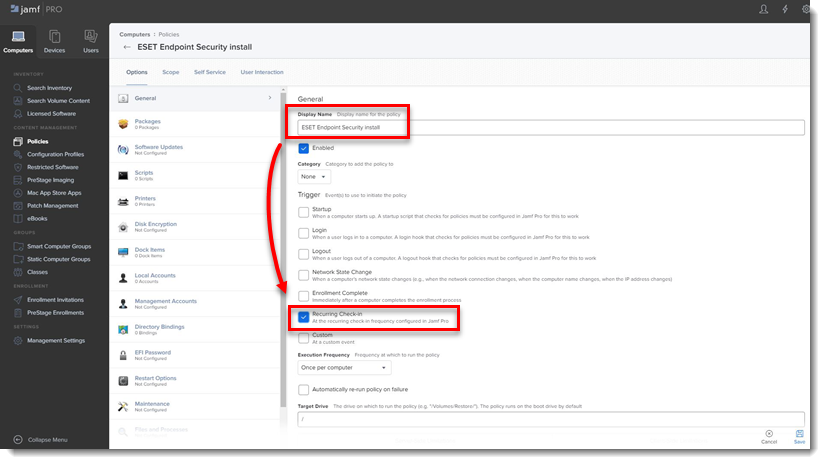
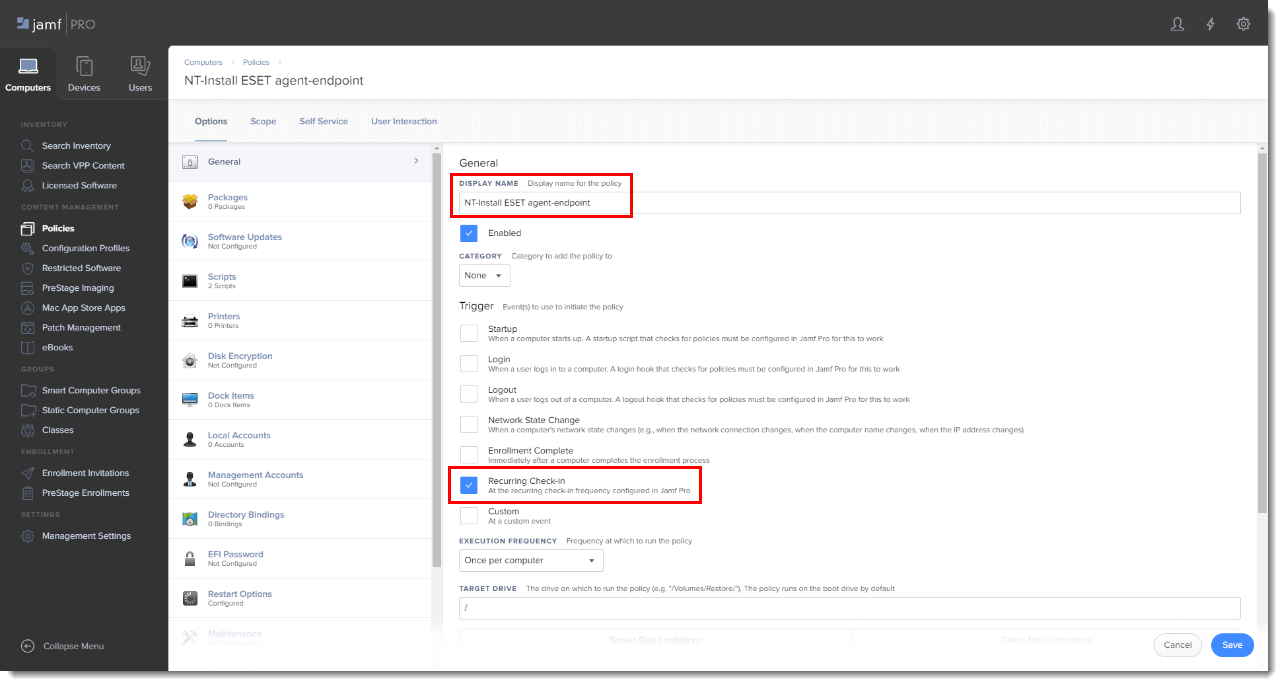
- Type a Display Name for the policy, and in the Trigger section, select the Recurring Check-in check box.
- Download the following ESET Security product and ESET Management Agent installation scripts:
- ESET Security product installation script: ESETavJamf.sh (right-click and select "Save link as")
- ESET Management Agent installation script: Download the ESMCAgentInstaller.sh file from your ESET Security Management server, follow the instructions to Create Agent Live Installer.
- After downloading the scripts, add the scripts to Jamf (this link takes you to the Jamf Pro Administrator's Guide).
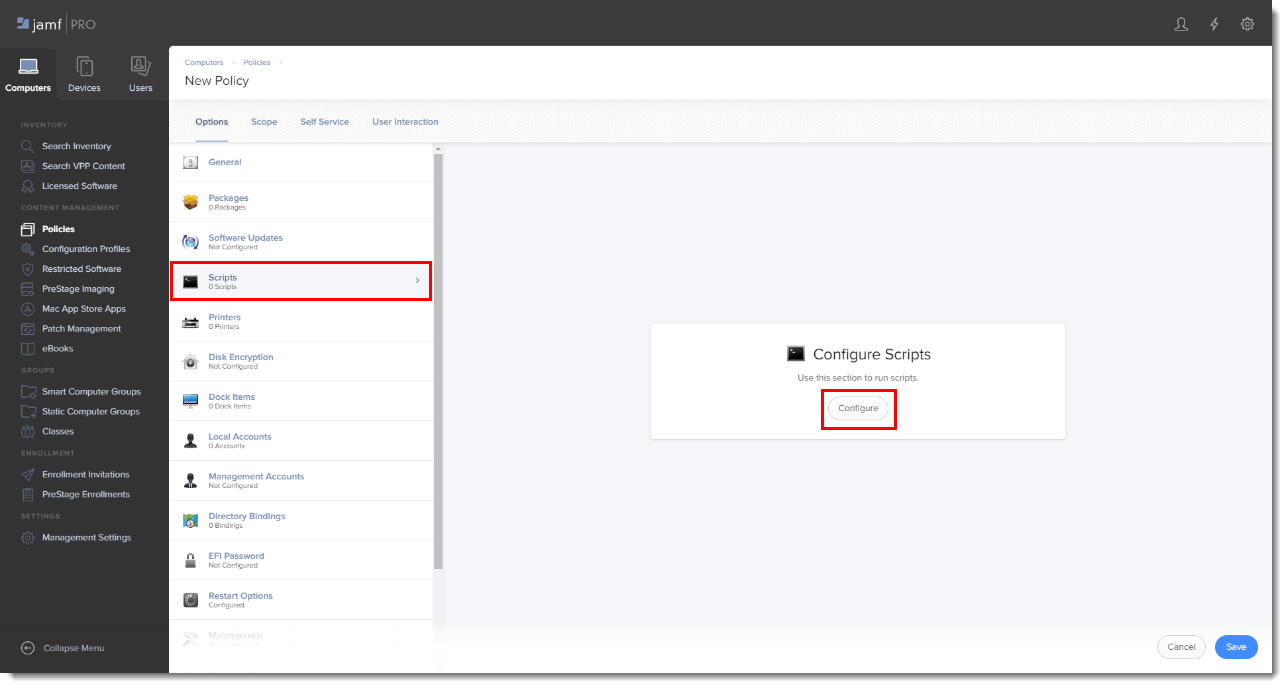
- From the Options tab, click Scripts and then click Configure.
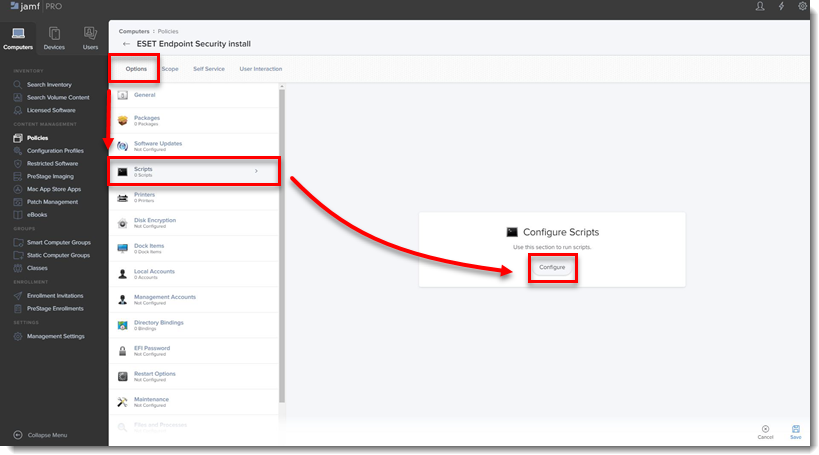
- Click Add to select the scripts to add to the policy.
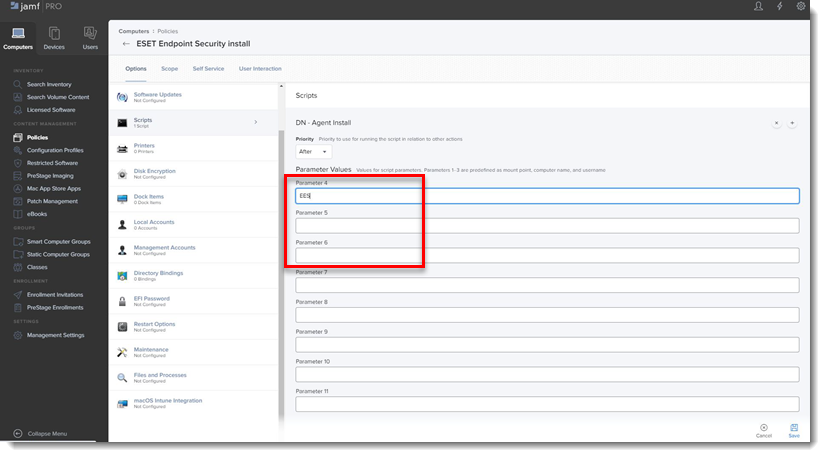
- Add the following Parameter Values for the Endpoint script:
- Parameter 4 (Required): Type '
EES' (if you use ESET Endpoint Security) or 'EEA' (if you use ESET Endpoint Antivirus) - Parameter 5 (Optional): License Key or Security Admin in the format PID:SecurityAdmin:Password, for example — 123-ABC-456:user=security.admin@email.com:pass=SecurityAdminPass
- Parameter 6 (Optional): Specify HTTP Proxy in the format http://10.0.0.100:3128
- Parameter 4 (Required): Type '
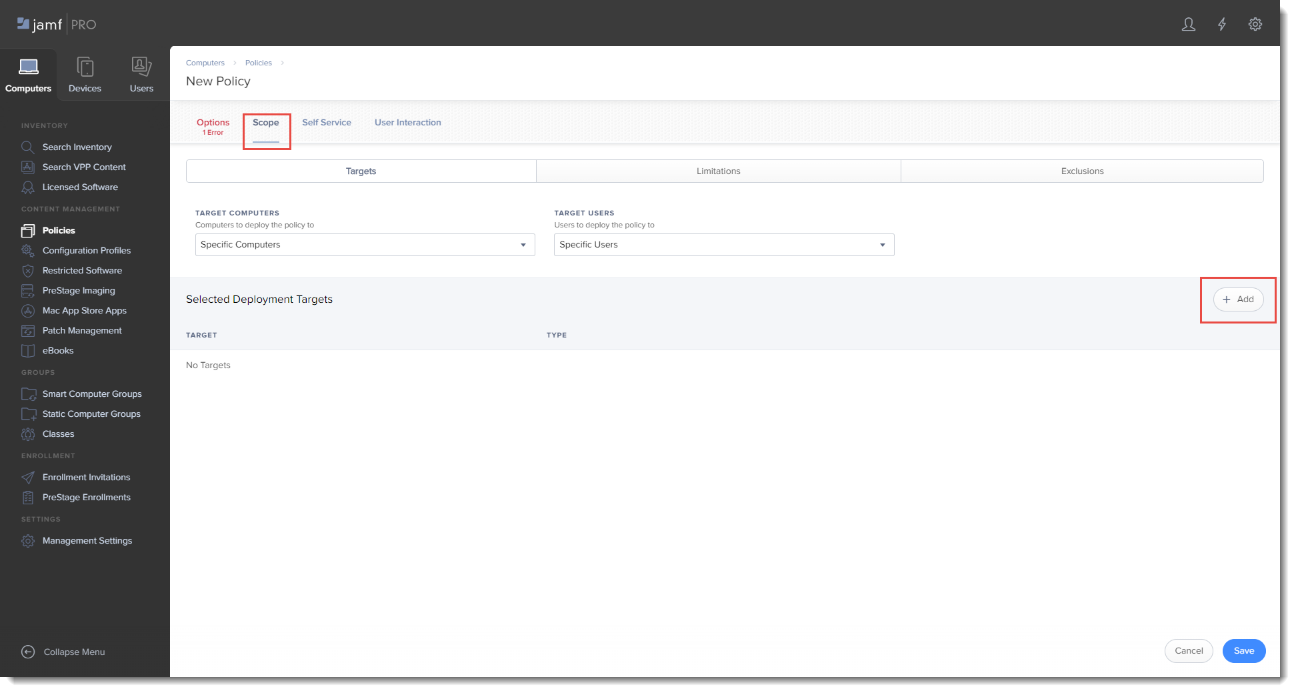
- Click the Scope tab and click Add.
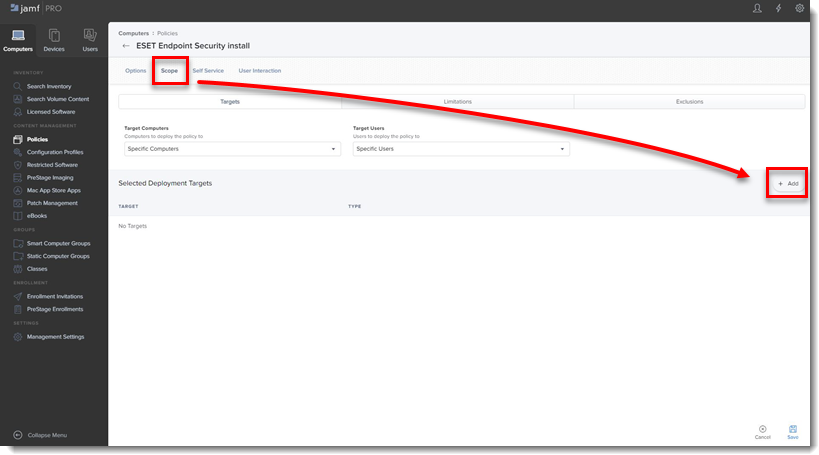
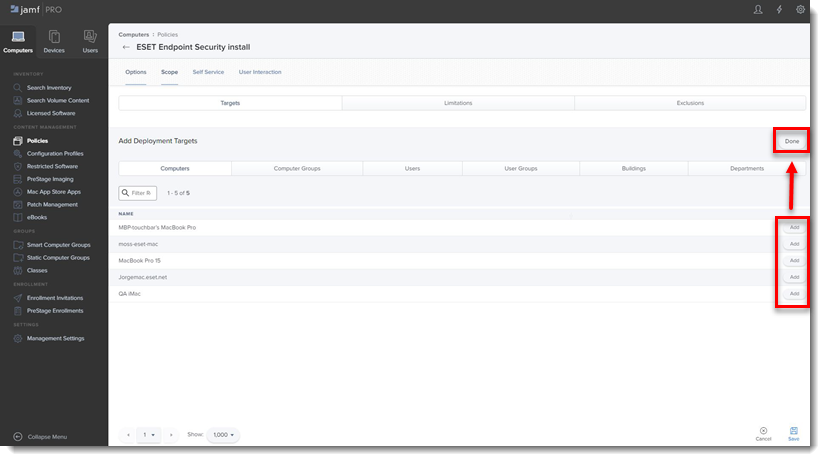
- In the Add Deployment Targets section, select the computers (or Computer Groups) you want to apply the policy to by clicking Add, and then click Done.
- Click Save to apply your changes.
III. Additional options
- Verify you can manage the ESET Endpoint using ESET Security Management Center: In the ESMC Computers section you will see the Jamf endpoint in the All Group.
- If you did not enter the License Key or Security Admin during the install scripts, you can activate using ESET Security Management Center.
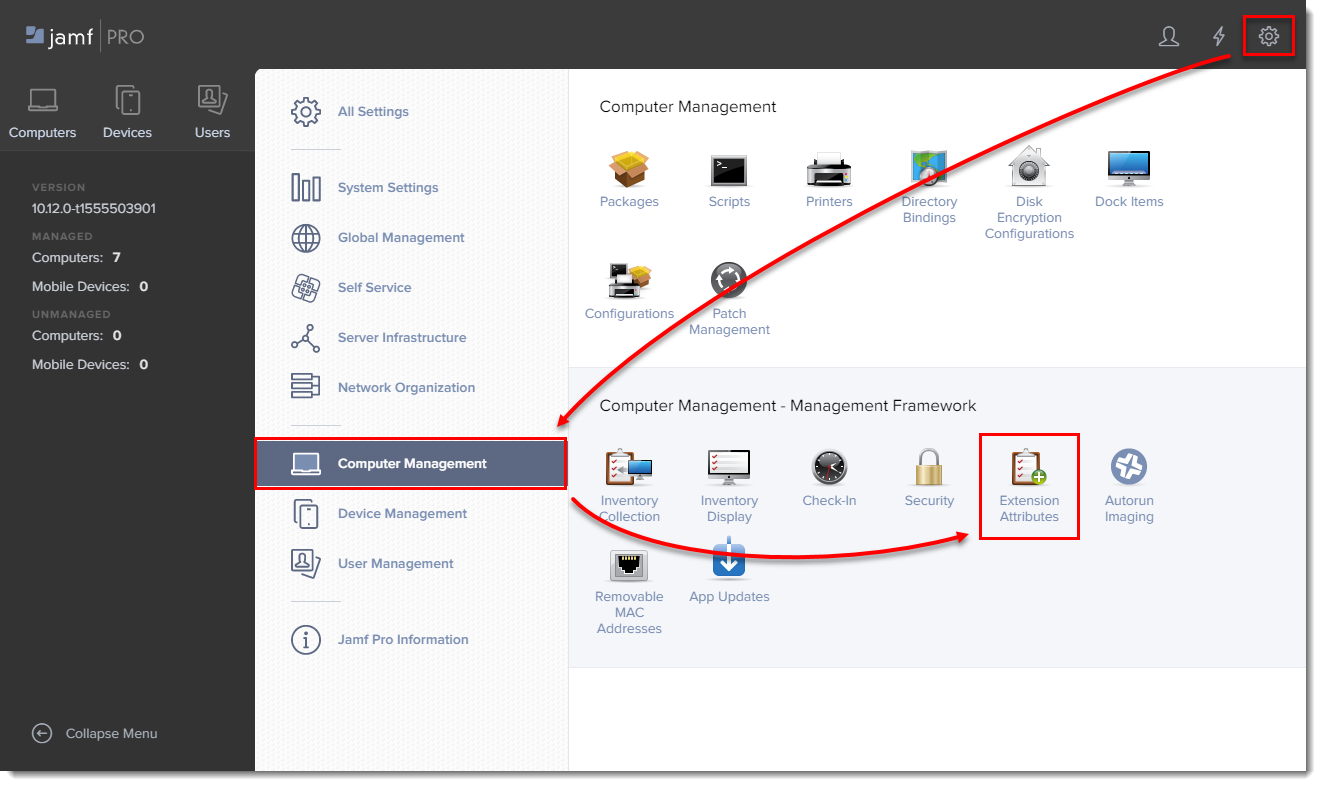
- Extension Attributes: Extension Attributes show information regarding ESET products in the Computer details → Search Inventory → General section.
Follow the instructions below to add the Extension Attribute:
- In the main window, click the All Settings gear icon → Computer Management → Extension attributes.
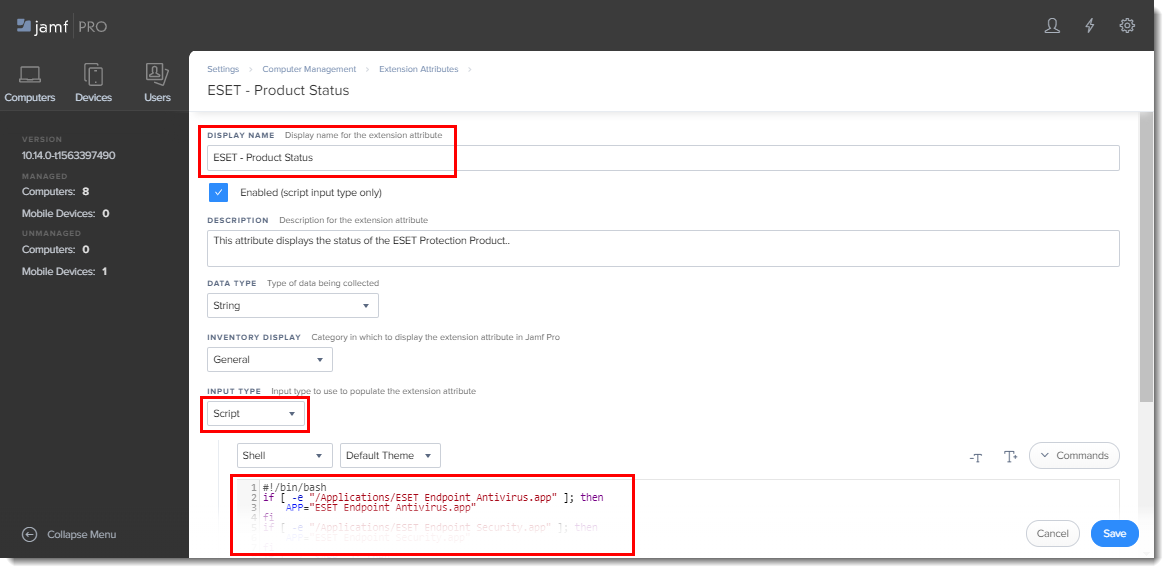
- Click New to create a new extension attribute.

- Type a name for the extension attribute, change the input type to Script and then paste the ESETstatusEA.sh (right-click and select "Save link as") script into the Shell field and click Save.
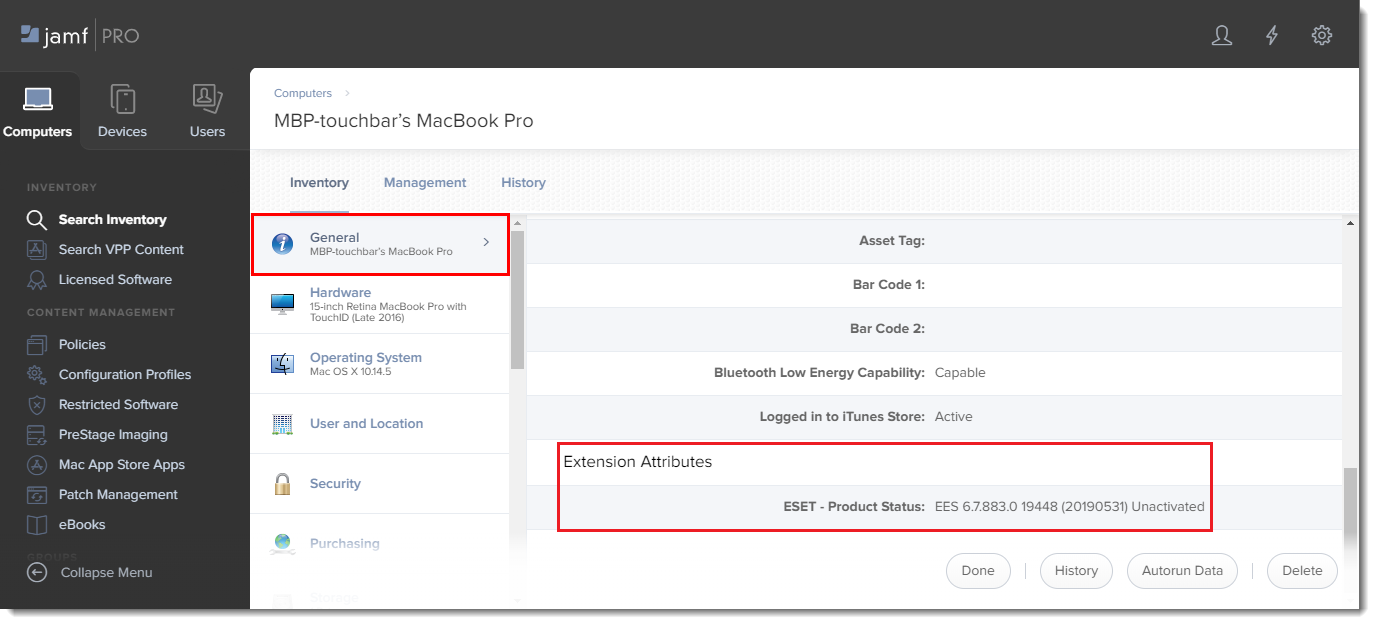
- The extension attribute will be automatically set to all computer groups. Click a computer and in the General section it will display the extension attribute.
Jamf Pro deployment for ESET Endpoint for macOS (earlier versions).
I. Configure KEXT and PPPC profile
- Click Configuration Profiles to set the approval for the KEXT and PPPC and then click New to add a new configuration profile (one configuration profile can contain both KEXT and PPPC settings).
- Type a Name for the profile.
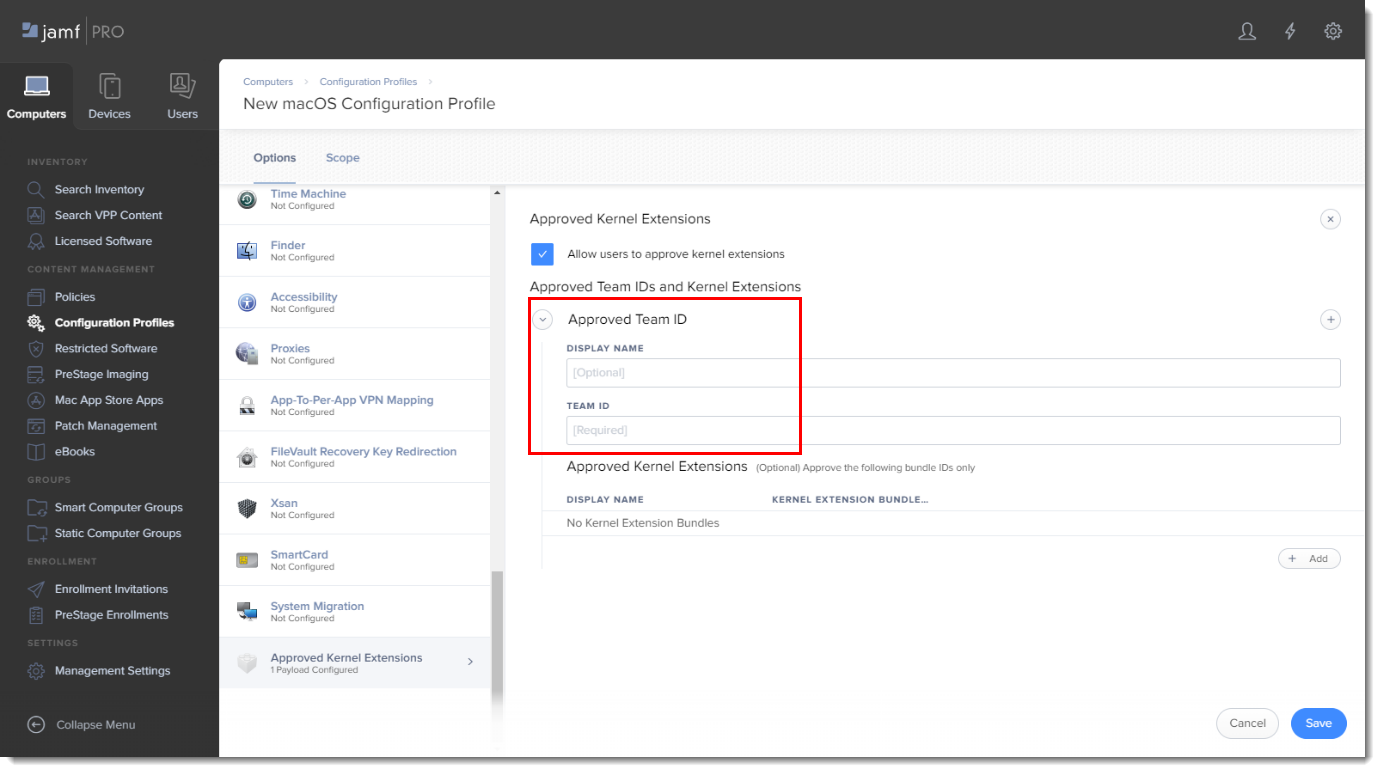
- In the Options tab, scroll down and click Approved Kernel Extensions → Configure.

- In the Approved TEAM ID section, enter the following information:
- Display Name: ESET KEXT [you can choose any name you want]
- Team ID: P8DQRXPVLP
- In the Options tab, scroll to Privacy Preferences Policy Control and add in the following information for your applicable ESET product:

ESET Endpoint Antivirus:
Identifier: com.eset.eea.6
Identifier type: Bundle ID
Code Requirement: identifier "com.eset.eea.6" and anchor apple generic and certificate 1[field.1.2.840.113635.100.6.2.6] /* exists */ and certificate leaf[field.1.2.840.113635.100.6.1.13] /* exists */ and certificate leaf[subject.OU] = P8DQRXPVLP
App or Service: SystemPolicyAllFiles
Access: Allow
ESET Endpoint Security:
Identifier: com.eset.ees.6
Identifier type: Bundle ID
Code Requirement: identifier "com.eset.ees.6" and anchor apple generic and certificate 1[field.1.2.840.113635.100.6.2.6] /* exists */ and certificate leaf[field.1.2.840.113635.100.6.1.13] /* exists */ and certificate leaf[subject.OU] = P8DQRXPVLP
App or Service: SystemPolicyAllFiles
Access: Allow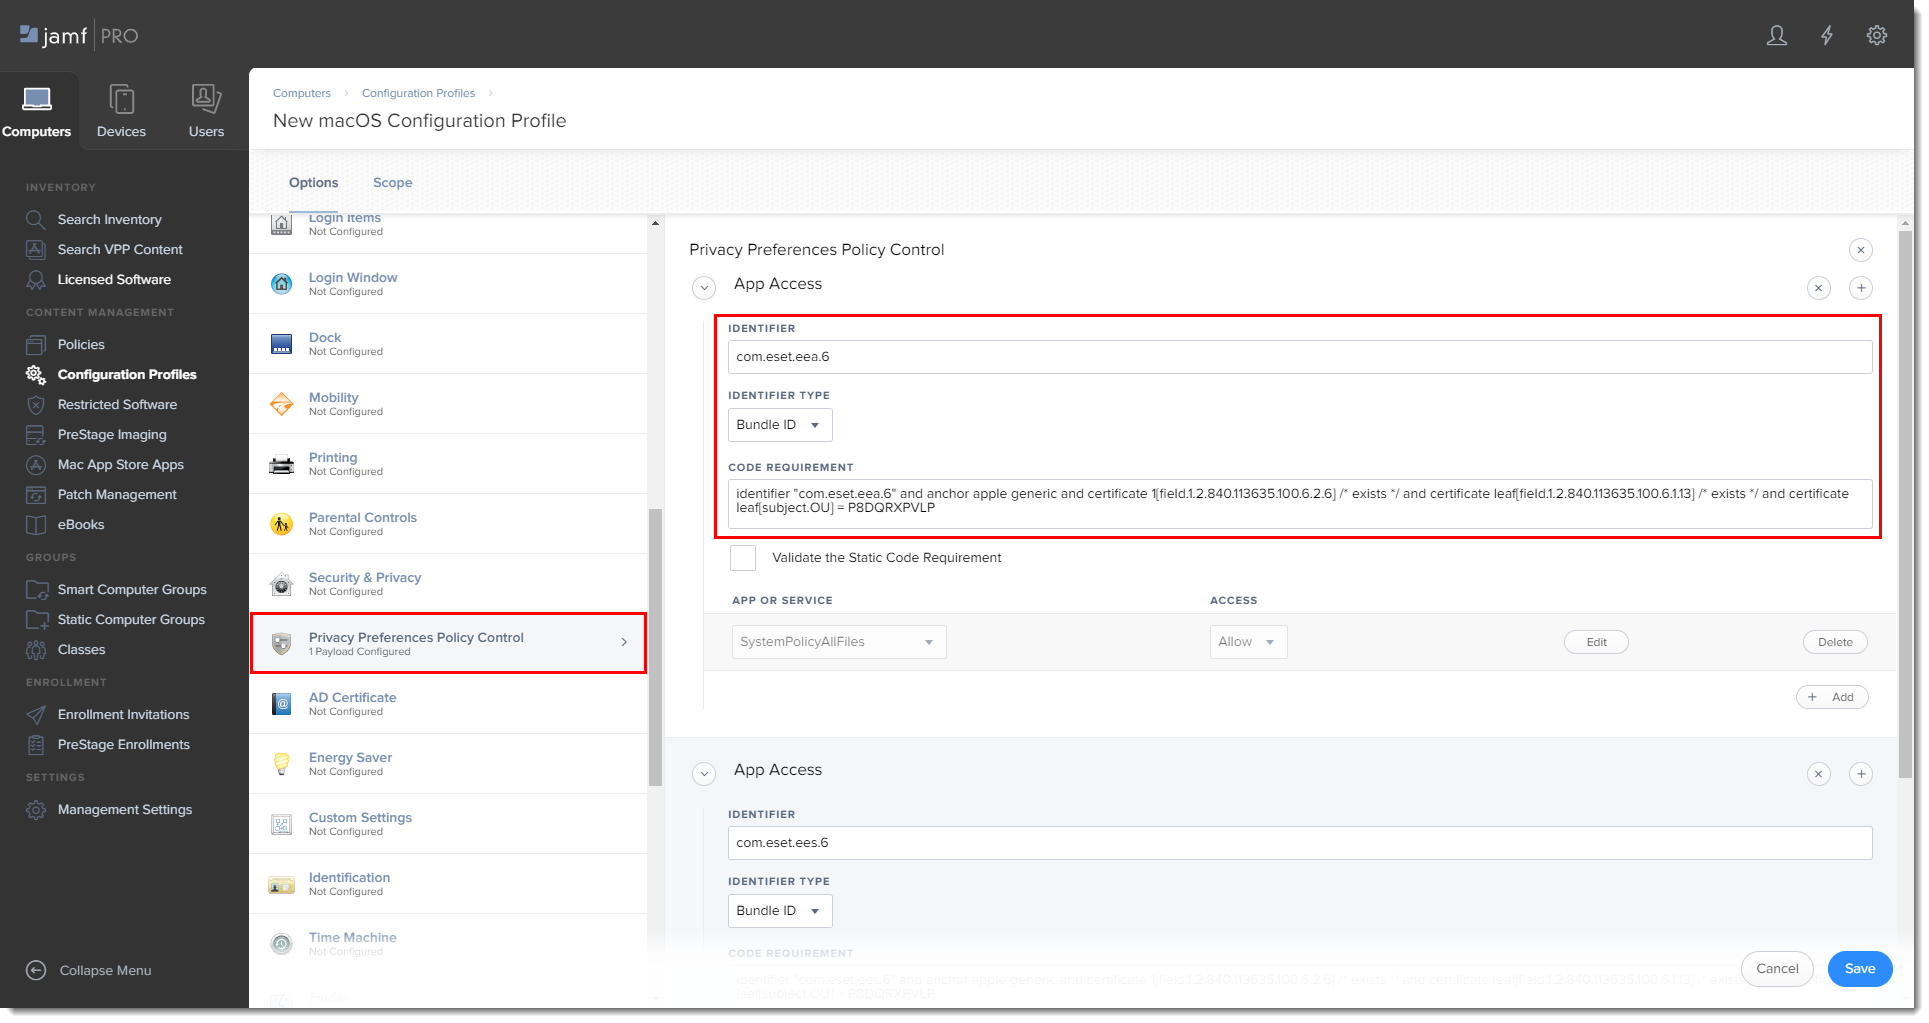
- Click Save to apply your changes.
II. Create policies
- Click Policies in the left menu and click New.
- Type a name for the policy and in the Trigger section, select Recurring Check-in.
- Download the following ESET Security product and ESET Management Agent installation scripts:
- ESET Security product installation script: ESETavJamf.sh (right-click and select "Save link as")
- ESET Management Agent installation script: Download the ESMCAgentInstaller.sh file from your ESET Security Management server, follow the instructions to Create Agent Live Installer.
- After downloading the scripts, add the scripts to Jamf (this link takes you to the Jamf Pro Administrator's Guide).
- From the Options tab, click Scripts and then click Configure.
- Click Add to select the scripts to add to the policy.
- Add the following Parameter Values for the Endpoint script:
Parameter 4 (Required): 'EES' (if you use ESET Endpoint Security) or 'EEA' (if you use ESET Endpoint Antivirus)Parameter 5 (Optional): License Key or Security Admin in the format PID:SecurityAdmin:Password, for example — 123-ABC-456:user=security.admin@email.com:pass=SecurityAdminPass
Parameter 6 (Optional): Specify HTTP Proxy in the format http://10.0.0.100:3128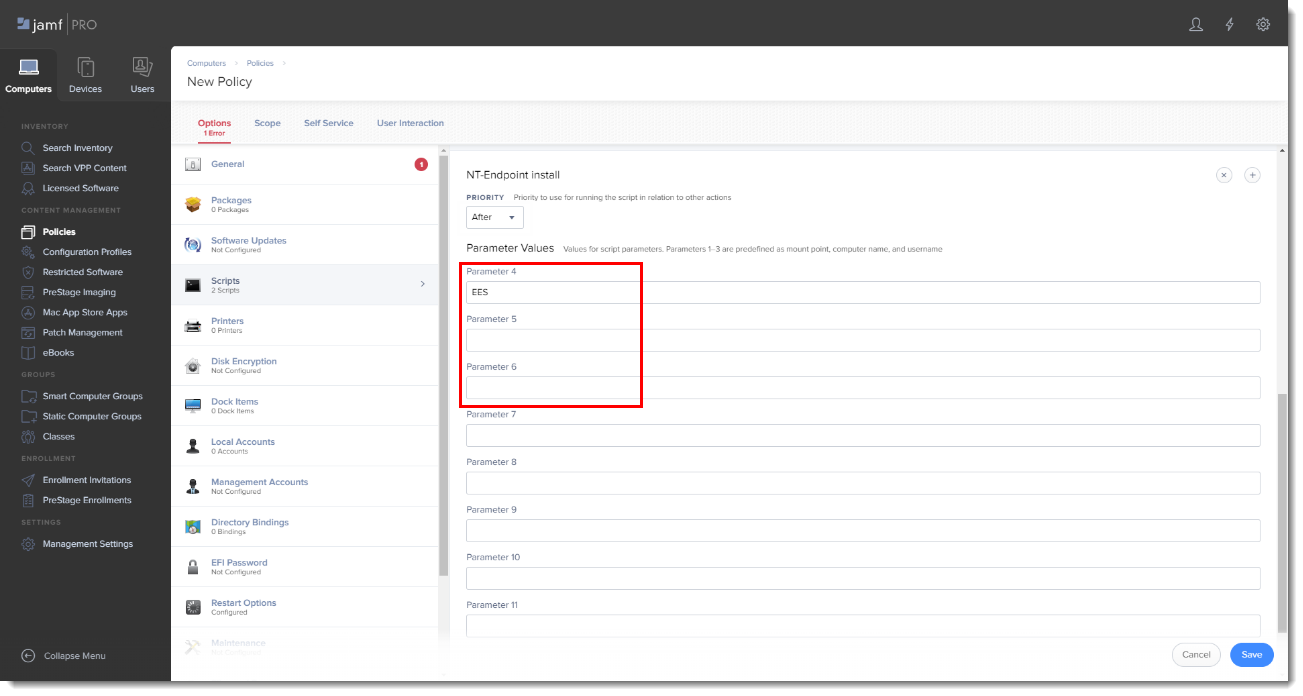
- Click the Scope tab and then click Add.
- In the Add Deployment Targets section, select the computers (or Computer Groups) you want to apply the policy to by clicking Add.

- Click Done when finished and then click Save to apply your changes.
Add a comment
Please log in or register to submit a comment.