

Issue
- ESET technical support has asked you to generate a memory dump file for analysis to help them resolve an issue with your computer.
Solution
Before you begin:
- Only follow the steps below if you have been advised to do so by ESET technical support
- In most cases, ESET technical support will request your SysInspector log in addition to a memory dump. View instructions to collect and submit a SysInspector log.
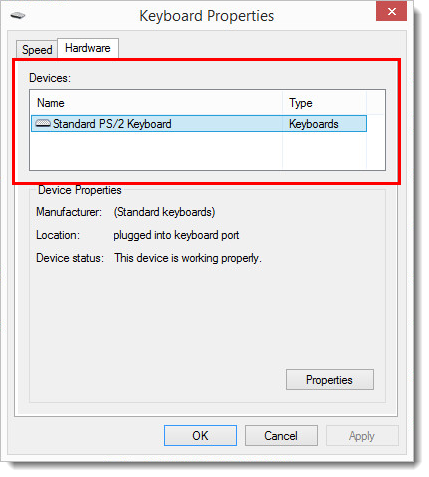
- The steps will vary depending on what type of keyboard you have (PS/2 or USB). To determine your keyboard type, open the Control Panel, double-click Keyboard, and then click the Hardware tab. Your keyboard will be listed in the Devices section.
I. Configure memory dump settings
- Press the Windows key
 + R, type sysdm.cpl into the Open field and click OK.
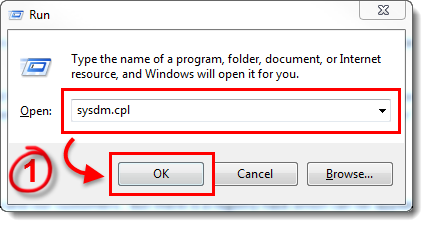
Figure 1-2
- Select the Advanced tab and click Settings in the Startup and Recovery section.
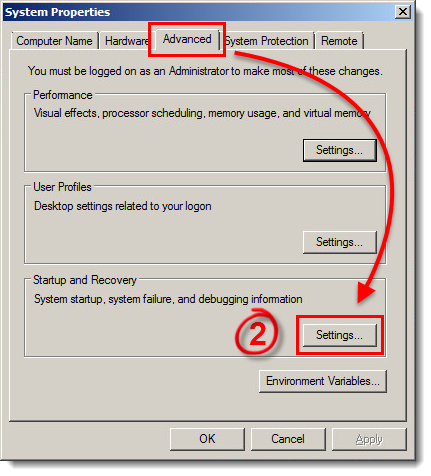 Figure 1-3
-
The Dump file section allows you to set the location where new memory dump files are saved. The %SystemRoot% string is a Microsoft Windows variable that stands for the root directory of your Microsoft Windows installation (typically the default value is C:Windows).
In the Write debugging information section, you can select the type of memory dump (we recommend that you use the Complete setting, see Figure 1-4).Don't see the Complete memory dump option?
If the Complete memory dump option is missing, click here for instructions.
- Click to bookmark this article before you continue and then click OK to restart your computer. After your computer restarts, continue to part II to generate a memory dump manually.
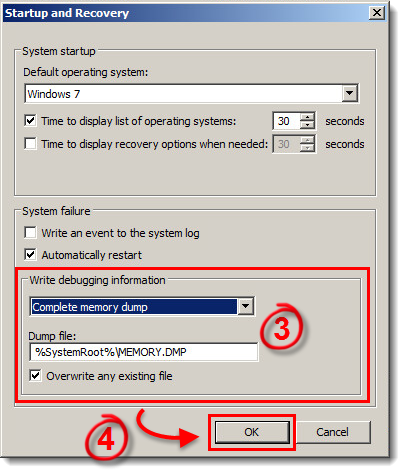 Figure 1-4
II. Generate a memory dump manually
Use caution when editing the registry
Make only the edits specified below to the system registry. Unnecessary changes to the registry can negatively affect system performance.
- Press the Windows key
 + R to open a Run dialog, type regedit and click OK. If you are prompted by Windows, click Yes.
 - In the Registry Editor window, expand HKEY_LOCAL_MACHINE → SYSTEM → CurrentControlSet → Services → kbdhid → Parameters.
PS/2 keyboards
If you are using a PS/2 keyboard, expand HKEY_LOCAL_MACHINE → System → CurrentControlSet → Services → i8042prt → Parameters (we are using a USB keyboard in this example—kbhid is expanded in Figure 2-1).
- Right-click in the right pane and select New → DWORD or DWORD (32-bit value) depending on your operating system.

Figure 2-1
- Name the key CrashOnCtrlScroll. Type 1 into the Value data field and click OK.
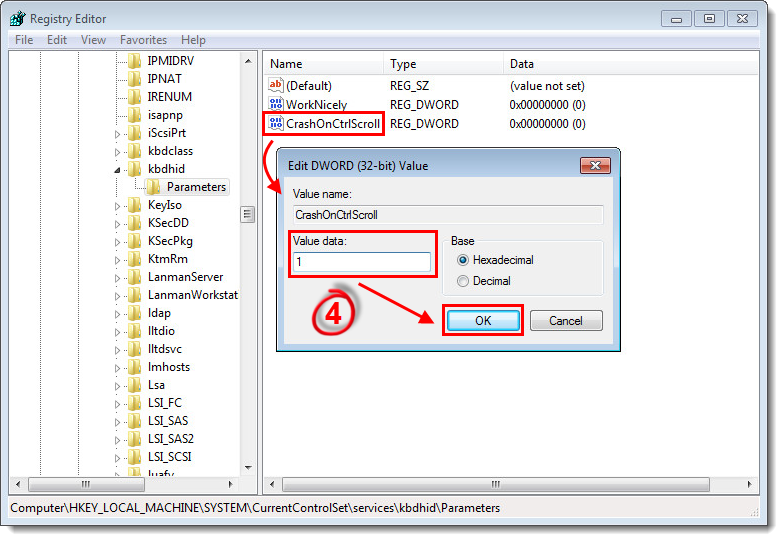
Figure 2-2
- Close Registry Editor and restart your computer.
- Once your computer has started, press and hold the right CTRL key on your keyboard (you must use the right and not the left) and then press the Scroll Lock key (located in the upper right on most keyboards) twice. The Windows forced crash dialog will run and a memory dump will be generated. Your computer may restart as a result.
- Once your computer has started, navigate to your system's root directory (C:Windows by default) and locate the file named MEMORY.DMP. Respond to the last email from your case with ESET technical support and notify them that you are ready to submit your memory dump file. An ESET technical support agent will contact you with instructions to submit the file for analysis.
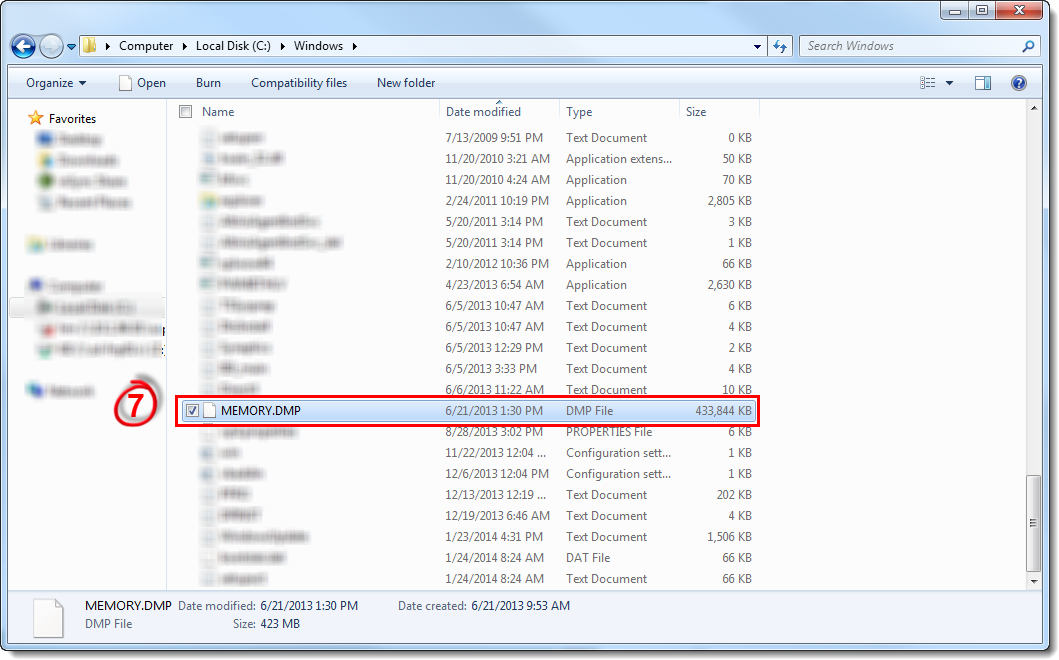
Figure 2-3
Forcing a crash dump through NotMyFault.exe:
If you are unable to use the keyboard combination to trigger the crash and the system can be accessed while the problem is occurring, use the Microsoft Sysinternals NotMyFault tool to generate the crash dump. Follow these steps:
- Download the NotMyFault tool from http://download.sysinternals.com/files/NotMyFault.zip.
- Click Start, Run, type cmd, and click OK.
- At the command line, type NotMyFault.exe /crash, and then press Enter. The system crashes with Bug Check D1. A dump file is then written to the specified location.
Troubleshooting: No Complete memory dump option
- Click Start → Run, type regedit.exe into the blank field and then click OK.
- Use the tree to navigate to and select the the following key:
HKEY_LOCAL_MACHINESYSTEMCurrentControlSetControlCrashControl - Double-click the CrashDumpEnabled data value to edit it.
- Change the value to 1.
- Click OK.
- Restart the computer.
The Complete memory dump option is now enabled and can be selected from Write debugging information drop-down menu.
Reactie toevoegen
Log in of registreer om een reactie te plaatsen.